Start by clearing clutter, pulling weeds, and edging lawns and beds for crisp borders. Pressure-wash paths, joints, and any driveway stains, then sweep kiln-dried sand into block paving once it’s dry. Touch up peeling trim, fascia, and gutters, replace dead exterior bulbs, and straighten house numbers. Make the front door pop by cleaning hardware and adding matching planters for symmetry. Finish by cleaning windows, hiding bins, and checking gates and downspouts—next you’ll see easy upgrades that lift the whole frontage.
Key Takeaways
- Declutter the frontage: remove litter, toys, hoses, and overflowing bins; straighten house numbers and wipe the door handle and mailbox.
- Tidy the garden fast: pull weeds, snip dead blooms, edge lawns crisply, and top up mulch without burying plant stems.
- Deep-clean hard surfaces: pressure-wash paths and walls safely, treat stains, clear gutters, and reseal porous areas to prevent quick grime return.
- Repair and refresh finishes: fill cracks, re-sand paving joints, re-caulk gaps, scrape flaking paint, prime bare patches, and apply thin exterior paint coats.
- Upgrade lighting and styling: install warm LED entry/path lights with timers or sensors, and add matching planters or a cleaned, simple seating feature.
Kerb Appeal Quick Checklist (15 Minutes)
In just 15 minutes, you can spot—and fix—the small exterior details that make buyers judge your home before they ever reach the front door. Start at the curb and walk in, noting anything that distracts.
Pick up litter, toys, and hoses; coil cords neatly. Do fast Garden maintenance: pull obvious weeds, snip dead blooms, and edge the path with a hand tool. Shake out the doormat, and wipe visible dust from the door handle and mailbox.
Straighten house numbers so they read cleanly from the street. Empty overflowing bins and park them out of sight. Check exterior lights; replace any dead bulbs. Reset outdoor furniture: align chairs, clear tabletops, and remove faded cushions. Finish by sweeping the porch and steps for a crisp, cared-for look.
Pressure-Wash Walls, Paths, and Driveway Stains
Before you pressure-wash, you’ll clear loose debris, cover plants and outlets, and wear eye protection and closed-toe shoes so you don’t etch surfaces or cause injuries.
You’ll treat oil spots, algae, and rust with the right cleaner first, then use a controlled fan tip and steady passes to lift stains without striping.
When you’re done, you’ll reduce future grime by rinsing thoroughly, improving drainage, and sealing porous concrete or pavers where needed.
Prepare Surfaces And Safety
Once you’ve cleared the area, tackle surface prep with a pressure washer to strip away grime, algae, and embedded dirt that dulls your exterior. Cover delicate landscape design elements with tarps, and move outdoor furniture well away from overspray.
Choose the correct nozzle (25° for general cleaning, 40° for softer surfaces), and test on an inconspicuous spot first. Work top-down on walls, and sweep in overlapping passes on paths and driveways to avoid zebra striping.
Keep the wand moving, hold it 20–30 cm from the surface, and never aim at mortar joints, vents, or seals. Wear eye protection, gloves, and non-slip footwear, and use an RCD-protected outlet.
Let surfaces fully dry before any next step.
Remove Stains Effectively
Although a general rinse lifts surface grime, you’ll need a targeted approach to remove set-in stains from walls, paths, and driveways. Start by identifying the stain: algae and mould, rust, oil, or tannin run-off.
Use proven Stain removal techniques—pre-treat first, then pressure-wash. Apply detergent with a pump sprayer, keep it wet for 5–10 minutes, then rinse from top down on walls to avoid streaks.
For concrete oil spots, scrub in a degreaser, then hit the area with a 25-degree nozzle at steady distance.
For rust, use an oxalic-acid cleaner; for organic growth, a diluted bleach or biocide works.
Test Cleaning solution options on a hidden patch first to protect finishes.
Prevent Future Grime
Stains might be gone, but grime will creep back fast if you don’t put simple barriers and routines in place after pressure-washing. Seal porous concrete and pavers with a penetrating sealer to block oil, tannins, and algae stains. Re-sand joints with polymeric sand so weeds don’t trap dirt and moisture.
Redirect runoff: clear gutters, extend downspouts, and grade soil away from walls and the driveway edge. Follow landscaping tips like adding gravel drip lines, edging beds, and keeping mulch off render and brick.
Place mats under outdoor furniture to stop rust rings and food drips. Sweep paths weekly, rinse monthly, and spot-treat new marks with a mild detergent before they set. Keep a clean-water rinse after every wash day too.
Touch Up Paint, Trim, Fascia, and Gutters
After you’ve pressure-washed, prep and patch any peeling or cracked areas on trim, fascia, and siding so the touch-up paint bonds properly.
Scrape loose paint, sand to feather edges, spot-prime bare spots, and seal small gaps before you paint.
Then refresh your trim and gutters with a clean, consistent coat and clear out debris so everything looks sharp and functions correctly.
Prep And Patch Surfaces
Before you touch up paint or replace hardware, you’ll get better results by prepping and patching every exterior surface you plan to refresh—especially trim, fascia, and gutters.
Start by clearing the work zone: move outdoor furniture, cover garden landscaping, and protect paths with drop cloths. Wash surfaces with a detergent solution, then rinse and let everything dry fully.
Scrape loose paint, feather edges, and sand glossy areas so primers bond. Probe trim and fascia for soft spots; cut out rot, treat remaining wood with hardener, and fill with exterior epoxy.
Re-caulk failed joints at corners and seams, and reset popped nails or screws.
On gutters, remove debris, check hangers, and patch pinholes with compatible sealant, then wipe down for adhesion.
Refresh Trim And Gutters
A crisp band of trim and clean, even gutters can make the whole exterior look freshly updated without touching the siding. Start by washing fascia and trim, then scrape loose paint and feather edges. Spot-prime any bare wood or metal to prevent bleed-through and rust.
Apply Exterior paint in thin, controlled coats along edges, corners, and window casings to sharpen lines. Caulk small gaps where trim meets siding, but don’t seal the underside of lap siding where water must drain.
For Gutter maintenance, clear leaves, flush downspouts, and check hangers for sagging runs. Re-secure loose brackets, then seal leaking joints with gutter sealant. Touch up chipped gutter finish to stop corrosion.
Finally, make sure downspouts discharge away from the foundation.
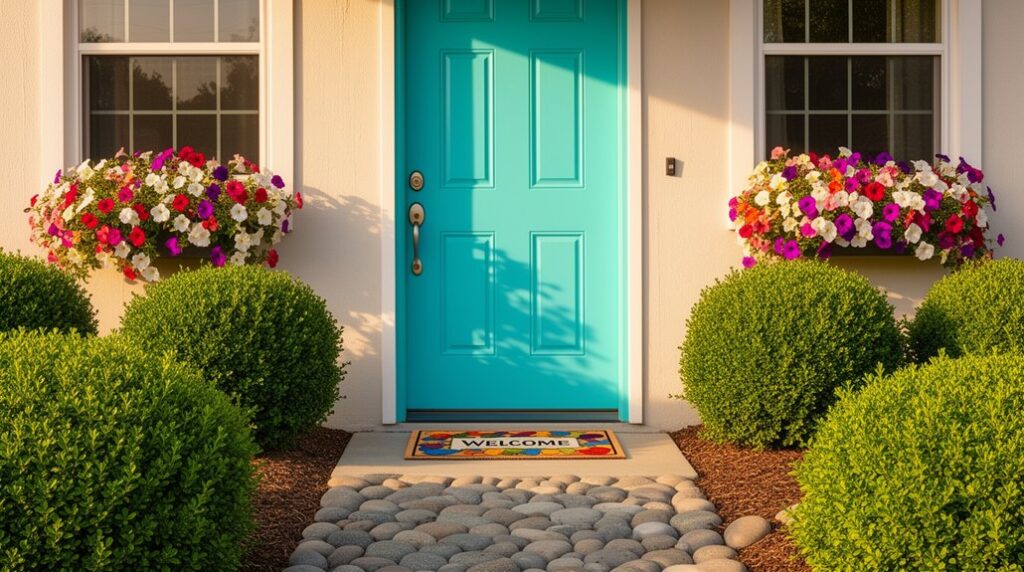
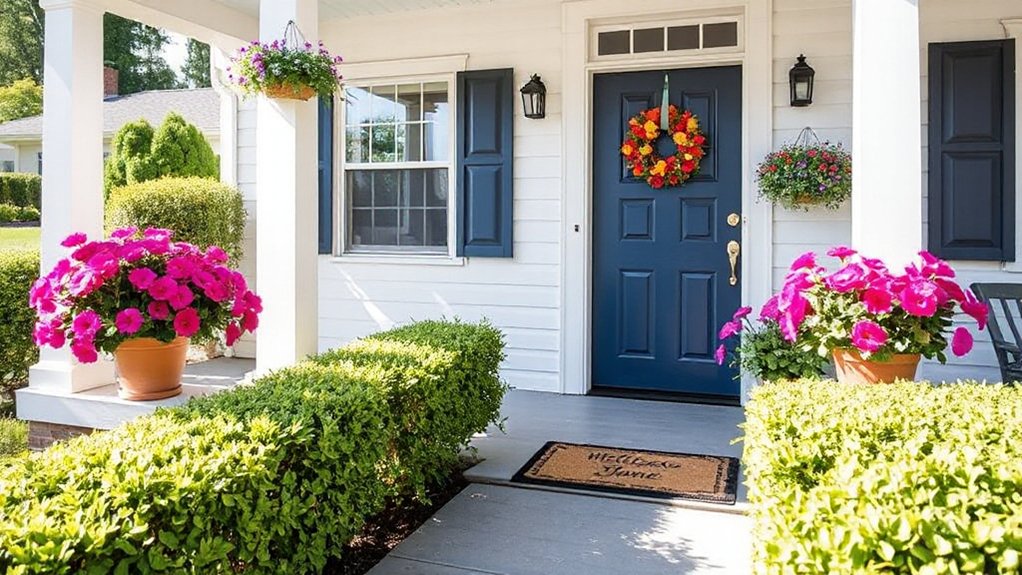
Make the Front Door the Focal Point
If you want instant kerb appeal, start by making your front door the clear focal point. Give it a thorough clean, then sand and patch any chips or cracks so paint adheres evenly. Review door color choices in daylight: choose a crisp classic (black, navy, deep green) for traditional homes, or a bold statement (red, teal, mustard) if your façade is neutral. Use exterior-grade primer and paint, and keep edges sharp with painter’s tape for a factory-finish look.
Next, refine front door decor without clutter. Add a single oversized planter, a seasonal wreath, or a simple doormat that echoes your palette. Balance symmetry, keep sightlines clear, and ensure lighting highlights the entry after dark for maximum impact.
Update House Numbers, Letterbox, and Door Hardware
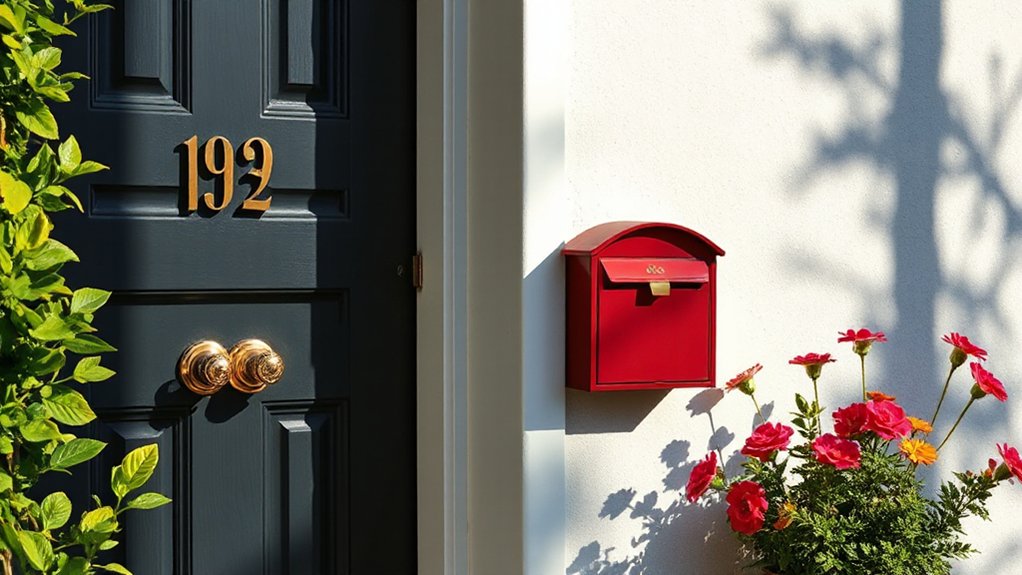
Once you’ve got the door looking sharp, swap out tired house numbers, the letterbox, and mismatched door hardware so the whole entry reads as one intentional set. Choose a finish that matches your tapware and exterior accents—matte black, brushed nickel, or aged brass—then stick with it across numbers, knocker, handle, and hinges.
Mount numbers at eye level, space them evenly, and use a simple, readable font. Replace a cracked letterbox with a solid, weather-sealed model, and align it square to the door or wall.
Upgrade the lockset to a smooth, secure unit and tighten every screw so nothing rattles. Tie the look into your landscaping ideas and nearby outdoor furniture by repeating the same metal tone on planters or chair frames.
Add Exterior Lighting for Safety and Warmth
Choose exterior light fixtures that match your home’s style and scale, and stick to a consistent finish for a clean look.
Place lighting to clearly highlight paths, steps, and entry points so you improve safety while creating a welcoming glow.
Add timers, dusk-to-dawn controls, and motion sensors so the lights run automatically and efficiently without you thinking about it.
Choose Fixtures For Style
While paint and landscaping set the stage, well-chosen exterior fixtures finish the look and make your home feel safer after dark. Start by matching your lighting fixtures to your home’s architecture: clean cylinders for modern facades, lantern profiles for traditional exteriors, and matte black or aged bronze for broad compatibility. Keep finishes consistent across the front elevation so nothing looks pieced together.
Upgrade details you touch and see up close. Swap dated knobs, knockers, house numbers, and mailbox accents for coordinated decorative hardware that echoes your light finish. Choose weather-rated metals, sealed gaskets, and corrosion-resistant fasteners so everything holds up.
Use warm-white LEDs (2700–3000K) and shielded shades to reduce glare while maintaining a welcoming glow.
Highlight Paths And Entries
After you’ve coordinated your exterior fixtures, use lighting placement to guide visitors and eliminate dark spots from the curb to the front door. Line walkways with low bollards or shielded stake lights, spacing them evenly so you light edges, not eyes. Add a brighter, glare-controlled sconce or pendant at the entry to make the lockset and doorbell easy to see.
Layer light where people pause. Mount step lights on risers, tuck small downlights under porch eaves, and aim a narrow beam at house numbers for quick identification.
In seating areas, place soft lights near garden furniture to keep faces visible without washing out the scene. Use warm color temperatures to complement outdoor decor and create a welcoming, secure approach.
Install Timers And Sensors
Because exterior lighting works best when it’s consistent, set your fixtures up with timers and sensors so the right areas light up automatically at dusk or when someone approaches.
Use timers scheduling to run porch lights and path lights from sunset to bedtime, then switch to a low-output mode overnight to save energy. Choose a photocell timer or a smart switch that adjusts for seasonal daylight shifts so you don’t have to reset it weekly.
Add motion sensors at side gates, garages, and back doors, aiming them away from streets to prevent false triggers. With sensor automation, lights respond instantly to movement, improving safety while keeping glare and power use down.
Test detection zones, set sensitivity, and keep lenses clean for reliable performance year-round.
Repair Cracks and Weeds in Paths and Driveways
Even small cracks and stray weeds in your paths or driveway can make the whole exterior look neglected, so tackle them early before water and traffic widen the damage. Start by clearing debris and pressure-washing joints so repairs bond properly.
Pull weeds by the root, then treat regrowth with a targeted, non-staining weed killer or boiling water, keeping runoff away from planted areas.
For hairline concrete cracks, force in a flexible masonry filler; for wider gaps, use a backer rod first, then apply a polyurethane sealant and tool it smooth.
On block paving, sweep kiln-dried sand into joints after drying to lock pavers and improve pathway aesthetics.
Recheck monthly as part of your garden maintenance routine, especially after heavy rain.
Edge Lawns and Tidy Garden Beds Fast
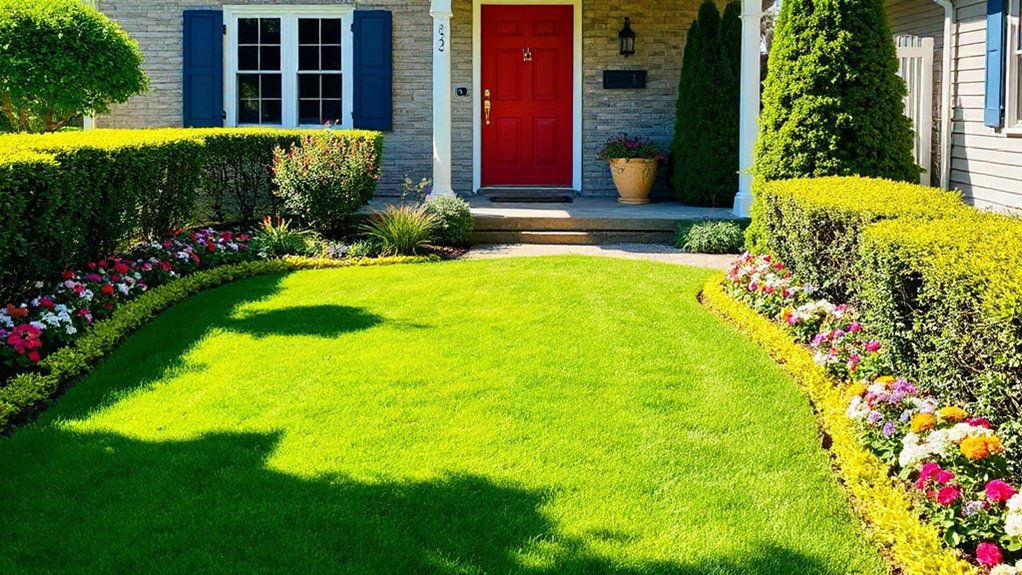
While you can’t control the weather, you can sharpen your kerb appeal in minutes by edging the lawn and tightening up bed lines. Use a half-moon edger or flat spade and cut a crisp trench where grass meets paving or beds, keeping the blade vertical for a clean shadow line. Follow with a quick string-trim to remove stragglers.
Next, rake mulch and soil back from the edge, then redefine curves with a hose line so your garden design looks intentional. Pull visible weeds, snip spent growth, and top up mulch to 50–75 mm without burying stems.
Finish with a blower to clear clippings from paths. This lawn maintenance sequence creates sharp borders, reduces encroachment, and makes the whole frontage look cared for quickly.
Use Planters and Symmetry for Instant Style
If your entry feels a bit flat, planters and symmetry give you a fast, high-impact fix without major landscaping. Start by choosing two matching planters for either side of your front path or steps, so your garden layout looks intentional and balanced.
Keep heights similar, but vary texture: one upright evergreen paired with a trailing plant adds depth without looking messy.
Use color coordination to tie everything together: repeat one flower color already on your exterior, then add a neutral filler like white alyssum or silver foliage. Stick to a tight palette of two to three colors so it reads crisp from the street.
Group smaller pots in odd numbers near the door, but align them to one edge to keep the symmetry strong.
Final Details: Windows, Bins, Screens, and Seating
Once your planters and symmetry set the frame, tighten the finish with small fixes that read instantly from the street: clean your windows inside and out, wipe down sills and frames, and replace any cracked flyscreens or bent security screens. Keep up window maintenance by checking seals, lubricating tracks, and aligning latches so everything closes cleanly.
Next, sort bin storage: move bins off the sightline, add a low screen or slim enclosure, and rinse them so odours don’t telegraph neglect. If you’ve got a front gate, guarantee it swings freely and doesn’t scrape.
Finally, add one intentional seating element—a tidy bench or two chairs—kept proportional to the porch. Repaint or oil timber, tighten bolts, and remove faded cushions. Clear spiderwebs and touch up scuffed skirting boards.
Frequently Asked Questions
How Often Should I Refresh Kerb Appeal to Maintain Home Value?
Refresh kerb appeal seasonally, with a deeper update every 3–5 years to protect home value.
Each spring and fall, you should tidy beds, edge paths, mulch, and apply simple landscaping ideas like drought-tolerant planting or new lighting.
Annually, wash siding, clean gutters, and check caulk.
Repaint touchpoints as needed, and revisit paint color choices every 5–7 years, sooner if fading, peeling, or neighborhood trends shift.
What Exterior Upgrades Offer Best ROI Before Selling?
Like Odysseus steering toward safe harbor, you’ll get the best ROI from sharp, visible fixes: fresh exterior paint in current paint color trends, a new front door or hardware, and pressure-washed siding and paths.
Swap dated lights and house numbers, repair gutters, and refresh roofing flashings.
Use low-cost landscaping ideas—edged beds, mulch, trimmed shrubs, and seasonal color—to frame the entry.
Don’t overbuild; fix defects first.
Do I Need Council Approval for Exterior Changes or New Lighting?
You might need council approval, but it depends on your local planning rules and what you’re changing. Minor works like repainting a compliant paint color or adding low-voltage landscape lighting often don’t require a permit.
You should check heritage overlays, body corporate bylaws, and rules on light spill, wiring, and fixture height. If you’re altering фасades, adding poles, or changing electrics, expect approvals and inspections.
How Can I Improve Kerb Appeal on a Tight Budget?
Like a first handshake, kerb appeal sets the tone—so focus on high-impact, low-cost fixes.
You’ll get the most value by cleaning: pressure-wash paths, scrub the front door, and weed edges.
Do simple Pathway updates with fresh gravel, edging, or repainting pavers.
Add affordable Garden lighting: solar stake lights along the walk and a warm LED porch bulb.
Finally, mulch beds, trim hedges, and add two matching pots.
What Are Common Kerb Appeal Mistakes That Turn Buyers Away?
You’ll turn buyers away with neglected landscaping design, peeling paint, and a clashing paint color scheme. You can’t ignore weeds, bare patches, or overgrown shrubs; they signal poor maintenance.
You shouldn’t block windows with bulky plants or mismatched pots. You can’t leave dirty paths, stained driveways, or broken edging.
You shouldn’t use harsh, trendy paint color choices that fight the roof or brick. You can’t forget lighting or visible bins.
Conclusion
You’ve just pulled off a kerb-appeal makeover so fast it should be illegal. In 15 minutes, you’ve blasted grime off walls and paths, sharpened edges, killed weeds, and made cracks behave. You’ve freshened trim, turned the front door into a headline, and swapped tired numbers and hardware for instant credibility. Add symmetric planters, spotless windows, and hidden bins, and your place won’t just look “neat”—it’ll look unstoppable from the street.