You’ll get the most character and usefulness from garden structures you place with sun, space, and foot traffic in mind. Measure setbacks, door swings, and mower width, and keep paths at least 36 inches wide. Add a pergola or shade sail where you sit most, and use an arbor to frame a walkway. Install sturdy trellises or an obelisk for climbers, plus raised beds and mow-friendly edging for tidy lines. Keep tools organized in a shed or bench box, and you’ll see more smart options ahead.
Key Takeaways
- Plan structures around sun, setbacks, and traffic flow, keeping paths at least 36 inches wide and sightlines open to focal points.
- Add pergolas, arbors, or shade sails to cool seating and paths without blocking winter light or shading vegetable beds.
- Use trellises and obelisks to support climbers, add vertical interest, and match materials and size to each plant’s weight and growth habit.
- Build tidy raised beds and mow-friendly edging to define planting areas, reduce weeds, and keep mulch and soil where they belong.
- Install sheds or bench boxes sized for gates and tools, then organize with hooks and bins for secure, attractive, year-round storage.
Plan Garden Structures by Space, Sun, and Flow
Before you buy lumber or set a post, map your garden structures around three constraints: space, sun, and how you’ll move through the yard. Measure setbacks, door swings, and mower width, then sketch paths that stay at least 36 inches wide.
Place tall elements where they won’t crowd beds or block winter light from windows. Track sun for a week; orient screens and trellises so they shelter seating from harsh afternoon glare without shading vegetables you rely on.
Use corners and fence lines for garden structures for privacy, and keep sightlines open toward one strong feature. To create garden structures for focal points, center a gate, bench niche, or simple obelisk on a main view.
Build in modules so you can expand later cheaply.
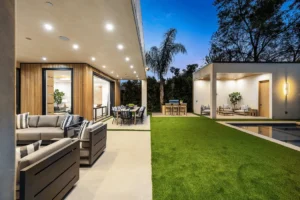
Garden Structures for Shade: Pergolas and Arbors
Once you’ve mapped space, sun, and traffic flow, you can add shade where it actually improves how you use the yard—usually over seating, a grill zone, or a frequently used path.
Choose a pergola when you want broad, adjustable shade: set posts in concrete, use pressure-treated lumber, and keep spans short to avoid costly beams. Add a simple shade sail or reed mat for quick relief without custom roofing.
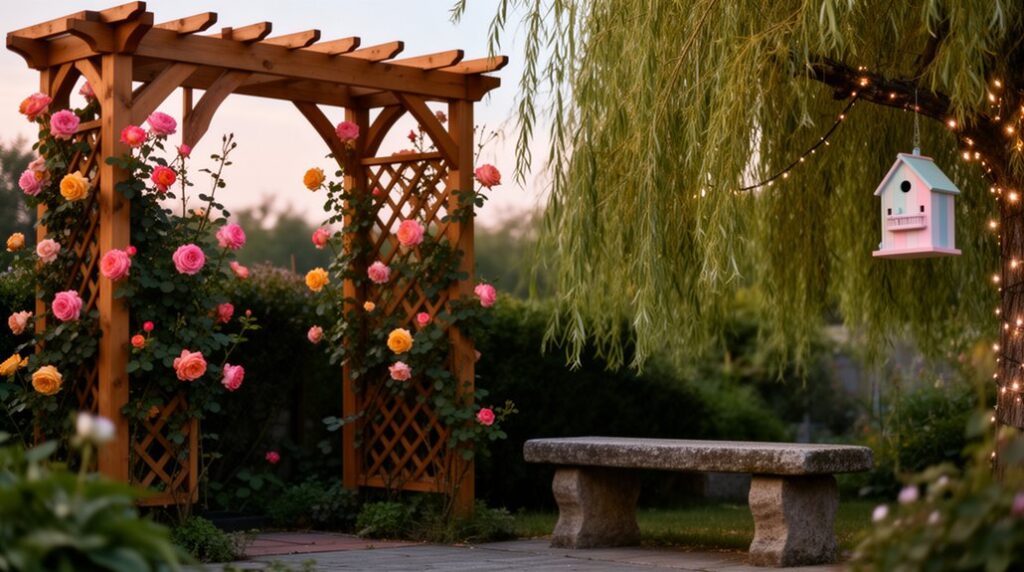
Pick an arbor when you need a focused passage, like a gate over a walkway; anchor it with stakes or post bases so it won’t rack.
For privacy plus shadow, pair the structure with Decorative garden screens on the west side.
If you want full coverage, price Outdoor dining pavilions carefully before committing.
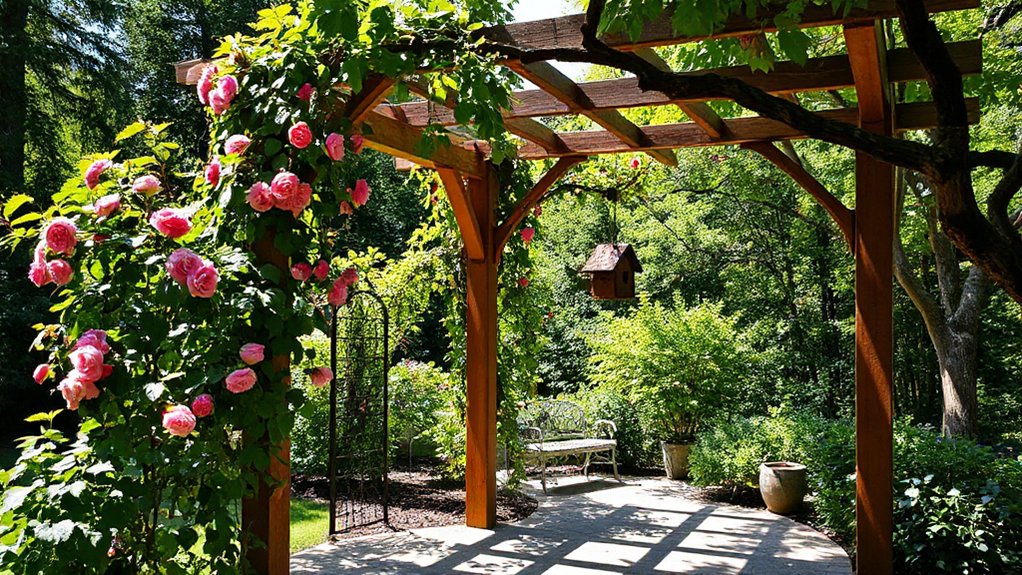
Garden Structures for Climbers: Trellises and Obelisks
When you’re training climbers, you’ll get the best results by matching a trellis style to your garden’s look and the plant’s weight. Simple wire panels cost less, while wood lattice reads more traditional.
If you need a strong vertical focal point in a tight bed or pot, you can add an obelisk to lift blooms upward without taking much ground space.
Choose durable, rust-resistant materials and the smallest size that still supports your vine so you don’t pay for extra structure you won’t use.
Choosing Trellises By Style
Although every climber needs solid support, the trellis style you choose should match both your garden’s look and your budget while still giving the plant the right spacing and grip. Start by checking vine type: twining beans like thin rungs, while roses need wider bars for tying.
For cottage beds, Decorative lattice softens fences and hides gaps, but buy pressure-treated wood or seal it yearly to avoid rot.
If you want a Modern minimalist feel, pick flat metal panels with clean lines; they cost more upfront but last longer and stay rigid in wind.
On a tight budget, use galvanized wire on eye bolts or cattle panels; you’ll get strength fast with little framing. Keep openings 2–4 inches for tendrils, and leave an air gap from walls to cut mildew.
Obelisks For Vertical Accents
If you want a strong vertical accent without committing to a wall or long fence run, set an obelisk in a bed or large container and let the plant climb upward from all sides. Choose powder-coated steel for longevity, or budget-friendly bamboo or willow for a seasonal look.
Anchor it deep: push legs 8–12 inches into soil, then firm and water to settle. In pots, zip-tie legs to a rebar stake or weight the base with gravel.
Match height to the plant’s vigor—4–5 feet for sweet peas, 6–7 for clematis, 7–8 for beans. Train stems weekly with soft ties to prevent wind damage.
You’ll get decorative focal points and tidy vertical plant displays.
Garden Structures for Tidy Beds: Raised Beds and Edging
To keep garden beds neat without spending a fortune, start with simple raised-bed frames and sturdy edging that lock soil and mulch in place. Use untreated cedar, recycled composite, or stacked concrete blocks, keeping beds 10–12 inches tall so you don’t need deep fills. Square corners with stakes, then line the inside with cardboard to suppress weeds before adding soil.
For edging, choose steel strips, brick on compacted gravel, or paver caps; all create a mow-friendly boundary and stop grass creep. If you’re tying beds into pathways, align edges with Decorative garden arches for clean sightlines.
Near ponds, install low, straight borders that meet Water feature enclosures, preventing mulch wash-in. Recheck level after rain and tamp gaps before they widen.
Garden Structures for Storage: Sheds and Bench Boxes

When tools, bags of soil, and hoses pile up, a small shed or a weatherproof bench box gives you low-cost storage that also keeps your yard looking intentional. Pick a footprint that fits your path and gate, then measure your longest tools so doors and lids clear.
In a shed, add hooks, a narrow shelf, and a pegboard strip so you won’t waste floor space. In a bench box, store hand tools, gloves, and sprinkler parts, and gain extra seating near beds.
To keep costs down, choose a simple kit or a used unit and upgrade it with labeled bins. Match the look: stained wood adds Rustic charm, while clean lines support modern aesthetics.
Keep it locked and organized year-round.
Choose Garden Structure Materials for Your Climate
Because your weather beats on every post, panel, and fastener, choosing climate-appropriate materials saves you money on repairs and replacement.
In wet regions, pick pressure-treated lumber, cedar, or composite boards, and use hot-dipped galvanized or stainless screws to stop rot and rust.
In hot, sunny climates, choose UV-stable composites, powder-coated steel, or redwood, and budget for lighter colors that reduce heat warping.
For freeze-thaw areas, prioritize dense hardwoods, concrete footings below frost line, and flexible sealants so joints don’t split.
In coastal air, avoid plain steel and cheap hardware; salt eats them fast.
Whatever you build, compare upfront cost to lifespan, and pick climate-specific materials and weather-resistant choices that match your maintenance time too.
Frequently Asked Questions
Do I Need a Permit to Build a Pergola or Shed?
You might need a permit for a pergola or shed—it depends on your city, HOA, size, height, and whether it’s attached or has utilities. Call your building department before you buy Garden structure materials, since footing depth, setbacks, and wind/snow loads can trigger review.
If you want Design customization, submit plans early to avoid redo costs.
Prefab kits can still require permits, so verify rules first.
How Much Does Professional Installation Typically Cost for Garden Structures?
You’ll typically pay $1,500–$8,000+ for professional installation, depending on size, materials, site prep, and electrical needs. Like a traveler choosing roads, you steer costs: a simple pergola is the smooth path; a shed on a slab is the mountain pass.
You’ll save by handling grading, hauling, and finishing yourself.
Add-ons—landscaping accessories, garden lighting—raise labor and permitting costs fast.
Get itemized bids.
What’s the Best Way to Anchor Structures in High-Wind Areas?
In high-wind areas, you’ll anchor structures by using wind resistant foundations and proven anchoring techniques. Set posts in concrete below frost depth, or bolt frames to poured footings with galvanized anchor bolts.
Add ground screw anchors or helical piers for lighter builds to save money on excavation.
Use metal brackets, hurricane ties, and cross-bracing to reduce racking.
Check soil type, local codes, and retighten hardware annually too.
How Can I Deter Termites and Rodents From Wooden Garden Structures?
Want fewer pests chewing your hard work? You deter termites and rodents by choosing Termite resistant wood like cedar or pressure-treated lumber. Then keeping wood off soil with metal post bases.
Seal cuts, repaint yearly, and fix leaks fast so you don’t invite moisture.
Add gravel strips and clear vegetation around posts.
Install Rodent proof barriers: 1/4-inch hardware cloth under floors, around gaps, and at corners.
Store feed sealed, too.
Are There HOA or Property-Line Rules Affecting Where Structures Can Go?
Yes—HOA restrictions and Property line regulations can limit where you can build. You’ll need to check your HOA’s CC&Rs for setbacks, height limits, materials, and approval steps before buying anything.
Then you should confirm local zoning setbacks, easements, and utility corridors, and get a recent survey if stakes are unclear.
Call 811 before digging.
Spending a little on permits/surveying upfront saves costly relocations, fines.
Conclusion
When you plan garden structures around your space, sun, and walking flow, you’ll get more use from every dollar. Add a pergola or arbor where you need shade, and place trellises or obelisks where climbers can thrive without crowding beds. Keep things neat with raised beds and edging, and stay organized with a small shed or bench box. Measure twice, cut once, and choose materials that handle your climate with minimal upkeep.