After a rain, walk your yard to flag puddles, soggy seams, and flow lines, then test soil by filling a 12-inch hole—under 1 inch/hour means poor drainage. Core-aerate compacted spots and topdress with compost. Regrade low areas so soil drops about 6 inches over 10 feet away from your foundation. Extend downspouts 6–10 feet to a safe outlet, and add a mowable swale or berm to steer runoff. You’ll find more fixes ahead.
Key Takeaways
- Inspect the yard after rain, flag low spots and flow paths, and run a 12-inch soil percolation test to identify drainage issues.
- Regrade for a gentle slope away from the foundation, targeting a 6-inch drop over 10 feet, and fill low areas in compacted lifts.
- Extend downspouts 6–10 feet from the house using splash blocks or buried 4-inch pipe, directing water to a safe outlet.
- Add drainage features where needed: shallow swales and berms for surface flow, or French drains for persistent pooling areas.
- Improve infiltration with compost and aeration, deep-rooted native plant layers, and permeable pavers built on open-graded aggregate, not sand.
Find Yard Drainage Problems After a Rainfall
After a good rainfall, walk your yard and map where water actually goes instead of where you think it should go. Mark puddles, soggy turf, and muddy seams where runoff cuts channels. Watch roof drips at eaves and downspouts, and note whether water sheets toward your foundation, driveway, or patio joints.
Flag low spots that stay glossy after surrounding areas dull. Trace flow lines with small stakes or spray paint so you can revisit them dry.
Check that gutters discharge where you can route water for Rainwater harvesting, not into beds that overflow.
Before you plan any swales or drain lines, locate Underground utilities and label access lids, cleanouts, and valve boxes.
Photograph problem areas from fixed points for comparison later.
Test Soil Drainage and Fix Compaction
Before you add drains or reshape grades, confirm whether your soil can actually absorb water and identify where compaction blocks infiltration. Start with simple Soil testing: dig a 12-inch-wide hole about 12 inches deep, fill it with water, let it drain, then refill.
If the second fill drops less than 1 inch per hour, drainage is poor; over 3 inches per hour, it’s too fast and may need organic matter to hold moisture.
Next, probe with a screwdriver or soil probe. If it stops at 2–4 inches, you’ve got compaction.
For Compaction fixing, core-aerate when soil is moist, not wet, then topdress with 1/4–1/2 inch compost.
Keep foot traffic off soggy areas and avoid heavy equipment.
Fix Yard Grading So Water Flows Away
Even if your soil drains well, you’ll still get pooling if the surface grade funnels water toward your house or low spots, so fix the slope first. Walk your yard after a rain and mark puddles with flags or spray paint.
Use a string level to confirm a gentle fall away from the foundation; aim for about 6 inches of drop over the first 10 feet.
Add clean fill or topsoil to build up low areas, then taper smoothly so you don’t create new dams. Compact in thin lifts and finish with a shallow swale to guide sheet flow.
Re-seed or re-sod immediately to lock soil in place and protect yard aesthetics. Reset outdoor lighting so fixtures sit level after regrading.
Extend Downspouts and Pick a Safe Outlet
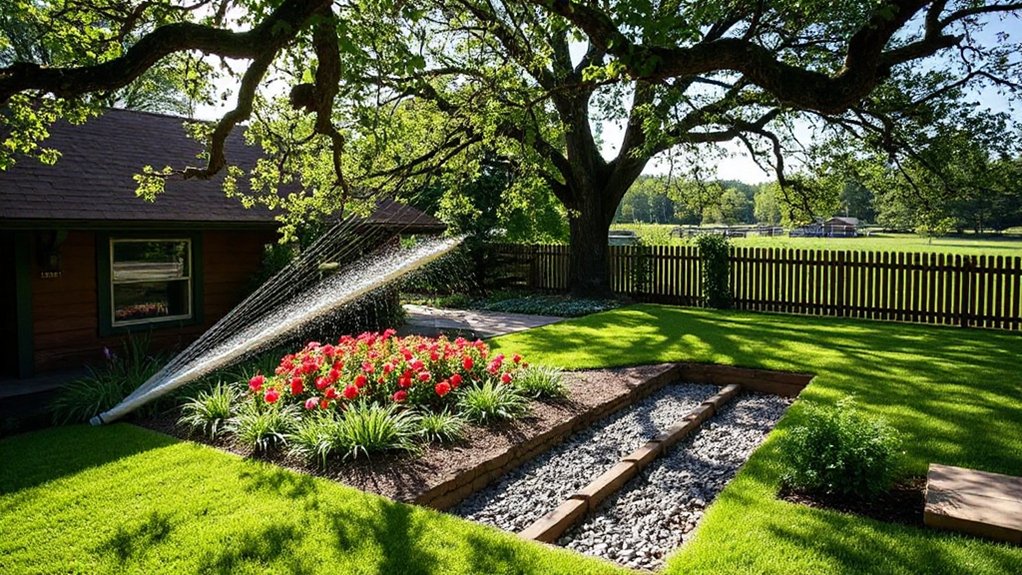
Next, you’ll want to move roof runoff farther from your foundation by extending your downspouts with options like splash blocks, flexible extensions, or buried solid pipe to a pop-up emitter.
Aim the outlet toward a safe discharge spot—such as a sloped lawn area, a drainage swale, or a permitted curb cut—so water keeps flowing away instead of soaking your soil.
Don’t dump water next to the house, onto a neighbor’s property, or into a septic/drainfield area where it can cause backups or erosion.
Downspout Extension Options
Two choices make the biggest difference when you tackle downspout extensions: how far you’ll carry roof runoff away from the foundation, and where you’ll safely discharge it. Start by sizing the run: aim for 6–10 feet, or farther on heavy clay, and keep a steady downhill pitch so water doesn’t backflow.
For simple installs, use rigid 4-inch corrugated pipe with a pop-up emitter or a hinged extension you can flip up for mowing.
Choose smooth-wall PVC when you need maximum flow and fewer clogs. Add a leaf filter at the outlet elbow to reduce maintenance.
Place a Gutter splash block under short runs to prevent trenching. Secure joints with screws, seal with exterior tape, and stake the line so it won’t shift during storms.
Safe Discharge Locations
Where should your downspout extension actually dump the water? Pick an outlet that moves runoff away from your foundation without sending it to a neighbor. Aim for a spot at least 6–10 feet from the house, on a gentle downslope, and never into a septic field, crawlspace vent, or eroding edge.
Discharge onto a splash block, gravel pad, or turf that can absorb flow. Better yet, route it to a rain garden or dry well sized for roof area and soil type.
If you’re planning Rainwater harvesting, tie the downspout into a screened barrel or cistern with an overflow line to the same safe outlet. You can also feed Irrigation systems, but add a first-flush diverter and backflow protection.
Keep outlets clear year-round.
Add Swales and Berms to Redirect Runoff
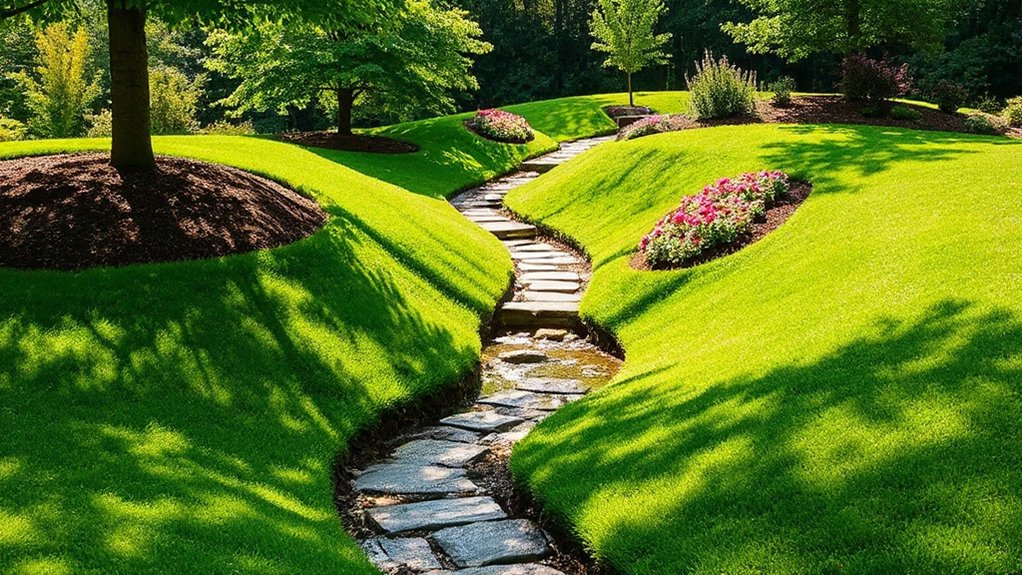
If runoff keeps racing across your yard and pooling where you don’t want it, you can reshape the surface to guide that water away by adding a swale (a shallow, broad channel) and a berm (a low raised ridge).
Lay out the swale on contour so it carries water slowly to your chosen discharge area, then build the berm on the downslope side to keep flow contained.
Aim for gentle side slopes you can mow, and keep the channel wide and shallow to reduce soil erosion.
Compact the berm in lifts, top it with mulch, and seed or sod both features immediately.
Use native grasses or low shrubs to stabilize soil while improving landscape aesthetics.
Check grades after heavy storms and touch up low spots.
Install a French Drain for Persistent Pooling
When surface grading and swales still leave you with a soggy spot that won’t dry out, a French drain gives that trapped water a reliable path to escape. Mark the lowest point and pick an outlet downhill, away from foundations.
After garden contouring confirms the fall, dig a trench 8–12 inches wide, sloping 1 inch per 8 feet. Lay filter fabric, add 2–3 inches of washed gravel, then set a perforated pipe with holes down.
Cover with more gravel, wrap fabric, and top with soil or turf. Add a catch basin if water concentrates fast.
Pair it with soil aeration nearby to improve infiltration and reduce recurring puddles after heavy storms.
Build a Rain Garden to Soak Up Runoff
You’ll get the best results by placing your rain garden where runoff naturally flows—at least 10 feet from your foundation and away from septic lines—so it can intercept water without causing new problems.
Choose a spot with gentle slope and good overflow routing, then size it to match the roof or yard area feeding it.
Fill it with native, water-loving plants that handle both soggy periods and dry spells, so the garden soaks up runoff with minimal maintenance.
Choosing The Right Location
Before you start digging, pick a rain-garden location that captures runoff without putting your home at risk. Set it at least 10 feet from your foundation and away from septic fields, retaining walls, and neighbor property lines.
Aim for a low spot that already receives downspout or driveway flow, but don’t place it where water ponds against patios or walkways.
Check slope: a gentle 1–5% grade works best; on steeper ground, you’ll fight erosion and uneven pooling.
Do a quick infiltration test by digging 8 inches, filling with water, and confirming it drains within 24 hours.
Keep it accessible for maintenance while supporting landscaping aesthetics and privacy screening near outdoor living areas.
Selecting Native Water-Loving Plants
Although rain gardens handle short bursts of standing water, the right native, water-loving plants keep the basin draining and stable by rooting deeply, filtering runoff, and outcompeting weeds.
Start with Native plant selection based on your garden’s moisture zones: put the toughest Water loving vegetation in the lowest bowl, medium-moisture species on the side slopes, and drought-tolerant natives on the rim.
Choose plants with fibrous roots for soil binding and a few deep-rooted grasses or sedges for infiltration.
Aim for dense spacing to shade out weeds and reduce soil splash. Mix bloom times for resilience and pollinators, but prioritize function over show.
Skip aggressive exotics and avoid liners; you want roots to open pathways.
Water the first season, then mulch lightly.
Choose Plants That Boost Drainage and Absorption
When water lingers after rain, the right plants can pull moisture down, open up compacted soil, and reduce puddling without extra hardscape. Choose species with deep, fibrous plant root systems, such as switchgrass, little bluestem, sedges, and rushes, to create channels that improve infiltration.
Place these plants in low spots, along downspout discharge areas, and at the edges of swales so they intercept runoff before it spreads. Mix in shrubs with strong rooting, like redtwig dogwood or inkberry, to stabilize soil and prevent erosion.
Keep a layered planting: groundcovers to slow flow, grasses to aerate, and shrubs to anchor. During establishment, water deeply but less often so roots chase soil moisture downward, not across the surface.
Use Permeable Pavers: and Avoid Common Mistakes
If you need a patio, walkway, or driveway that won’t turn into a runoff chute, permeable pavers let water pass through the joints into a gravel base so it can soak into the soil instead of pooling on top.
You’ll get the best results when you prep the subgrade: excavate deep enough, compact in lifts, and install geotextile to stop fines from clogging the base.
Use washed, open-graded aggregate (not sand) for the bedding and joints, then sweep and vibrate it in so water can percolate.
Set a slight slope away from your foundation, but don’t overpitch it.
Common mistakes include skipping edge restraints, using dense base rock, sealing the surface, or letting soil wash into joints from nearby beds.
Frequently Asked Questions
Do I Need a Permit to Install Drains, Swales, or Berms?
You might need a permit, depending on your city, HOA, and how you connect to storm sewers or alter grading. Call your local building/public works office before you dig.
If you’ll install a drainage pipe that ties into a municipal line, expect permits and inspections.
Swales and berms often don’t need permits unless they redirect runoff to neighbors.
A rain garden may trigger rules near wetlands or easements.
How Can I Manage Drainage Without Harming Mature Trees and Roots?
You can manage drainage and still protect mature trees—if you work with the roots, not against them. First, map the dripline, then keep grading changes shallow and outside it for Tree preservation.
Use surface swales, permeable paths, and rain gardens instead of deep trenching. If you must add pipe, bore under roots, don’t cut them—Root protection matters.
Finish with 2–4 inches of mulch, never piled on trunks.
What’s the Best Way to Prevent Basement Seepage From Surface Runoff?
Stop basement seepage by moving surface runoff away from your foundation fast. You’ll regrade soil to slope 6 inches over 10 feet, extend downspouts 10+ feet to a splash block or solid drain line, and keep gutters clear.
You can add permeable paving on walks to reduce puddling, and build a rain garden downhill to capture overflow.
Seal cracks and add a sump if needed.
How Do I Handle Drainage Improvements on a Very Small Urban Lot?
On a very small urban lot, you’ll get the biggest drainage gains by managing every square foot.
Start with Soil grading: pitch soil 5–10% away from the foundation for at least 6 feet, and keep mulch thin.
Extend downspouts to a tight soakaway or rain barrel.
Build a compact Rain garden in the lowest spot using amended soil and overflow to the street, not neighbors.
Add permeable pavers where possible.
When Should I Hire an Engineer Instead of Doing It Myself?
You should hire an engineer when drainage feels like a chess match—one wrong move floods everything. Bring one in if you’ve got repeated water intrusion, steep slopes, retaining walls, basement seepage, or you must tie into storm sewers or meet permit requirements.
If soil is unstable, utilities are close, or you’re changing grades considerably, don’t wing it. They’ll specify landscape materials and clarify cost considerations before you start.
Conclusion
When you tackle drainage, you’re really giving water a clear path—like turning a messy traffic jam into a marked roadway. After each rain, you spot puddles, loosen compacted soil, and correct grading so runoff leaves your foundation alone. You extend downspouts to a safe outlet, then shape swales, berms, or a French drain where pooling won’t quit. Add a rain garden, choose thirsty plants, and use permeable pavers—installed right—so your yard breathes.