Start by inspecting your skirting for swelling, stains, soft spots, open mitres, and loose fixings, then fix the cause (leaks, condensation, impact, movement) and dry the area. Re-secure loose boards with pre-drilled countersunk screws into studs or backing, and clamp bows flat. Fill dents and holes with lightweight filler, rebuild corners or rot with epoxy (use wood hardener first), then sand flush. Caulk moving gaps, spot-prime, and paint; next you’ll pick up pro tricks.
Key Takeaways
- Inspect skirting for dents, gaps, swelling, and rot, and trace moisture sources like leaks or condensation before starting repairs.
- Choose the right material: lightweight filler for small dents, epoxy for rot or missing chunks, and paintable caulk for moving joints.
- Remove loose fibers, square damaged edges, overfill slightly, then sand flush with 120–220 grit for a seamless surface.
- Re-fix loose boards with adhesive and countersunk screws into studs, and clamp bowed sections before fastening to stop movement.
- Spot-prime bare wood or filler, lightly sand, then apply two thin coats of matching paint to blend sheen and finish.
Find the Cause of Skirting Board Damage
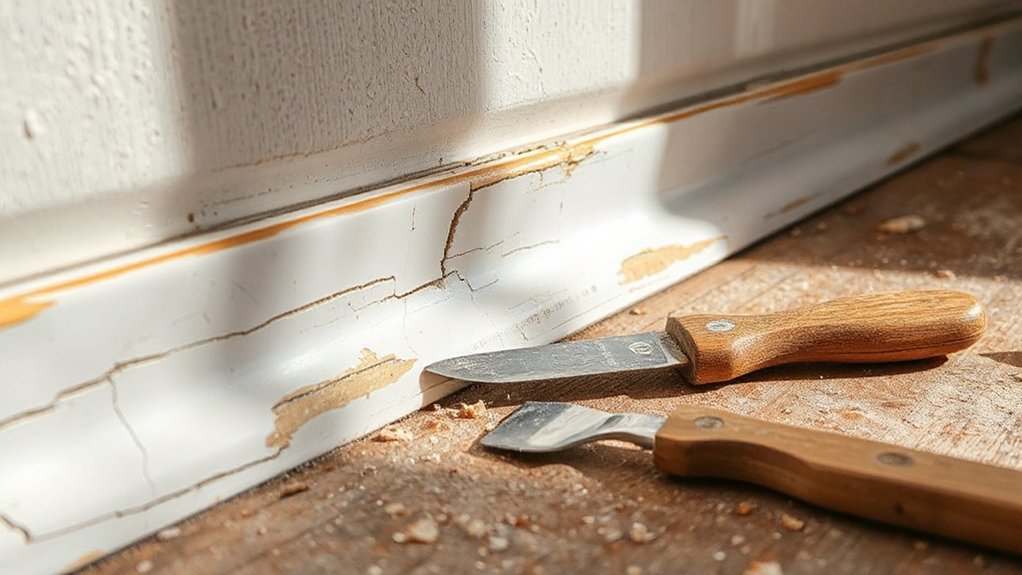
Before you reach for filler or paint, work out what damaged the skirting board so you don’t repair it twice. Start with a Skirting inspection: scan the full run for swelling, staining, dents, gaps, and loose sections.
Press with a screwdriver handle; soft, spongy timber points to moisture. Check nearby plumbing, radiators, exterior walls, and window reveals for leaks or condensation paths.
For impact damage, look for localized crush marks at door swings, chair backs, or vacuum strikes. For movement, note open mitres or nail pops; then check for uneven floors or seasonal shrinkage.
Complete a Damage assessment: mark the extent, photograph it, and confirm the substrate (timber, MDF, plaster) so you match the eventual repair method.
Gather Tools, Filler, Caulk, and Fixings
Once you’ve identified the damage and the skirting material, lay out the right kit so you can repair, bond, and finish in one pass: a sharp utility knife and scraper for removing loose paint and failed filler, 120–240 grit abrasive paper or a sanding block for feathering edges, a caulk gun, a filling knife set, and a vacuum or tack cloth for dust control.
Choose filler by Material selection: lightweight for shallow work, two-part epoxy for rot or broken corners, and flexible decorator’s caulk for moving joints. Add wood glue, construction adhesive, panel pins, lost-head nails, and wall plugs/screws for re-fixing loose runs.
Keep a mitre box, fine saw, and clamps ready if you’re replacing short lengths or Decorative accents. Finally, stage primer, matching paint, and a damp rag for immediate cleanup.
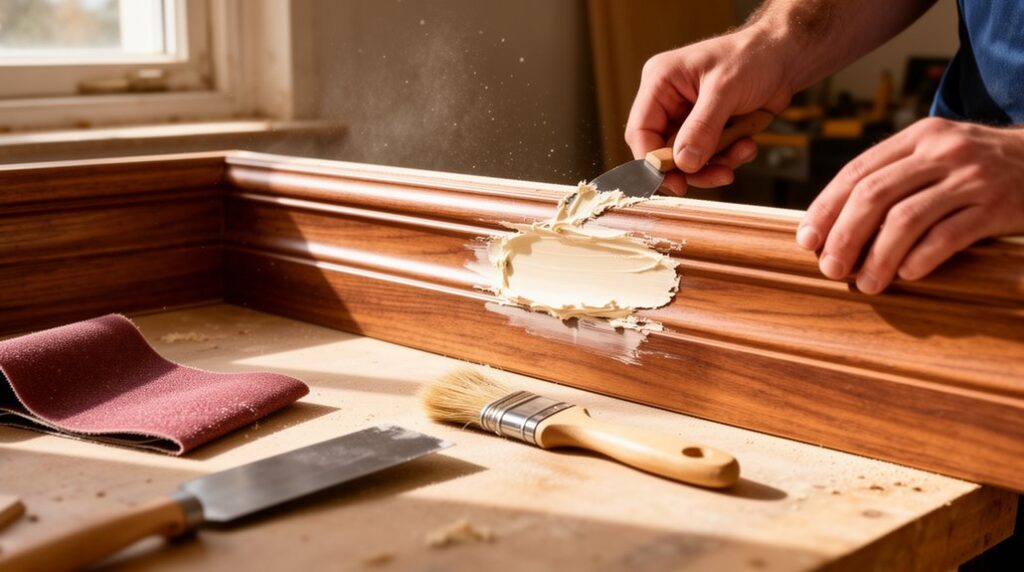
Fill Scuffs, Dents, and Nail Holes in Skirting
Choose a filler that matches your skirting material and the damage size (lightweight for small nail holes, two-part for deeper dents).
Press it in with a putty knife, overfill slightly, let it cure, then sand flush with fine-grit paper.
Wipe off dust and paint the repaired area to blend it in.
Choose The Right Filler
When should you reach for wood filler, lightweight spackle, or caulk on skirting boards? Start with material selection: if the trim is timber and the damage is a dent, gouge, or exposed grain, choose wood filler because it bonds and can be shaped.
For painted MDF, small nail holes and shallow scuffs take lightweight spackle; it spreads fast and shrinks less on tiny voids.
Use caulk only for flexible gaps at joints—skirting-to-wall seams or mitres that move—never for impact dents.
Next, check color matching: pick a stainable filler for bare wood or a paint-ready filler for coated boards.
Then confirm compatibility: water-based for indoor, low-odour work; solvent-based for harder, high-wear edges.
Patch, Sand, And Paint
With the right filler in hand, you can move straight into patching: clean the scuff or hole, then press filler in with a putty knife and slightly overfill so it can be sanded flush. Let it cure fully, then sand with 120-grit, finishing with 180-grit for a feathered edge. Vacuum dust and wipe with a damp cloth.
For ornate skirting styles shaped by historical trends, keep profiles crisp: use a sanding block on flats and fold paper for tight coves. Spot-prime bare filler to stop flashing, then caulk any open mitres.
Paint with a small angled brush first, then roll the face for a uniform sheen. Apply two thin coats, sanding lightly between if needed.
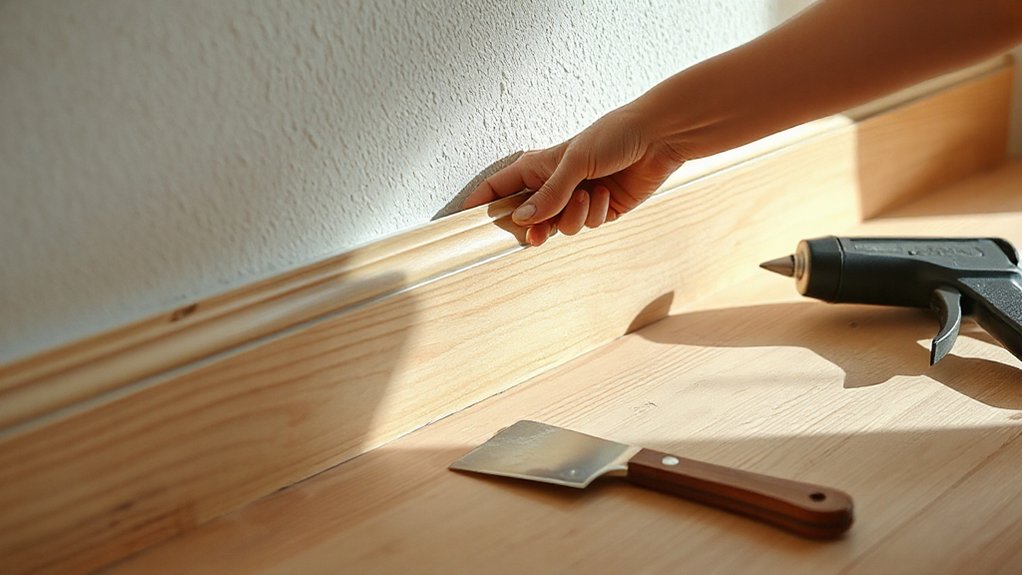
Re-Fix Loose Skirting Boards Before You Fill
Although it’s tempting to grab the filler straight away, re-fix any loose skirting boards first so the repair doesn’t crack or pop later. Start by locating movement: press along the board and mark any flexing spots. Lift carpet edges if needed to access fixings. Remove protruding nails or screws, then resecure into studs or solid backing using countersunk screws; pre-drill to prevent splitting.
If the board has bowed, pull it tight with a clamp or a temporary block and screw through the thickest section. Set screw heads slightly below the surface so you can fill cleanly later. This skirting maintenance step restores stability and supports lasting aesthetic enhancements during repainting.
Seal Wall Gaps and Tighten Skirting Joints
Check the gap between the wall and skirting and identify what’s causing it—shrunk plaster, uneven walls, or seasonal movement—so you don’t seal over an active fault.
Run a neat bead of paintable decorator’s caulk along the gap, then tool it smooth to form a continuous seal.
If any joints are loose, clamp or pin them tight, add adhesive where needed, and re-fix so the mitres close up before the caulk skins.
Identify Wall Gap Causes
Before you reach for caulk or a nail gun, pinpoint why the gap opened up in the first place: seasonal shrinkage in timber, minor wall movement, loose fixings, uneven plaster, or an out-of-square corner can all pull the skirting away.
First, run a straightedge along the wall to spot hollows or proud plaster; mark high spots in pencil.
Next, check for nail pops or missing screws by pressing the board—if it flexes, the fixing’s failed.
Then inspect joints and mitres for separation; measure the widest point with feeler gauges.
Look for cracking in wall paint above the board, signalling movement.
Finally, consider furniture placement: heavy items can bow floors and shift skirting.
Note each cause before deciding on the right corrective fix.
Apply Caulk For Seals
Once you’ve traced the gap back to shrinkage, minor movement, or a slightly uneven wall, you can seal it with the right caulk so the skirting sits clean and the joint stays tight.
Start with material selection: use paintable acrylic latex for most interior walls, or a paintable hybrid/urethane where movement is higher; avoid pure silicone if you’ll paint.
Clean the joint, remove loose paint, and vacuum dust. Mask both edges with painter’s tape.
Cut the nozzle at a 45° angle to match the gap width, then run a continuous bead with steady pressure.
Tool it within minutes using a damp finger or caulk tool, pressing caulk into the seam.
Pull tape immediately.
For color matching, caulk first, then prime and paint.
Reinforce Loose Skirting Joints
Although caulk hides fine seams, you’ll need mechanical reinforcement when the skirting itself has loosened and the joint flexes.
First, locate studs with a finder and mark them lightly. Pull the board tight to the wall with a clamp or a pry bar against a wood block.
Pre-drill angled pilot holes through the top edge, then drive 50–60 mm trim screws into studs; set heads slightly below the surface.
For joints between lengths, add a brad nail or two through the face into the adjoining piece, or use a pocket screw from the back if accessible.
Inject wood glue into open mitres, clamp, and wipe squeeze-out. Refill, sand, then touch up paint so Decorative accents stay crisp.
This finishes Skirting maintenance.
Rebuild Cracked or Broken Skirting Corners
When a skirting corner has split, chipped, or snapped off, you can rebuild it so the joint closes up cleanly and the profile matches. First, knife out loose fibres and old filler, then square the break with a chisel.
Drill two 2–3 mm pilot holes and pin a backing block behind the corner with brads or screws so you’ve got solid support. Butter the break with wood glue, press the piece back, and clamp or tape it tight.
If the chunk is missing, pack a two-part epoxy filler onto the backing, overfill slightly, and let it cure. Shape with a file, then sand to the skirting’s curve.
Use Decorative corner molding or a Custom trim design template to copy the profile accurately. Prime and paint.
Repair Swollen MDF or Rotten Wood Skirting
If moisture has made MDF puff up or rot has softened timber skirting, fix the water source first, then test how deep the damage goes. Probe with an awl: if the tool sinks easily or fibers crumble, you’ve got Rotten wood beyond surface repair.
For MDF swelling, cut back to firm, square edges with a multi-tool, then remove any loose laminate. Dry the area with ventilation and a dehumidifier until readings stabilize.
Treat softened timber with a liquid wood hardener, let it cure, then fill voids with two-part epoxy filler and shape it flush.
If rot extends past 10–15 mm or reaches the wall plate, cut out the section and splice in a new piece, glued and pinned.
Sand, Caulk, Prime, and Paint for a Seamless Finish
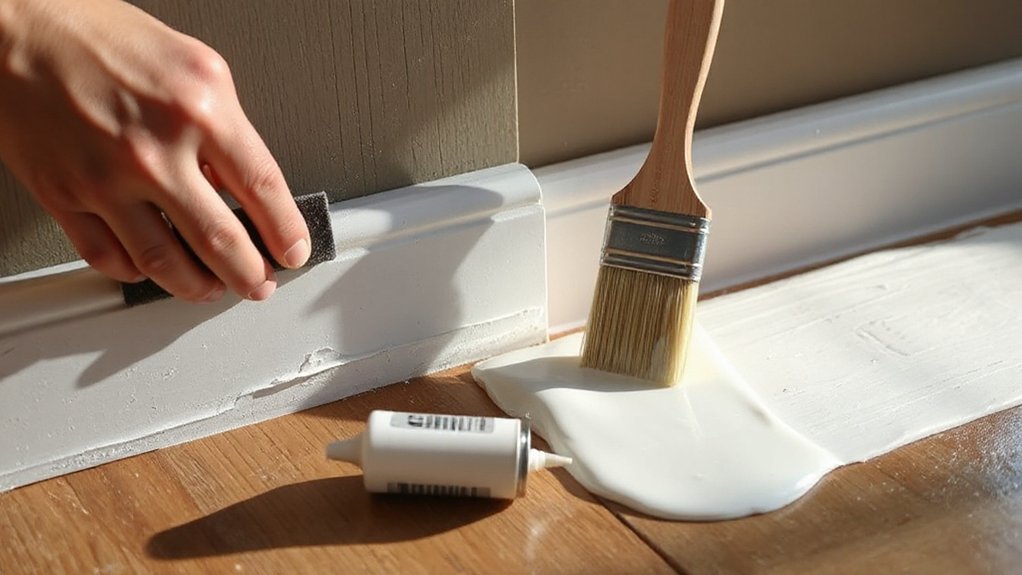
Once your repair has fully cured and the skirting feels solid, move straight into surface prep so the patch disappears under paint. Start with 120-grit to level filler and feather edges, then switch to 180–220-grit for a smooth blend. Vacuum dust and wipe with a damp microfiber.
Run paintable acrylic caulk along gaps at the wall and joints; tool it with a wet finger or caulk tool, then let it skin over.
Spot-prime bare wood, MDF, and filler with stain-blocking primer, extending 25–50 mm past the repair. Lightly sand the primer with 220-grit and de-dust.
Apply two thin topcoats, cutting in first. Match sheen to adjacent trim so Decorative accents and historical styles stay consistent.
Frequently Asked Questions
What Paint Sheen Is Best for Skirting Boards: Satin, Semi-Gloss, or Gloss?
Choose semi-gloss for most skirting boards: it balances durability, cleanability, and highlight control.
Start by picking your paint finish: use satin if you want a softer look and you’ve got minor wall imperfections; choose gloss if you want maximum toughness and don’t mind showing every dent.
Next, match sheen preferences to traffic: higher traffic needs higher sheen.
Finally, test a small section under your lighting before committing.
How Long Should Filler and Caulk Cure Before Priming and Painting?
Wait 15–30 minutes for fast-dry filler, 1–2 hours for standard filler, and 24 hours for deep fills.
Let caulk cure 2–8 hours, or 24 hours if it’s thick.
Around 80% of paint failures trace to rushed prep.
For Filler application, sand once fully hard and dust off.
For Painting techniques, prime after curing, then paint only when the primer’s dry to touch, too.
Can I Match New Trim Profiles to Old Skirting Without Replacing Everything?
Yes, you can match new trim to old skirting without replacing everything. First, measure height, thickness, and key curves with a profile gauge.
Next, check local mills and big-box catalogs for trimming profile options closest to yours. Buy extra length for test cuts.
Then, scribe and plane joints for a tight fit, and back-cut miters.
Finally, blend seams with filler and caulk, and finish by matching paint colors to unify old and new.
How Do I Remove Skirting Boards Without Damaging Plaster or Drywall?
Slip skirting safely: score, shim, separate.
First, cut paint/caulk along the top edge with a sharp utility knife.
Locate studs/nails, then use a wide putty knife as a shield and pry gently with a flat bar.
Work in small steps along the length, adding shims to hold gaps.
For Removing techniques, pull nails through the back.
For Surface preparation, scrape residue, fill divots, sand smooth.
When Should I Hire a Carpenter Instead of Attempting a DIY Repair?
Hire a carpenter when you see structural damage, widespread rot, bowing walls, hidden wiring/plumbing, or you need seamless joints and matching profiles.
Start by evaluating scope: measure lengths, check moisture, probe softness, and map fasteners.
If you can’t cut mitres accurately, scribe to uneven floors, or repair plaster cleanly, you’re better off Choosing professional help.
Otherwise follow DIY repair tips: fill, sand, prime, repaint, and re-fix neatly.
Conclusion
You’ve tracked the damage like a watchmaker following a slipped gear: find the cause, then restore the line. You’ve tightened loose boards, filled dents and holes, sealed wall gaps, and rebuilt corners with filler and fixings. If MDF’s swollen or timber’s rotten, you’ve cut back to sound material and patched. Now sand flush, caulk fine seams, prime bare spots, and paint in thin coats. Step back—the trim runs true again.