
Pick the best hammer by matching head type, weight, and handle to your jobs. You’ll use a curved-claw for general carpentry and nail pulling, a straight-claw for prying and demolition, and a rubber or dead-blow mallet for assembly without marring. Choose 12 oz for trim, 16 oz for most DIY work, and 20 oz for dense lumber. Prefer wood for feel, fiberglass for durability, steel for rigidity, then test balance, grip, and sting—keep going to refine your choice.
Key Takeaways
- Pick the hammer type for your tasks: curved-claw for carpentry, straight-claw for demolition, mallets for non-marring assembly, tack hammer for brads.
- Choose the lightest weight that drives nails cleanly: 12 oz light-duty, 16 oz general DIY, 20 oz dense lumber and large nails.
- Select handle material for your conditions: wood for feel, fiberglass for durability, steel for rigidity but more vibration.
- Match claw shape to work: curved claw for smooth nail pulling, straight claw for prying boards and ripping during teardown.
- Test balance and grip comfort; minimize vibration sting, ensure the head is tight, and maintain grips and rust protection.
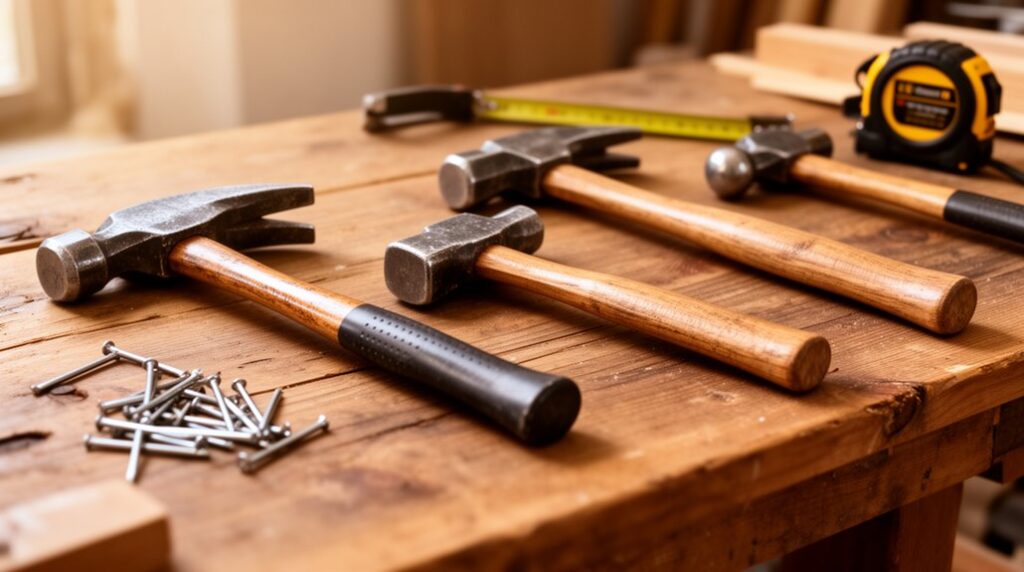
Best Hammer Types for Common Home Projects
Whether you’re hanging a picture frame or framing a wall, you’ll get better results if you match the hammer type to the task. Choose a curved-claw hammer for pulling nails and general carpentry; its split claw gives controlled leverage.
Use a straight-claw (ripping) hammer when you’ll pry boards or demo trim; the straighter claw bites deeper for teardown.
Pick a rubber mallet for assembling furniture, setting pavers, or tapping joints without marring surfaces.
Reach for a dead-blow mallet when you need force without rebound, like seating hardware or loosening stuck parts.
For delicate finishes, use a tack hammer to place small brads accurately.
Favor ergonomic design—contoured grips and balanced heads reduce wrist strain.
Keep faces clean, handles tight, and replace mushroomed heads for hammer maintenance.
Best Hammer Weight: 12, 16, or 20 Oz?
You’ll pick hammer weight based on project demands: 12 oz for light trim and small fasteners, 16 oz for most framing and general repairs, and 20 oz when you need maximum driving force in dense lumber or large nails.
You also have to match the head weight to your strength and grip, because heavier hammers raise fatigue and can degrade accuracy over long runs.
Focus on comfort and swing control—choose the lightest weight that still sets nails in clean, consistent strikes without over-swinging.
Weight By Project Type
Because hammer weight controls both striking force and fatigue, matching it to the job saves time and reduces mistakes. Choose a 12 oz hammer for light-duty tasks like hanging pictures, assembling flat-pack furniture, or tapping trim where you need quick, precise blows with minimal risk of denting softwood.
Step up to 16 oz for general DIY: driving common nails, framing small repairs, and installing fence pickets; it balances power and control for repeated strikes.
Reach for 20 oz when you’re driving long nails, pulling stubborn fasteners, or working dense lumber, since extra mass boosts energy per swing and reduces bounce.
Pair the right weight with an ergonomic grip to keep handling secure. You’ll also find budget-friendly options in each weight class.
Comfort And Swing Control
Even if a heavier hammer delivers more impact, your accuracy drops fast when the head weight fights your natural swing path.
For most DIY tasks, a 16 oz hammer balances speed and control, letting you keep the face square on the nail without overcorrecting mid-swing.
Choose 12 oz when you’re working overhead, doing trim, or driving small fasteners where wrist fatigue ruins alignment.
Step up to 20 oz only if you’re framing or pulling stubborn nails and you can maintain a consistent arc.
Your ergonomic grip matters as much as ounces: it should lock your hand without forcing a death-grip.
Also match handle material to comfort—wood dampens shock, fiberglass is stable, and steel transmits vibration unless well-isolated.
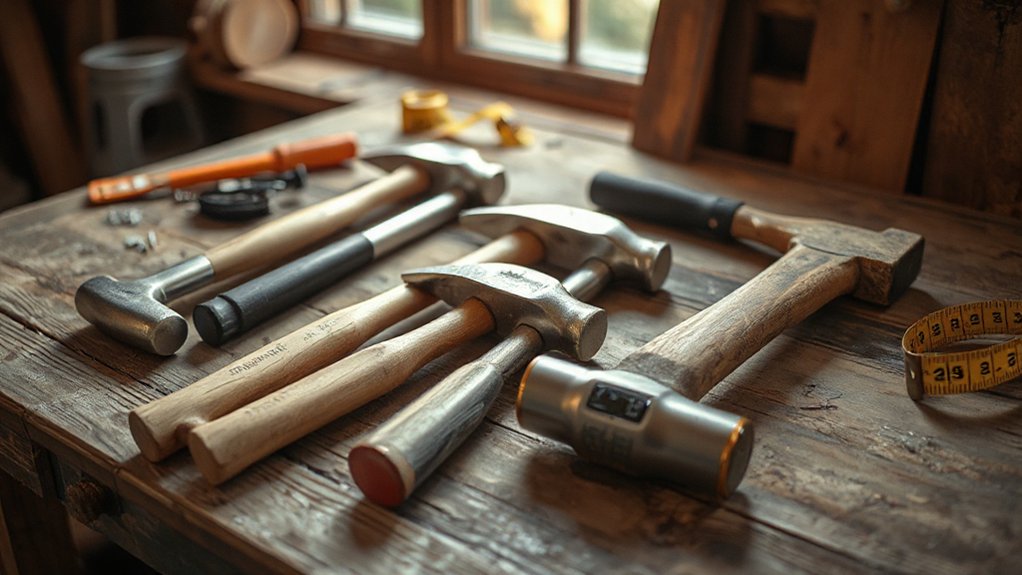
Best Hammer Handles: Wood vs Fiberglass vs Steel
When you choose a hammer handle, you’re balancing feel, vibration control, and long-term durability.
Wood typically gives you the warmest grip and the best natural shock absorption, but you’ll need to watch for swelling, cracking, and a loosening head over time.
Fiberglass and steel take hits and weather better, yet fiberglass can transmit more sting and steel often sends the most shock back into your hand unless it’s heavily overmolded.
Wood Handles: Feel And Shock
Although they require more care than composite designs, wood hammer handles deliver the most natural feel and some of the best shock absorption you can get from a traditional handle. You’ll notice the grain flexing slightly on impact, which filters high-frequency vibration before it reaches your wrist.
For performance, focus on wood handle construction: straight, continuous grain running parallel to the handle length, a properly seated wedge at the eye, and a slim oval profile that indexes your swing.
Hickory is the standard because it balances stiffness with controlled bend. Check the shock absorption features: a longer handle with a gradual taper, smooth gradual changeover at the throat to avoid stress risers, and a lightly textured or oiled surface so you keep grip without squeezing.
Fiberglass Vs Steel Durability
If you prioritize long-term handle durability over feel, fiberglass and steel both beat wood in different ways: fiberglass shrugs off moisture, resists swelling and rot, and survives jobsite drops with little more than cosmetic scuffs, while steel won’t crack or splinter but can bend under overload and transfers impact shock straight into your hand unless the grip isolates it.
For repeated DIY use, you’ll notice fiberglass resilience in temperature swings and when you miss a strike; the core stays stable, and the overmold keeps traction even when dusty.
With steel strength, you get a rigid, slim handle that tolerates prying, but watch for grip wear and rust at chips.
Choose fiberglass for mixed conditions; choose steel for maximum rigidity and minimal handle maintenance.
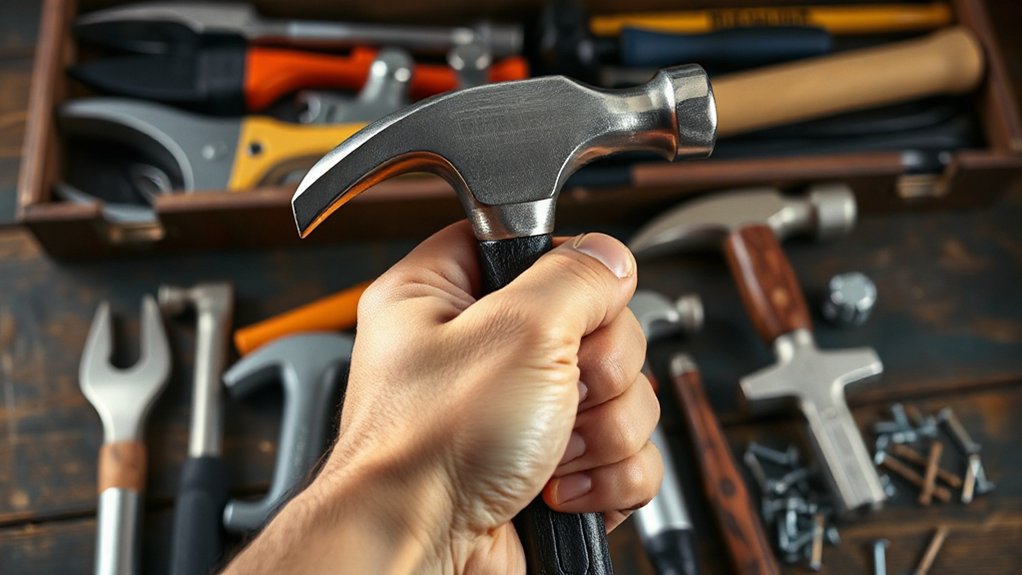
Choose the Right Claw Hammer (Curved vs Straight)
Since the claw shape controls both how you drive nails and how cleanly you pull them back out, you’ll want to match it to the work: a curved-claw hammer gives you better leverage for nail removal and general home repairs, while a straight-claw (ripping) hammer bites into framing lumber and pries apart boards more aggressively.
Choose curved claws for finish carpentry, trim, and drywall where you’ll pull brads or common nails without gouging surfaces; the arc rides on the head’s heel and lifts smoothly.
Pick a straight claw for demolition, deck repair, and rough framing, where you’ll hook under nail heads, split studs, or lift sheathing; its flatter profile concentrates force.
Compare claw hammer design with your typical tasks, and keep hammer handle ergonomics in mind for control.
Check Hammer Balance, Grip, and Vibration
Before you commit to a hammer, check how it balances in your hand, how the grip locks in under sweat or dust, and how much shock it sends up your wrist on each strike. Hold it at the end of the handle and make slow, controlled swings; the head shouldn’t feel like it “drops” or twists off-axis. A neutral balance helps you land square hits with less corrective force.
Evaluate grip texture and diameter: you want full contact without over-squeezing. Rubber overmolds improve traction, while straight wood can feel slick unless it’s properly contoured.
For vibration, strike a scrap block; excessive sting means poor damping. Better Hammer ergonomics reduce fatigue, and safety considerations improve accuracy and control during repetitive work.
Avoid These Hammer-Buying Mistakes
A hammer can feel perfectly balanced with a comfortable grip and still be the wrong buy if you overlook basic fit and use-case details. Don’t default to a 16-oz claw if you’ll drive framing spikes; pick 20–28 oz and a straight claw. Don’t oversize either—fatigue ruins accuracy and increases misses.
Avoid bargain cast heads with soft faces; look for forged steel and a secure wedge or epoxy-set head. Don’t ignore handle material: fiberglass transmits less shock than wood, but slips if the texture’s poor.
Verify face type: milled grips nails, smooth reduces marring. Follow safety precautions: check head tightness, wear eye protection.
Build maintenance tips into your choice: rust-resistant coating, replaceable grips, and easy cleaning.
Frequently Asked Questions
What Hammer Face Finish Is Best for Preventing Marring Finished Surfaces?
For preventing marring finished surfaces, you’ll get the best results with a smooth, polished face, ideally paired with a non-marring cap. Use brass, copper, nylon, or urethane caps when possible; they deform before the workpiece does.
Avoid milled or checkered faces, which concentrate force and leave texture. Among Hammer face materials, softer alloys and polymers excel for Surface marring prevention, especially on trim, cabinetry, and delicate veneers.
How Do I Safely Replace a Worn or Cracked Hammer Handle?
Like a ticking time bomb, a cracked handle can fail mid-swing.
For hammer handle replacement, first secure the head in a vise, then saw off the old handle and drive out the wedge and remnants with a punch.
Fit a new hickory handle: test-seat, rasp for full eye contact, then install a wooden wedge with glue, add a metal cross-wedge, and trim flush.
Handle safety tips: inspect alignment, no gaps.
Are Titanium Hammers Worth the Cost for Occasional DIY Use?
For occasional DIY, titanium hammers usually aren’t worth the cost unless you value reduced fatigue and long-term Titanium durability. You’ll pay a premium, so weigh Cost vs. performance: titanium’s lighter head swings faster, dampens shock, and resists corrosion, but it doesn’t drive nails dramatically better than a quality steel hammer.
If you only hammer periodically, buy a well-balanced 16–20 oz steel model and spend on good nails.
What Safety Gear Should I Use When Hammering Nails or Metal?
You should wear Eye safety glasses with side shields, because nail heads and metal chips can ricochet fast.
Add Protective gloves that still let you feel the nail, ideally snug leather or cut-resistant synthetic.
Use hearing protection when striking hardened steel or working in enclosed spaces.
Wear closed-toe boots to protect against dropped hammers and nails.
If sparks or fragments fly, add a face shield and long sleeves.
Keep hair tied back, too.
How Should I Store and Maintain a Hammer to Prevent Rust?
Store your hammer in a dry, ventilated spot and keep it off concrete to prevent rust. Use Hammer storage ideas like wall hooks, a toolbox tray, or a pegboard with a desiccant pack.
After use, wipe the head clean, remove moisture, then apply a thin oil or paste wax—core Rust prevention techniques.
Check monthly for corrosion, lightly sand spots, and recoat. Don’t leave it outdoors or in damp buckets.
Conclusion
When you pick your hammer, you’re not just buying steel—you’re tuning a tool to your projects. Match the type to the task, match the weight to your swing, match the handle to your comfort. Choose a curved claw for pulling nails, choose a straight claw for prying and framing. Check balance at the head, check grip under load, check vibration after repeated strikes. Don’t overbuy weight, don’t ignore handle fit, don’t accept sloppy ergonomics.

