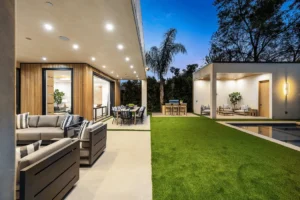
Start by zoning your deck around how you’ll use it—dining, lounging, play, or pots—and size it with 60cm walkways and 90cm chair clearance so it feels bigger without adding area. Choose cost-effective timber for easy board swaps, or composite to cut upkeep to simple cleaning. Warm it up with honey or walnut tones and UV-resistant stain. Add built-in perimeter seating with storage, low-rise steps between levels, and warm 2700–3000K lighting. Next, you’ll see smart shade, privacy, and planter tricks.
Key Takeaways
- Plan deck zones around real use—dining, lounging, play, storage—and allow 90cm chair clearance plus 60cm walkways for easy movement.
- Add built-in perimeter seating and storage to save floor space, reduce clutter, and make small gardens feel larger.
- Use multi-level decking with wide, low-rise steps to define areas and improve flow without needing extra square metres.
- Choose warm, mid-tone timber stains or matte composites (honey, chestnut, walnut) to reduce glare, hide scuffs, and feel inviting.
- Extend evening usability with warm-white, low-glare lighting on steps and edges, using low-voltage or solar fixtures for safe, simple installs.
Plan Garden Decking Ideas Around Your Lifestyle
Before you pick materials or a layout, map your decking to how you’ll actually use the garden day to day—dining, lounging, kids’ play, container gardening, or a hot tub—so you don’t pay for space and features that won’t earn their keep.
Measure the footprint you truly need: allow 90cm clearance behind chairs, 60cm walkways, and a 1.5–2m circle for turning with a tray or pram.
Place steps and paths where you already walk to reduce wasted boards and future wear.
Plan zones for outdoor furniture, storage benches, and a barbecue pad so you won’t keep rearranging.
Budget for garden maintenance access: leave edges reachable for sweeping, weeding, and drainage checks.
Add lighting only where you’ll use it nightly.
Choose Warm Decking Materials (Timber vs Composite)
Although both timber and composite can feel “warm” underfoot, they hit your budget and maintenance time very differently. If you’re cost-led upfront, timber usually wins: boards are cheaper and easier to source, and you can replace a single damaged plank without redoing the whole run.
Factor in timber durability, though—softwoods dent and weather faster, while hardwoods last longer but cost more and may need pre-drilling and pricier fixings.
Composite costs more per square metre and often needs special clips, but it can cut labour because it’s straighter and more uniform.
Over the years, composite maintenance is lighter: you’ll mainly clean it, not continually sand and re-treat.
Check slip ratings, end caps, and warranty terms.
Use Warm Deck Colours, Stains, and Finishes
Once you’ve settled on timber or composite, the quickest way to make a deck feel warmer is through colour choice and the finish you put on top. Pick honey, chestnut, walnut, or muted red-browns; they reflect less glare and visually “heat” the space. Aim for Color harmony by matching undertones to your fence, brick, and planters so the deck looks intentional, not patchy.
For timber, a mid-tone stain is the best value: it hides scuffs better than clear oil and won’t show dust like near-black. Prioritise stain durability—look for UV inhibitors, mould resistance, and a 2–3 year recoat rating.
For composite, use colour-matched end-caps and a matte sealer where recommended. Budget for two coats, proper drying time, and non-slip grit on steps.
Build in Deck Seating to Save Space
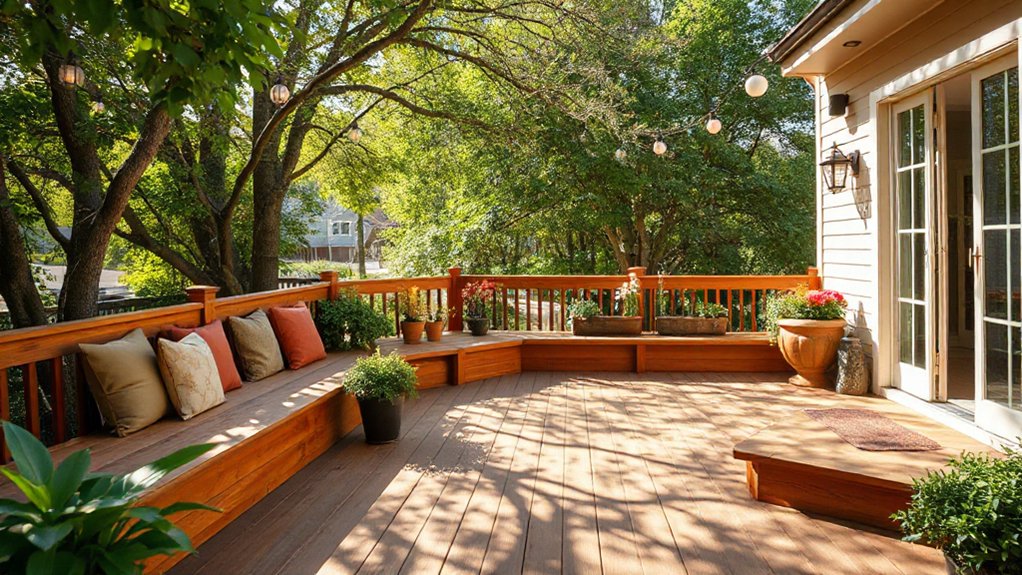
When you’re working with a small garden deck, built-in seating gives you extra places to sit without paying for bulky furniture or losing floor space. Fix benches to the perimeter, and you’ll keep the centre clear for a table, planters, or a grill.
Keep costs down by building simple box benches from pressure-treated timber, then cap them with matching deck boards for a seamless finish. Add a hinged top so you can store cushions, tools, or kids’ toys and avoid buying separate storage.
For comfort, set the seat height around 450mm and the depth 400–450mm, then add outdoor foam pads. Built-in seating doubles as space-saving furniture, and it won’t blow over or need constant rearranging.
Zone Your Garden With Multi-Level Decking Ideas
Use a higher deck for dining and a lower tier for lounging so you define clear zones without extra fencing or paving costs.
Link the tiers with wide, low-rise steps to keep materials simple and make the shift feel intentional.
Add straightforward railings where the height change needs it, and you’ll guide traffic smoothly while keeping the build compliant and tidy.
Define Zones With Levels
Although a flat deck feels straightforward, adding one or two level changes lets you define clear garden “zones” without building full walls or spending heavily on extra fencing. You can lift a dining platform slightly to separate it from a lounging area, or drop a corner to create a snug reading nook that feels sheltered.
Keep each level’s footprint tight so you buy less timber and reduce subframe complexity. Match board direction across tiers to keep offcuts usable and waste low.
Position heavier garden furniture on the most stable, widest section, and reserve smaller tiers for planters or a bistro set.
If you want water features, set them on a dedicated level with hidden liner access and a straight run for power and drainage.
Link Tiers With Steps
How do you make multi-level decking feel like one coherent space instead of a set of awkward platforms? You link tiers with steps that land where you naturally walk—between the dining zone and lawn, or the lounge and shed path.
Keep riser heights consistent (around 170–190mm) and aim for deeper treads (250–300mm) so the transition feels safe and comfortable without extra build cost.
Match step cladding to the main boards for visual continuity, but upgrade nosings for material durability in high-wear edges.
Use pressure-treated framing and stainless fixings to reduce replacements later.
Plan drainage gaps and easy access under the steps, because maintenance requirements rise where leaves collect and moisture sits.
Add simple, low-cost lighting if needed.
Add Railings For Flow
Once your steps land in the right places, railings help the tiers read as one planned route instead of separate platforms. Run a continuous top rail along the main edge, then break only where traffic turns or where you want a pause zone for seating.
Keep costs down by repeating one post spacing and using standard 90x90mm treated posts fixed with bolt-down anchors. Add decorative handrails only on the “travel” side of each level; leave garden-facing edges open if you don’t need fall protection.
For visual warmth, swap plain infill for ornamental balustrades on the landing section, not the whole perimeter, so you get detail without paying for metres of spindles. Finish with a single stain colour across all tiers to unify the route and reduce maintenance.
Soften the Look With Curved Deck Boards
If your deck looks a bit boxy or harsh against the garden, curved deck boards can soften the lines and make the space feel more natural. A curved design helps you echo organic shapes found in beds, paths, and lawn edges, so the deck blends instead of shouting.
To control costs, curve only the outer picture-frame border and keep the field boards straight. Use thinner boards or kerf-cut pressure-treated lumber for tighter radiuses, or choose composite made for heat bending if your budget allows.
You’ll need extra blocking and closer joist spacing (often 12 inches on center) to support the curve and prevent bounce. Template the arc with a flexible batten, then predrill to avoid splitting. Plan for more waste and longer install time.
Add Warm Deck Lighting for Evenings
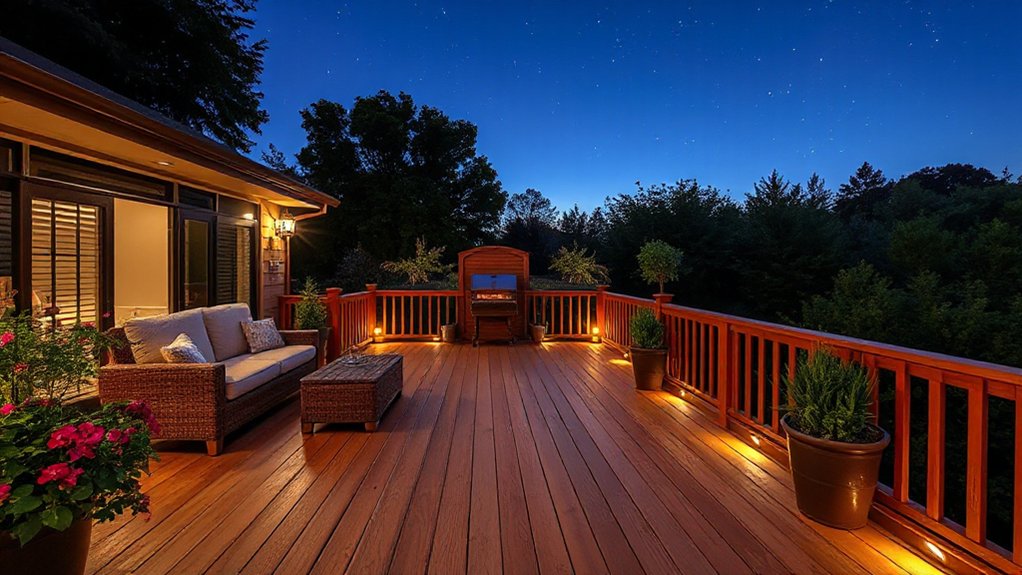
You’ll get more usable deck time after sunset if you add warm, low-glare ambient lighting that won’t blind you or your guests.
For safety, install small step and riser lights on a low-voltage circuit so you can light walkways without running up your power bill.
To keep costs down while adding atmosphere, scatter solar lantern accents where they’ll catch daytime sun and glow along the edges at night.
Low-Glare Ambient Lighting
Why let harsh glare cut your deck time short when a few warm, low-watt fixtures can keep the space usable after sunset? Choose soft, indirect light that bounces off railings, planters, or pergola beams instead of shining in your eyes. Warm-white LEDs (2200K–2700K) cost pennies to run and still make food, faces, and furniture look inviting.
Start with a couple of dimmable wall or post-mounted sconces aimed downward, then add weather-rated string lights under the pergola for an even glow. Keep wiring simple with a low-voltage transformer and timer, or use solar where you don’t want trenching.
Place light near your fire pit seating and by a water feature, but shield it to avoid reflections. Check IP ratings, too.
Step And Riser Lights
How often does the deck feel “done” until the steps disappear after dusk? Step and riser lights fix that fast, and they’re one of the most cost-effective upgrades for safety and evening use.
Recessed LED step caps or slim riser fixtures guide footing without the glare of overhead garden lighting. Choose warm-white (2700–3000K) for a welcoming look, and aim for 2–3 watts per fixture to keep running costs low.
Space lights every other step, or each step on wider stair runs, so outdoor illumination stays even. Use a low-voltage transformer and weather-rated cable; you’ll cut electrician time and simplify future replacements.
Seal cutouts and keep lenses flush to prevent water pooling.
Solar Lantern Accents
Step lights keep stairs safe, but the rest of the deck can still feel dim once the sun drops. Add solar lanterns to create warm pools of light without wiring or an electrician.
Choose models with 10–20 lumens for table edges and corners, and 30+ lumens for paths off the deck. Look for replaceable AA/AAA batteries, a dusk-to-dawn sensor, and an IP44 (or higher) weather rating to avoid early failures.
Place them where panels get 6+ hours of sun; shade cuts runtime fast. Use shepherd hooks, rail clips, or weighted bases so you won’t drill.
To stretch your budget, buy multipacks and space lanterns 6–8 feet apart for steady garden illumination around seating areas.
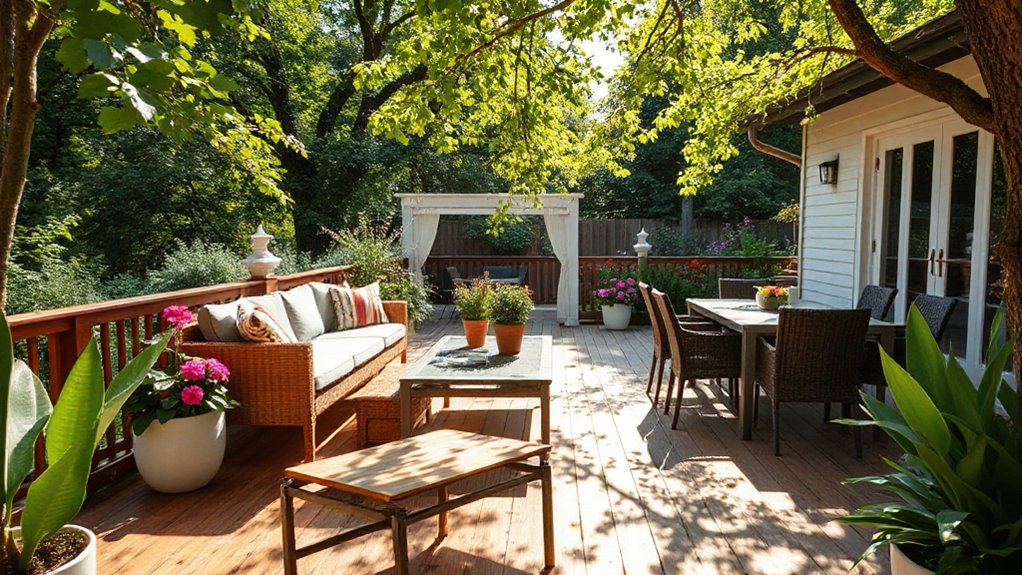
Frame Your Decking With Planters and Greenery
Even if you’re working with a tight budget, you can make your decking look finished by framing the edges with planters and layered greenery. Use inexpensive troughs, reclaimed crates, or DIY timber boxes, and line them with landscape fabric to protect the wood and reduce soil loss. Fill gaps along railings and corners first to hide cut ends and screws.
Build container gardens with a simple “thriller, filler, spiller” mix: one upright grass, compact herbs, then trailing ivy or bacopa to soften the boards.
For vertical greenery, screw a narrow trellis to posts or a fence and train climbers in lightweight pots. Add drip trays to prevent staining, and lift pots on feet so water drains freely. Refresh with mulch and slow-release feed twice yearly.
Add Shade and Shelter to Extend Deck Use
Although a bare deck works on perfect days, adding shade and shelter keeps it usable in harsh sun, light rain, and cooler evenings without blowing your budget.
Start with a cantilever umbrella: it covers a dining set, swivels with the sun, and stores easily.
For more reliable cover, mount a retractable awning; you’ll spend more upfront but gain fast, adjustable shade.
If you DIY, build a simple pergola kit and add a weatherproof shade sail for a lower-cost roofline.
Place outdoor furniture under cover to cut fading and cushion mildew.
Add a small wind-rated canopy panel on the prevailing side to reduce drizzle.
Keep water features just outside the drip line so splashes don’t slick the boards.
Add Privacy Screens and Heat for Year-Round Decking
Once you’ve got shade and shelter in place, privacy and heat turn your deck into a space you’ll actually use in shoulder seasons and on busy evenings. Start with privacy screens: fixed timber slats, budget reed rolls, or trellis panels with climbers. Place screens on the windward and neighbour-facing sides, but leave a gap at the top so light still reaches the deck.
Use posts set in bolt-down anchors to avoid digging and keep costs down, and choose exterior screws to prevent rust streaks.
Then add outdoor heaters to extend nights without overspending. Infrared wall heaters give targeted warmth and low running costs; propane patio heaters suit occasional use.
Position heaters away from screens, follow clearance rules, and run cables through weatherproof conduit for safety.
Frequently Asked Questions
Do I Need Planning Permission for a Garden Deck in the UK?
You don’t usually need planning permission for a garden deck in the UK if it’s no higher than 30cm above ground and doesn’t cover more than half your garden. Listed buildings or conservation areas can change that. Check local rules before you buy.
Choose cost-effective decking material options (treated softwood, composite) and plan garden maintenance costs like sealing, cleaning, and drainage to avoid repairs.
Keep it away from boundaries to reduce disputes.
How Much Does Professional Decking Installation Typically Cost per Square Metre?
You’ll typically pay £120–£250 per m² for professional decking installation in the UK, including labour and standard subframe.
Softwood can land near £120–£170, while composite often runs £180–£300+.
Costs rise with ground prep, steps, balustrades, lighting, and difficult access.
Compare landscaping options like patios or gravel, and consider alternative materials such as porcelain paving or resin-bound surfaces.
Get itemised quotes.
What Is the Best Way to Stop Decking Boards Becoming Slippery in Rain?
Stop decking boards becoming slippery in rain by cleaning them regularly and adding traction. You’ll get the best results if you scrub off algae with a deck cleaner, then apply non slip coatings with grit additives.
If you’re replacing boards, choose grooved or brushed boards that create textured surfaces.
Fit anti-slip strips on steps and high-traffic zones.
You’ll spend less by treating only danger areas and reapplying annually.
How Can I Protect Decking From Termites, Woodworm, and Other Pests?
Keep termites and woodworm from making your deck their “quiet retreat” by choosing naturally durable timber or using Pest resistant treatments like borate and copper-based preservatives. Seal all cut ends, then recoat stain or oil yearly as core Deck preservation techniques.
Elevate boards, improve drainage, and keep soil and mulch away from joists. Inspect spring/fall, replace soft spots fast, and add bait stations if you’re in a high-risk zone.
How Long Should I Wait Before Sealing or Staining Newly Installed Timber Decking?
Wait 4–12 weeks before you seal or stain newly installed timber decking, and confirm the boards’ moisture content is under ~15%. You’ll save money by avoiding peeling and rework.
If it’s pressure-treated, lean toward 8–12 weeks; if it’s kiln-dried, 4–6 may do.
For solid timber maintenance, water-test: if droplets soak in, stain.
Set a staining schedule around dry weather and clean first.
Conclusion
When you plan your decking around how you actually live, you’ll get more “outdoor room” without a bigger garden. Pick warmer boards, choose honey-toned stains, and seal them well so they age gracefully. Build bench seating with hidden storage to avoid buying extra furniture. Use a small step or split level to define dining and lounging zones. Add low-voltage lighting, planters, and a simple screen or heater, and you’ll stay comfortably outside longer.