Add structure and long-term value by planning a clear budget with a 10% contingency and designing outdoor “rooms” for dining, grilling, and seating. Start drainage-first: excavate 4–6 inches, install fabric, build a 4–6 inch compacted crushed-stone base, and pitch surfaces 1/8–1/4 inch per foot away from your home. Choose durable, slip-resistant pavers, add steel edging, and use tiered retaining walls with gravel and drain pipe. Keep going to see which upgrades buyers notice most.
Key Takeaways
- Invest in proper base prep and drainage to prevent heaving, pooling, erosion, and premature failure in patios, paths, and driveways.
- Create defined outdoor rooms using borders, edging, and banding to organize dining, grilling, and seating zones with clean structure.
- Choose durable, low-maintenance, freeze-thaw resistant materials like pavers, stone, or broom-finished concrete for lasting performance and safer traction.
- Add segmental retaining walls with gravel backfill and weep drainage to manage grade changes, stop washouts, and expand usable flat space.
- Install well-lit, wide, tight-joint walkways and upgraded driveways with crisp edging and concealed drainage for safer access and stronger curb appeal.
Plan Your Hardscape: Budget, Style, and Layout
Before you buy pavers or schedule a crew, map out your hardscape plan around three basics: budget, style, and layout.
Start with Budget planning: list must-haves (patio, walkway, steps) and nice-to-haves, then price materials, base prep, edging, delivery, and a 10% contingency. Decide what you’ll DIY versus hire so your numbers stay real.
Next, lock in Style selection by matching your home’s architecture, existing finishes, and maintenance tolerance. Choose a consistent palette and one primary texture to avoid a patchwork look.
Finally, sketch layout to scale: measure door clearances, traffic paths, seating zones, and grill space. Use string lines or marking paint to test proportions before you commit. Document dimensions for quotes.
Hardscaping for Drainage: Bases, Slopes, and Swales
Although drainage isn’t the flashy part of a patio or walkway, it’s what keeps pavers from heaving, joints from washing out, and water from pooling against your foundation.
Start with a compacted base: 4–6 inches of crushed stone, topped with a bedding layer you screed flat. Pitch the surface 1/8–1/4 inch per foot away from structures so runoff moves fast but feels level underfoot.
Where water collects, cut a shallow swale to steer flow toward a safe discharge area or a planting zone. If grades don’t cooperate, add subsurface drainage: perforated pipe in gravel wrapped with fabric, tied into daylight or a dry well.
You can also plan rainwater harvesting by directing downspouts into tanks.
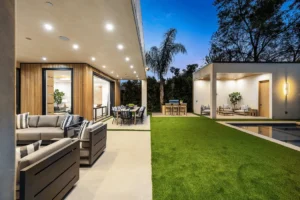
Create Outdoor Rooms With Patios and Borders
When you treat a patio as an “outdoor room,” you get a space that works as well as any interior—defined, comfortable, and easy to use. Start by setting clear edges with soldier-course pavers, stone banding, or steel edging so furniture stays put and gravel or mulch won’t creep in.
Use borders to cue function: a dining zone, a grilling strip, or a conversation nook. Keep widths generous—at least 3 feet for circulation—and align joints with doors and paths for a built-in look.
Add Garden lighting along borders and step progressions to improve safety and extend usability without clutter.
Plan Plant integration by reserving pockets for shrubs or herbs, keeping roots away from compacted bases and allowing drainage gaps.
Patio Ideas for Four-Season Comfort
Even if your climate swings from blazing summer afternoons to icy winter mornings, you can design a patio that stays comfortable year-round with a few smart upgrades. Start with a stable base and choose pavers or textured concrete that won’t get slick when wet.
Add a pergola with a retractable canopy for shade, then include clear wind screens or outdoor curtains to cut drafts without blocking light. Install a compact gas fire table or infrared heater so you’ll actually use the space in shoulder seasons.
Plan seasonal plantings in large, insulated containers so you can swap color, add winter evergreens, and protect roots. Finish with layered garden lighting: step lights, wall sconces, and dimmable string lights for safe footing and warm ambiance. It also boosts resale appeal.
Walkway Ideas That Prevent Muddy Shortcuts
To stop muddy shortcuts, you can guide foot traffic with a gravel path set in sturdy edging that keeps stones contained and defines the route.
You’ll also keep shoes clean by placing stepping stones over drainage-prone spots, giving water a way out while providing sure footing.
For a clean, long-lasting solution, you can install permeable paver walkways that lock in place, drain efficiently, and hold up to heavy use.
Gravel Paths With Edging
Although a simple gravel path looks casual, it solves a real problem fast: it gives you a firm, drain-friendly walkway that keeps feet from cutting muddy shortcuts through your yard.
Start by excavating 4–6 inches, then add landscape fabric to stop weeds and keep stone from sinking.
Spread 3–4 inches of compactable base, compact it, and top with 1–2 inches of pea gravel or crushed stone.
Lock everything in with sturdy edging materials—steel, aluminum, brick, or pressure-treated bender board—set flush so mowers won’t catch.
Use color contrast to define the route and make it look intentional, not temporary.
A 36–48 inch width feels comfortable, and periodic raking keeps it tidy and long-lasting.
Add gravel to low spots as needed.
Stepping Stones Over Drainage
When runoff turns your favorite route into a muddy trench, set stepping stones over the drainage line so you can walk it year-round without carving new ruts. Lay stones perpendicular to the flow to bridge wet spots and keep water moving.
Excavate each pad, add 2–3 inches of compacted crushed stone, then bed the stone level so it won’t rock. Keep a slight crown on surrounding soil, and leave gaps for water to pass and debris to clear.
Choose larger, flat stones spaced to your natural stride to prevent unsafe hops. Tie the run into your garden pathways so traffic stays where you planned.
This simple upgrade protects turf, limits erosion, and delivers durable, low-maintenance drainage solutions that look intentional.
Permeable Paver Walkways
Stepping stones handle a few wet spots, but a permeable paver walkway gives you a full-time, mud-proof route that still lets water soak in. You’ll stop carving messy shortcuts across turf, and you’ll protect roots by keeping foot traffic on a stable path.
For lasting results, start with proper grade and edge restraint, then build a compacted open-graded stone base so rain drains through the joints.
During permeable paver installation, use joint aggregate (not sand) to maintain infiltration and reduce shifting. Choose thicker pavers for high-traffic routes, and widen the walk where people naturally cut corners.
This is eco friendly hardscaping that reduces runoff, limits puddling, and keeps your entry cleaner, season after season.
Driveway Materials That Upgrade Curb Appeal
Because your driveway takes up so much visual real estate, the material you choose can instantly sharpen your home’s curb appeal while improving durability and maintenance.
For Landscaping aesthetics, match color and texture to your facade and nearby hardscape: warm-toned pavers suit brick, while slate-look concrete complements modern lines.
Prioritize Material durability by selecting surfaces rated for your climate and loads. Concrete offers clean edges and low upkeep; add a broom finish for traction and saw-cut joints to control cracking.
Asphalt costs less upfront, but you’ll reseal it to prevent fading.
Interlocking pavers boost resale appeal and let you replace single units if stained.
Gravel feels informal and drains well, yet needs edging, periodic raking, and weed control.
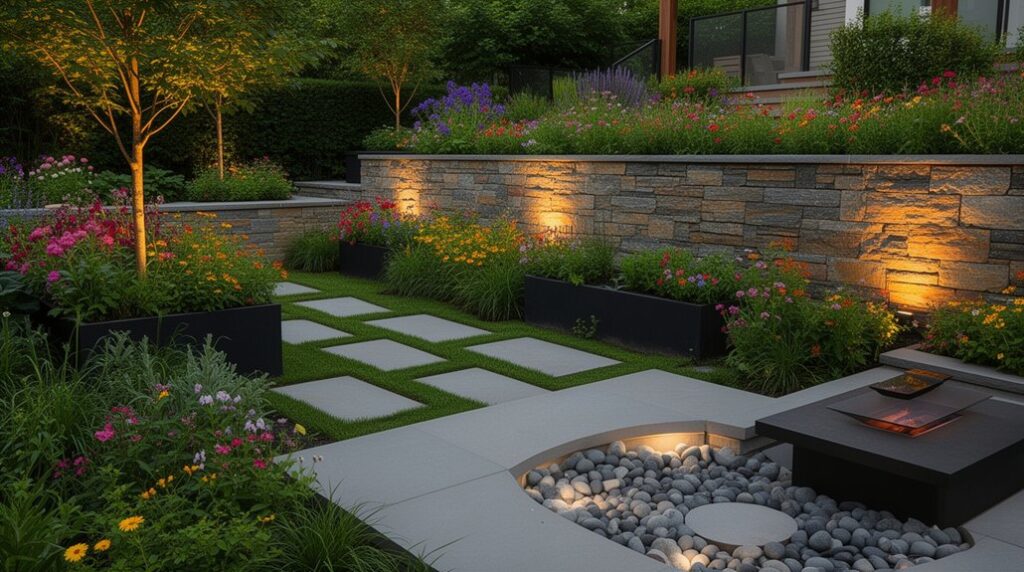
Retaining Wall Ideas to Stop Erosion
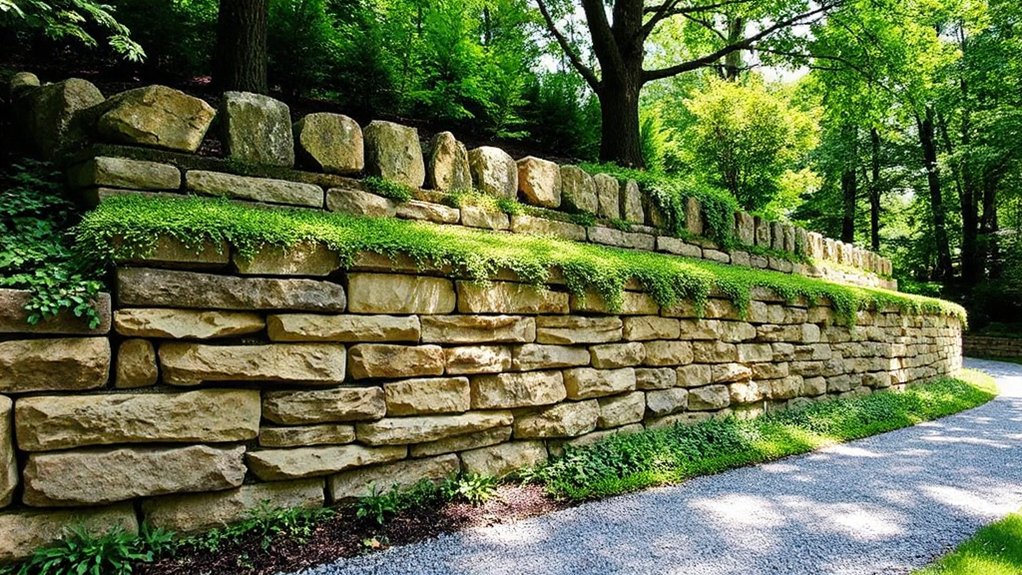
If runoff is chewing up your slope, you can stabilize it with tiered retaining walls that break the grade into smaller, stronger steps.
You’ll get better long-term performance when you build drainage-first—compact the base, add gravel backfill, and include a perforated drain with proper outlets.
Start by mapping water flow and wall height so you choose the right tier spacing and drainage details before you set a single block.
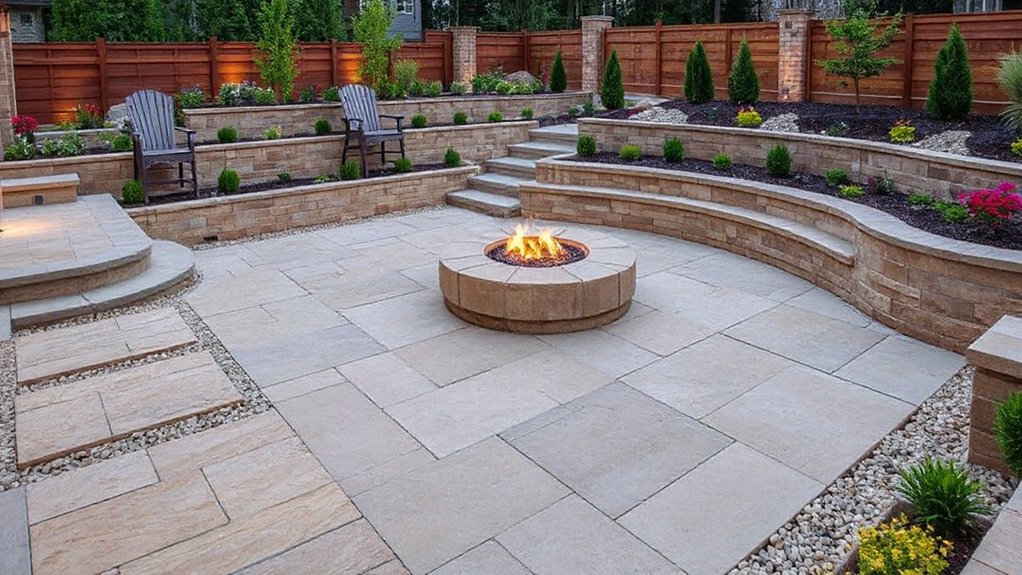
Tiered Retaining Walls
While a single retaining wall can slow runoff, tiered retaining walls control erosion more effectively by breaking a steep slope into several shorter, stable sections. You’ll reduce soil pressure on each wall, which helps prevent bulging and cracking over time, and you’ll gain level planting pockets that hold mulch and groundcover in place.
Plan each tier with a consistent setback so the upper walls don’t overload the lower ones, and match wall height to your block or stone system’s rated limits.
Use Tiered retaining to create usable terraces for paths, seating, or raised beds, turning a problem slope into structural landscaping that adds measurable curb appeal.
Finish with durable capstones and clean edges so mowing and trimming stay easy and your investment looks intentional year after year.
Drainage-First Wall Design
Even the strongest retaining wall fails fast when water builds up behind it, so you’ll get better erosion control by designing drainage first, not as an afterthought. Start with a free-draining gravel backfill and wrap it in filter fabric to keep fines from clogging voids.
Add a perforated drain pipe at the base, slope it to daylight, and include cleanouts so you can flush it later. Use properly spaced weep holes when pipe outlets aren’t possible.
Cap the wall with a drip edge and grade the soil to shed surface runoff away from the face.
For soil stabilization, compact in lifts and consider geogrid on taller walls. Route overflow to swales or cisterns for rainwater harvesting instead of undermining the base.
Steps and Landings for Safe Slopes
Because a sloped yard can turn slick and unstable fast, you’ll get the best results by breaking the grade into a series of steps with flat landings that control footing and manage runoff.
Size treads 11–14 inches deep and keep risers consistent (6–7 inches) so you don’t trip. Set landings every 6–8 feet of rise, or wherever you’ll turn, stop, or pass with a wheelbarrow.
Use textured stone or broom-finished concrete for grip, and pitch each landing slightly to a drain swale or gravel trench.
Add Garden lighting on step edges or low posts to prevent missed footing.
Finish with Plant integration: tough groundcovers at edges and deep-rooted shrubs to stabilize soil and soften hard lines.
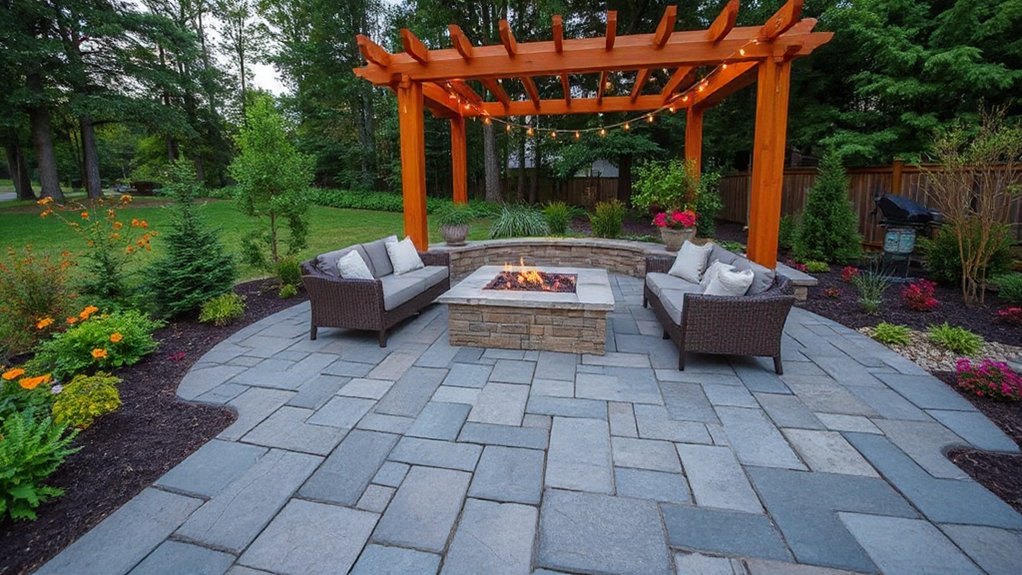
Fire Pit and Built-In Seating Ideas
Place your fire pit where smoke won’t blow into doors or seating, and keep it on a level, noncombustible pad with proper clearance from structures, trees, and fences.
Build in seating at a comfortable height and distance from the heat, and plan access paths so people can circulate safely.
Choose durable, low-maintenance materials—like concrete block with stone veneer, poured concrete, or natural stone—and use weather-resistant caps and mortar so the seat stays solid through freeze-thaw cycles.
Fire Pit Placement Tips
While a fire pit can anchor your whole patio, its placement determines how safe, comfortable, and usable the space feels. Set it on a level, noncombustible base and keep clearances from siding, fences, and overhanging branches to support Fire pit safety.
Position it where smoke won’t blow into doors, windows, or neighbor seating, and check typical wind direction before you commit.
Leave a continuous walking path around the pit so guests don’t cut through the “spark zone.” Place it within easy reach of a water source or extinguisher, but away from play areas and high-traffic steps.
Match the location to your fire pit materials: heavier masonry pits need stable sub-base support, while portable metal units still require heat protection below.
Finally, align it with sightlines so it feels intentional, not stuck in a corner.
Built-In Seating Materials
Where should you start when choosing built-in seating materials around a fire pit? Match the seat’s surface to heat, weather, and how you’ll maintain it.
Concrete caps and masonry block deliver strong material durability, resist sparks, and stay stable through freeze-thaw cycles when you use proper footings.
Natural stone looks premium and boosts resale, but you’ll want consistent thickness and a sealed top to limit staining.
Metal frames work for modern designs; choose powder-coated steel and add noncombustible panels near the fire.
Wood brings warmth, yet you should keep it farther from flames and select dense, rot-resistant species or composite.
For comfort, plan for backrests, 18-inch seat height, and removable cushions you can store dry.
Hardscaping Upgrades Buyers Notice Most
Because buyers judge a home before they ever step inside, the hardscaping you choose can quietly raise perceived value and reduce “work needed” objections. Focus on upgrades that look intentional and low-maintenance, aligned with current Landscaping trends, and specify Eco friendly materials where you can.
Start with a clean, wide paver walkway with tight joints and a soldier-course border; it reads “quality” fast. Add a defined patio zone with proper base prep, edge restraint, and subtle lighting on steps and corners for safety.
Replace crumbling timbers with a capped, segmental retaining wall that manages grade and drains correctly. Install a simple fire feature or built-in grill pad only if you’ve got space and clearance.
Finish with crisp metal edging and concealed drainage grates to keep water off the slab.
Frequently Asked Questions
Do I Need a Permit for a Patio, Retaining Wall, or Fire Pit?
You might need a permit for a patio, retaining wall, or fire pit—it depends on your local code, size, height, and setbacks. Call your building department before you pour concrete or stack blocks.
Retaining walls over certain heights often require engineering and drainage plans.
Fire pits may trigger fire-code clearances.
Permits can also affect Design trends and Material selection, so you don’t waste money redoing work later.
Check HOA rules too.
How Do I Prevent Weeds From Growing Between Pavers and Stones?
Prevent weeds between pavers and stones by tightening joints and denying seeds light. Sweep polymeric sand into joints, compact, then mist it to lock in place for long-term weed prevention.
Add a stable base and edging so gaps don’t reopen.
For joint sealing, apply a breathable paver sealer after the sand cures, and re-seal as directed.
Spot-treat sprouts early, and keep debris off joints to deter germination.
What’s the Best Way to Remove Stains From Concrete or Paver Surfaces?
Like Hercules tackling stubborn tasks, you’ll get the best results by matching the cleaner to the stain.
Start with Stain removal: sweep, pre-wet, then apply a degreaser for oil, an oxygen bleach for organics, or a mild acid for rust/efflorescence—test first.
Scrub with a stiff nylon brush, dwell 5–10 minutes, rinse thoroughly, and repeat if needed.
Seal afterward to block future stains and simplify Cleaning techniques.
How Long Do Common Hardscape Materials Typically Last Before Replacement?
You can expect typical lifespans like: poured concrete 25–50 years, pavers 30–50+ years, natural stone 50–100+ years, brick 40–100 years, asphalt 15–25 years, and timber edging 10–20 years.
Material durability depends on base prep, drainage, climate, and load.
For Maintenance tips, you’ll extend life by sealing, re-sanding joints, fixing settling early, keeping water off, and de-icing responsibly.
Will Hardscaping Increase Property Taxes or Require Updated Homeowners Insurance?
Hardscaping can increase your property taxes and may require a homeowners insurance update, but it depends on scope and local rules.
If your project boosts appraised value, your property tax assessment may rise after permits, sales comps, or reassessment cycles.
Call your insurer to review insurance coverage considerations, especially for pools, retaining walls, outdoor kitchens, and liability risks.
You’ll often need higher dwelling limits, added endorsements, or separate structures coverage.
Conclusion
When you plan your hardscape with a clear budget, smart drainage, and a layout that fits how you live, you’re not just decorating—you’re building a backbone for your yard. Patios, paths, steps, and retaining walls add safer footing, cleaner routes, and erosion control that lasts. Add a fire pit or built-in seating to extend the season. Choose durable materials and tight edges now, and you’ll avoid costly fixes later while boosting resale appeal.