Table of Contents
Key Takeaways
- Building a reclaimed wood coffee table is one of the most rewarding DIY furniture projects you can take on — the material does most of the aesthetic heavy lifting for you.
- Timber selection is the most important decision you will make; the character of the finished piece lives entirely in the wood you choose.
- Proper preparation — removing fixings, cleaning, drying, and checking moisture content — is not optional if you want a piece that lasts.
- A simple steel or iron base is the most popular pairing for a reclaimed top, and for good reason: it is strong, clean, and lets the wood take centre stage.
- The finish you choose will define how the table lives in your home — oil and wax preserve the natural character far better than lacquer or polyurethane.
- With basic tools and a clear plan, this is a project well within reach of a confident DIYer — and the result will be a piece you will never find in a shop.
Why We Decided to Make Our Own Reclaimed Wood Coffee Table
We had been looking for a coffee table for months. Not browsing in a vague, no-real-urgency way — genuinely looking, measuring, comparing, and coming up empty. Everything in the right size was either too new-looking, too fragile, or simply the same table we had seen in four other shops under four different names. When we found ourselves standing in front of a piece of chipboard with a printed wood-grain wrap, described in the product listing as having “rustic charm,” we decided enough was enough.
The answer turned out to be simpler than we had expected. A reclaimed wood coffee table — made ourselves, from timber we had chosen, to dimensions that actually suited our room. It took a weekend of proper work and a few evenings of planning and finishing. The result is the piece in our living room that every visitor asks about first.
This is how we did it.
Finding the Right Reclaimed Wood
The timber is everything. Get this decision right and the rest of the project flows naturally. Rush it or settle for the wrong piece and no amount of clever construction or finishing will rescue the result.
We visited our local reclamation yard with a measuring tape, a moisture meter borrowed from a friend, and no fixed idea of what we were looking for beyond the dimensions we needed. The top of our coffee table needed to be roughly 120cm by 60cm — large enough to be useful in our sitting room without overwhelming the space.
What We Were Looking For
We wanted a solid top rather than boards jointed together, which narrowed the field considerably. Single-slab reclaimed timber in that width is not always available, but reclamation yards that deal in old joinery and barn timber often carry wide planks of oak, elm, or pine that will do the job. We eventually found two lengths of old pitch pine flooring from a demolished Victorian mill — each plank around 200mm wide, 50mm thick, and beautifully marked with the grain pattern and surface character that only properly aged timber has.
The moisture content read at around 14%, which was higher than ideal for indoor use. We bought the timber and stored it in the room where the table would live for three weeks before doing anything else.
Timber Species Worth Considering
Pitch Pine
Our choice, and one we would recommend without hesitation for a coffee table top. Pitch pine is dense, hard, and resinous — it has a natural resistance to wear that makes it ideal for a surface that will take daily use. The grain is tight and the colour deepens beautifully with oil. Victorian mill floors were almost universally laid in pitch pine, which means it is one of the more commonly available species at UK reclamation yards.
Oak
Old oak is perhaps the most prized reclaimed timber species. It is heavy, extremely hard, and develops a patina over time that becomes more attractive with every passing year. Wide sections of reclaimed oak are not cheap, but for a coffee table — where the quantity of timber required is relatively modest — the cost is usually manageable. The grain character of old-growth oak, particularly if the timber was quarter-sawn, is difficult to match in any new product.
Elm
Elm has not been commercially available as new timber in the UK for decades, thanks to Dutch elm disease. Reclaimed elm, however, turns up in reclamation yards with some regularity — it was widely used for floorboards, workbenches, and agricultural purposes. The grain is wild and interlocking, the colour warm and varied, and a well-finished section of old elm is genuinely beautiful. It can be harder to work than oak or pine due to the grain pattern, but for a relatively simple coffee table top the challenges are manageable.
Scaffold Board Pine
For a more industrial look and a lower budget, old scaffold boards are worth considering. They are not always genuinely reclaimed in the architectural sense, but boards that have seen real site use carry nail holes, paint marks, and weathering that give them real character. At this thickness — typically 38mm — they are more than adequate for a coffee table top.
Planning the Build
Dimensions
Our finished table is 120cm long, 58cm wide, and 42cm tall — a comfortable height for use with a standard sofa. Coffee table height is worth thinking about carefully before you commit to a base design. Too low and it becomes awkward to reach; too high and it loses the relaxed, casual quality that a good coffee table should have. We measured the height of our sofa seat and worked back from there.
The Top
We jointed our two planks of pitch pine together along their long edges using a biscuit joiner and exterior-grade PVA glue. The joint was left clamped overnight before any further work. Once dry, we ran the top through a thicknesser to bring both boards to a consistent 40mm, then finished the surface by hand with a belt sander followed by orbital sanding through 80, 120, and 180 grit.
The ends were cut square with a circular saw guided by a straightedge, and the edges were softened with a hand plane and a light pass with 180-grit paper. We did not round the edges aggressively — a slight softening is enough to prevent the sharp-edge feeling of freshly cut timber without losing the honest, rectilinear quality of the piece.
The Base
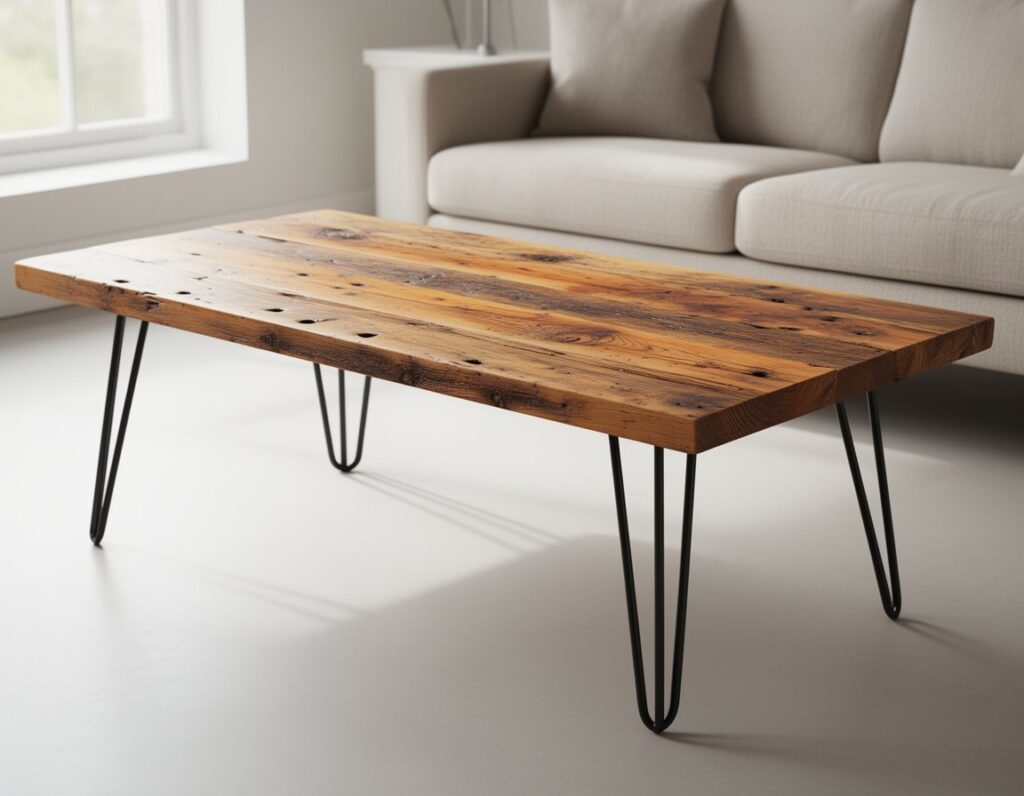
We opted for a simple steel hairpin leg configuration — four legs, 40cm tall, 12mm diameter steel, in a matte black powder-coated finish. Hairpin legs are not the only option, but they are a good one: they are clean, strong, widely available, and they do absolutely nothing to compete with the timber. The visual weight of the piece sits entirely in the top, which is exactly where you want it.
Alternative base options worth considering include:
Welded Steel Frame
A rectangular steel frame — either flat bar or box section — welded to form a low plinth or a simple four-legged structure gives a more considered, furniture-maker look than hairpin legs. If you have access to welding equipment or know someone who does, a bespoke steel base can be made to the exact dimensions of your top for a very clean result.
Reclaimed Timber Trestle
Using reclaimed timber for the base as well as the top creates a more unified, rustic look. A simple trestle construction — two A-shaped end frames connected by a central stretcher — is structurally sound and not beyond the capability of a confident DIYer with basic joinery tools. Oak or pine would be the natural choice to complement our pitch pine top.
Pipe and Fitting
Black iron pipe fittings have become a popular choice for industrial-aesthetic furniture. Flanges, pipes, and fittings from a plumbing supplier can be assembled without welding into a sturdy base that suits the raw, worked quality of reclaimed timber particularly well.
The Build Process
Step One: Final Timber Preparation
Before assembly, we went over the timber once more with a strong magnet to check for any remaining hidden fixings. We found two — a nail so deeply countersunk it had been invisible at the yard, and a fragment of screw thread that had snapped off flush with the surface at some point in the previous century. Both came out cleanly with a nail punch and a pair of pliers.
Step Two: Jointing and Gluing the Top
The two planks were laid face-down on a flat workbench, biscuit slots cut at regular intervals along the joining edges, and the joint assembled dry first to check the fit. Satisfied that the boards pulled together without gaps, we applied glue, inserted the biscuits, clamped the joint with sash clamps, and left it for twenty-four hours.
Step Three: Surfacing
Once the glue had fully cured, the top went through the thicknesser in light passes — no more than 1mm per pass — until both boards were at a consistent thickness and the surface was clean. This is the stage where the true character of the timber reveals itself. The machine removes the grey, weathered surface layer and exposes the warm, rich colour underneath. It is genuinely one of the most satisfying moments in any reclaimed wood project.
Step Four: Sanding
We worked through grits progressively — 80 to remove the machine marks, 120 to refine the surface, 180 for the final pass before finishing. Between each grit, we vacuumed the surface thoroughly and wiped it down with a tack cloth. Sanding with the grain throughout is important with old timber; cross-grain scratches from coarser grits show up very clearly under an oil finish.
Step Five: Fitting the Legs
Hairpin legs come with pre-drilled mounting holes. We marked their positions on the underside of the top — 80mm in from each corner — drilled pilot holes to prevent splitting, and fixed the legs with M6 machine screws and penny washers. The result is a sturdy, wobble-free base that took about twenty minutes to fit.
Step Six: Finishing
We finished the top with two coats of Rubio Monocoat, a single-coat hardwax oil that bonds with the timber rather than sitting on the surface. It is not the cheapest finishing product on the market, but the result is excellent — the timber looks fed and protected without looking coated. The grain and surface marks of the pitch pine are completely visible, and the colour has deepened to a warm, honeyed amber that improves every time we look at it.
The first coat went on with a cloth, worked into the grain in circular motions and then wiped back along the grain to remove excess. We left it for twenty-four hours, then applied a second coat using the same method. A light buff with a clean cloth after the second coat cured gave the surface a gentle sheen without any artificial gloss.
The Finished Result
The table has been in our living room for over a year now. It has had red wine on it, coffee rings, the sharp corners of hardback books, and the feet of visiting children. It looks better for all of it. The marks have joined the ones the timber came with, and the surface continues to develop in the way that only genuinely old, genuinely used wood does.
It cost us considerably less than a comparable piece from a furniture maker would have done — though not nothing, once you factor in the timber, the legs, the finishing product, and a few consumables. More importantly, it is exactly the right size, exactly the right character, and exactly what our room needed. No version of it exists anywhere else.
That is what a reclaimed wood coffee table, properly made, delivers. Not just a table — a piece that belongs.
Frequently Asked Questions
How much does it cost to make a reclaimed wood coffee table?
Costs vary considerably depending on the timber species, the base you choose, and how much preparation the wood requires. As a rough guide, expect to spend between £80 and £200 on reclaimed timber for a coffee table top of average size, depending on species and source. Hairpin legs typically cost £30–£60 for a set of four in good quality steel. Finishing products, consumables, and any additional fixings will add another £20–£40. A total material cost of £150–£300 is a reasonable expectation for a solid, well-finished coffee table — considerably less than a comparable handmade piece would cost to commission.
Do I need specialist tools to build a reclaimed wood coffee table?
The core toolkit is more accessible than many people assume. For a joined top, you will need a biscuit joiner (or a router with a straight bit), sash clamps, a thicknesser or belt sander for surfacing, a circular saw or jigsaw for cutting to length, and an orbital sander for finishing. A moisture meter is strongly recommended before working with any reclaimed timber. If you do not own these tools, most can be hired from local tool hire companies for a weekend at modest cost, or borrowed from a community workshop or makerspace.
How do I stop a reclaimed wood coffee table from warping?
Warping in a jointed timber top is almost always the result of one of two things: insufficient drying before construction, or unfinished undersides. Always check moisture content before building — aim for 8–12% for indoor furniture. Finish both the top and the underside of the table with your chosen oil or wax; leaving the underside unfinished allows moisture to enter and leave unevenly, which causes the top to cup. Using biscuits or a splined joint when joining boards helps resist cupping across the width.
What is the best finish for a reclaimed wood coffee table?
For most applications, a penetrating hardwax oil — products such as Rubio Monocoat, Osmo Polyx, or Treatex — gives the best combination of protection and natural appearance. These products bond with the timber fibres rather than forming a surface film, which means they do not peel, crack, or cloud over time, and they can be refreshed with a maintenance coat without any stripping or sanding back. Avoid water-based polyurethane on reclaimed timber — it tends to sit on the surface of porous or weathered wood and peel away over time. For a more rustic look with less surface protection, a simple wax applied over a Danish oil base works well and is very easy to apply and maintain.
Can I use reclaimed wood from a DIY source rather than a reclamation yard?
Absolutely — and this is often where the most interesting timber comes from. Old floorboards from a house renovation, timber from a demolished garden structure, or beams recovered from a building project are all potential candidates. The key is to apply the same due diligence you would with yard-sourced timber: check for hidden fixings with a magnet, assess the condition for rot or pest damage, check moisture content, and find out as much as you can about what the timber has been treated with. Timber from an old garage or outbuilding that was used to store chemicals or treated with a painted-on preservative needs careful assessment before you bring it into a living space.
Conclusion
Making a reclaimed wood coffee table is one of those projects that delivers on every front. It is satisfying to build, genuinely useful when finished, and produces a result that mass production simply cannot match. The combination of old timber — with all the character and history that brings — and a considered, simple design creates a piece of furniture that improves with age rather than deteriorating.
If you are new to working with reclaimed timber, a coffee table is an excellent starting project. The quantity of material is manageable, the construction can be as simple or as ambitious as your skills allow, and the investment — in both money and time — is reasonable relative to the result.
For everything you need to know about sourcing, preparing, and working with the material itself, our full guide to reclaimed wood covers the process from salvage yard to finished surface in detail.