You’ll transform your garden faster when you start with clear goals, a realistic budget (add a 10% cushion), and a quick site check of sun, soil, and drainage. Sketch a scaled layout, place fixed items first, then divide the yard into zones for dining, play, storage, and planting. Add 36–48 inch paths along natural walk routes using gravel or stepping stones. Build privacy with layered shrubs, and save money by repeating a few tough plants for year-round structure. Keep going to see simple upgrades that make the plan click.
Key Takeaways
- Set clear goals, a realistic budget with a 10% buffer, and must-have features before choosing materials or plants.
- Assess sun, soil pH, and drainage conditions to prevent plant failures and guide amendments for long-term success.
- Design functional zones and connect them with 36–48 inch paths that follow natural “desire lines” for easy movement.
- Build privacy and curb appeal with layered plantings, focused entryway details, and lighting that improves safety without clutter.
- Choose low-maintenance, cost-effective plant drifts with evergreens and multi-season interest, supported by mulch and efficient first-year watering.
Set Goals for Your Landscaping Design
Before you buy plants or hire help, set clear goals for your landscaping design so every dollar and hour goes where it matters. Decide how you’ll use the space: dining, play, privacy, or low-maintenance curb appeal. Rank needs, then assign a realistic budget range and timeline, including a 10% cushion for surprises.
Define your must-haves (patio, path, shade tree) and your nice-to-haves (water feature, accent lighting). Sketch simple zones and traffic routes so you don’t waste money on rework.
Choose a target look by naming your garden aesthetics—formal, cottage, modern, or native—and stick to core design principles like balance, repetition, and scale.
Measure key areas now; you’ll price materials accurately and avoid overbuying.
Check Sun, Soil, and Drainage First
Even if you’ve nailed your layout and wish list, you’ll waste money if you ignore the site conditions that actually control what grows and where water goes. Start with a Sun assessment: track morning, midday, and late-day light for a week, noting summer-hot spots and winter shade from buildings or trees. Use that record to avoid buying sun lovers for dim beds.
Next, do soil testing before you amend anything. A low-cost lab kit tells you pH, nutrients, and organic matter so you can target compost, lime, or sulfur instead of guessing.
Finally, check drainage after a hard rain: puddles lasting over 24 hours signal compaction or a low area. Dig a 12-inch hole, fill it, and time the drain rate.
Sketch a Simple Landscaping Design Layout
Once you’ve mapped sun, soil, and drainage, grab graph paper (or a free app) and sketch a rough plan to scale so you don’t overbuy plants or hardscape. Measure your lot lines, house footprint, doors, windows, and existing trees, then convert feet to squares (1 square = 1 foot works well). Mark utilities, hose bibs, and slopes, because they affect digging and irrigation costs.
Next, place fixed items first: sheds, bins, and patio edges. Sketch where garden furniture must fit, including clearance for chairs to slide back. Then outline planting beds with smooth curves or straight runs that match your edging budget. Leave realistic turf areas you can actually mow; your layout should support efficient lawn maintenance with fewer tight corners.
Finally, note plant counts and material quantities right on the drawing.
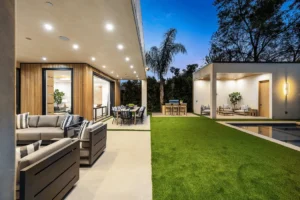
Create Zones and Paths That Flow
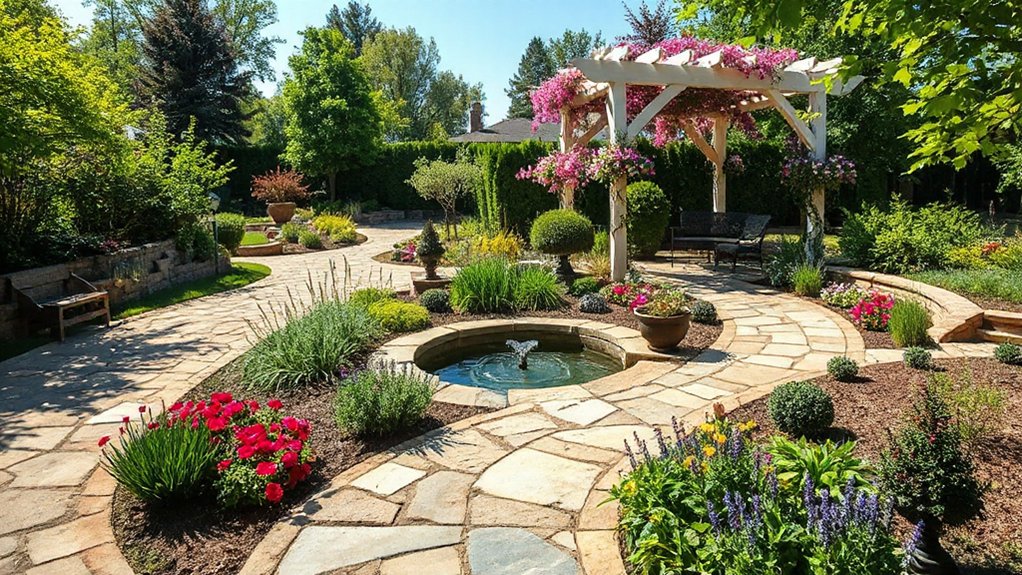
With your scaled sketch in hand, start grouping the yard into clear zones—entry, dining/patio, play or lawn, storage/utility, and planting beds—so every square foot has a job. Place high-use zones closest to the house to cut travel time and save on materials.
Next, connect zones with paths that follow how you already walk. Keep main routes 36–48 inches wide for two people; secondary paths can be 24–30 inches. Use budget-friendly gravel or mulch over landscape fabric, and edge with pavers or metal to stop spread.
Aim for gentle curves with clear sightlines to avoid wasted space. Leave a turning pad where you’ll move garden furniture, and add a small node for a bench. If you want water features, tuck them near seating and a power source for easy upkeep.
Balance Plants and Hardscape for Function
You’ll get a more usable garden when you balance greenery with hardscape like patios, edging, and retaining walls, so plants don’t spill into walking and seating areas.
Lay out pathways and planting zones first, then match plant sizes and materials to the space to reduce trimming and repairs.
Use a simple sketch and measure twice so you buy only what you need and avoid costly rework.
Harmonize Greenery And Structures
Even if you love a lush, plant-filled yard, your garden works better when greenery and hardscape share the job. Aim for garden harmony by pairing planting beds with durable, low-maintenance surfaces that handle wear, drainage, and seating.
For structure integration, repeat materials you already have—matching stone to your porch steps or using salvaged brick for edging—to keep costs down and the look consistent. Use shrubs to soften retaining walls, and train climbers on trellises to add shade without building new features.
Keep plant choices proportional: tall screens behind, mid-height fillers in front, and groundcovers to reduce mulch needs. Leave airflow around fences and walls to prevent rot and disease, and plan watering access.
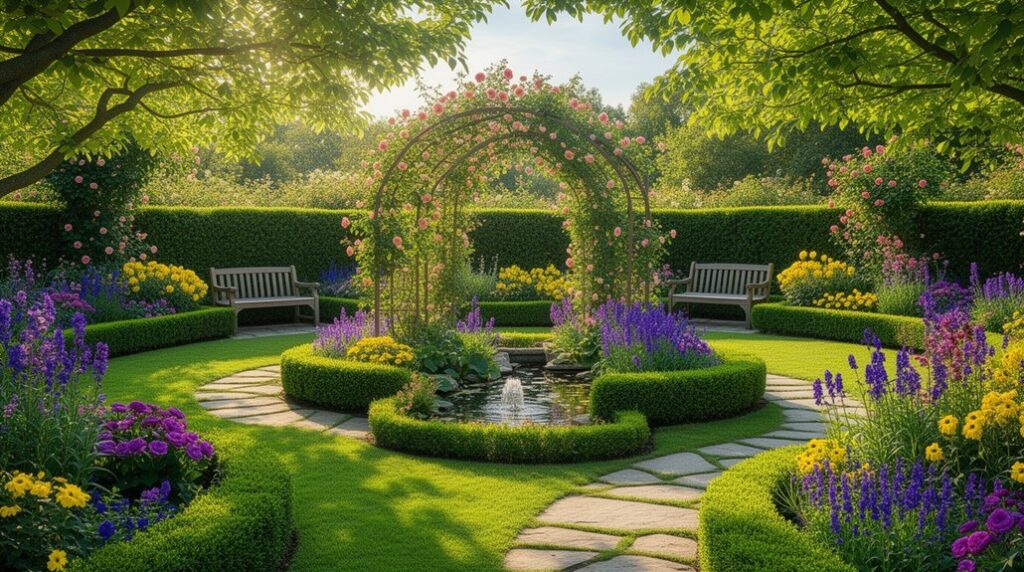
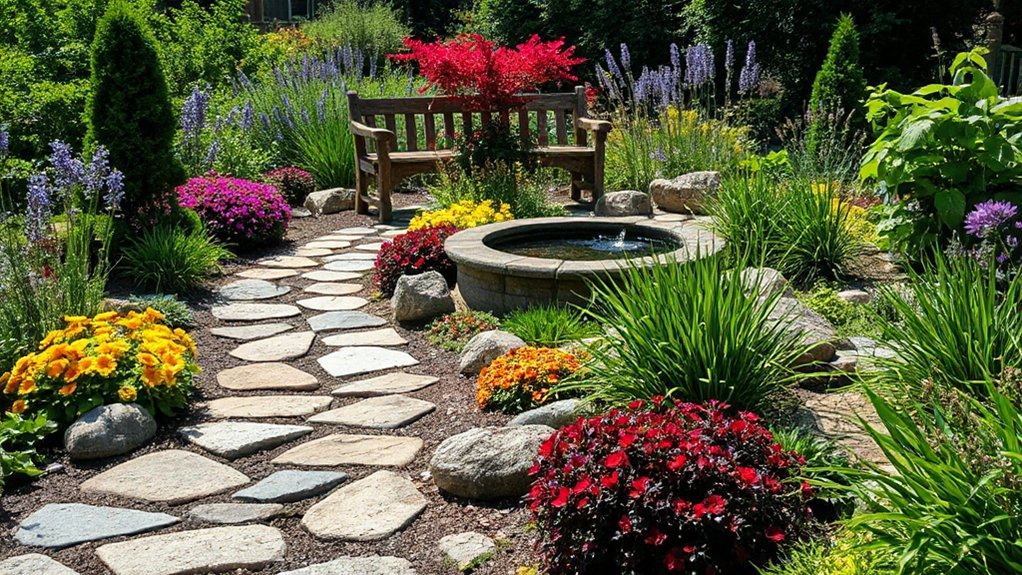
Plan Pathways And Planting Zones
Once you’ve balanced greenery with structures, map how you’ll actually move through the yard and where plants can thrive without getting trampled. Sketch desire lines from gates to doors, sheds, and seating, then convert them into 3–4 foot paths. Use affordable gravel, mulch, or stepping stones for low-cost circulation, and edge them to keep material out of beds.
Zone planting by sun and moisture: put tough groundcovers along path edges, and reserve deeper beds for shrubs and perennials. Leave maintenance lanes so you can weed and prune without compacting soil.
Anchor intersections with Garden art for wayfinding, and place Water features where you’ll see them from key paths. Keep curves gentle to reduce waste and simplify cuts.
Add Privacy and Curb Appeal With Landscaping Design
You can boost privacy and curb appeal without overspending by placing screening plantings where sightlines matter most, like along patios, windows, and busy streets.
Build layered borders with low shrubs in front and taller hedges behind to create a clean, year-round green wall that’s easier to maintain.
Then anchor the look with a simple entryway focal point—two matching containers, a small ornamental tree, or a defined path—so your front door feels intentional and welcoming.
Strategic Screening Plantings
While a fence can block a view, strategic screening plantings add privacy with a softer look and better curb appeal for the same footprint. Start by mapping sightlines from windows, patios, and the street, then place plants only where you need coverage.
Choose evergreens for year-round privacy screens, or mix in deciduous options where winter openness is fine and cheaper. For fast results on a budget, use clumping bamboo in containers, tall ornamental grasses, or narrow arborvitae, spaced to match mature width so you don’t pay twice to fix crowding.
If you need noise barriers, prioritize dense foliage and staggered placement near the sound source. Improve success with drip irrigation, mulch, and a simple annual prune schedule.
Layered Borders And Hedges
How do you get more privacy and polish without building a taller fence? Use layered borders and hedges to soften hard lines while blocking views at multiple heights.
Start by widening a garden bed to at least 4–6 feet so plants don’t crowd. Place the tallest hedge shrubs at the back, medium shrubs in the middle, and low mounding plants or grasses up front; this shrub layering looks intentional and fills gaps year-round.
Pick two or three hardy, drought-tolerant varieties and repeat them for a clean, budget-friendly design. Space plants for their mature width to avoid constant pruning.
Add mulch and a simple drip line to cut watering costs and keep weeds down. Choose evergreens for winter privacy, then mix in deciduous color sparingly.
Entryway Focal Point Design
Even if the rest of the yard feels unfinished, a well-designed entryway focal point makes the whole property look more polished and gives you a bit more privacy right where it matters.
Start by defining the path: widen it to 36 inches, edge it with brick or steel, and keep it level for safety.
Add a narrow screen near the door—tall planters, a lattice panel, or a pair of columnar shrubs—to block direct sightlines without crowding the walk.
Use entryway lighting to guide guests and deter tripping; solar path lights plus one hardwired sconce often fits a tight budget.
Finish with decorative accents like a simple address plaque, a matching doormat, and one seasonal pot you can swap out quickly.
Choose Plants for Year-Round Structure and Color
If you want your garden to look intentional in every season, choose plants that keep their shape and add color beyond peak bloom. Start with evergreen structure: boxwood, dwarf conifers, or inkberry for reliable massing and winter presence.
Then layer in shrubs with multi-season interest—hydrangea for dried heads, ninebark for foliage, and viburnum for berries.
For seasonal flowering, pick perennials that stagger bloom times: hellebores, allium, coneflower, and asters.
Add grasses like switchgrass for movement and tan seed heads through snow.
Repeat 2–3 plant types in drifts to cut costs and simplify maintenance.
Favor smaller container sizes, then mulch and water well the first year so they fill in fast.
Frequently Asked Questions
What Permits or HOA Approvals Are Needed Before Starting Landscaping Work?
You’ll usually need to check Permit requirements and HOA approvals before you break ground.
Start by calling your city/county planning office about grading, retaining walls, drainage changes, irrigation lines, tree removal, fences, decks, patios, or electrical/lighting—permits vary by scope and cost.
Then review your HOA rules for plant lists, hardscape materials, heights, colors, and contractor hours, and submit plans early to avoid rework, fines.
How Much Should I Budget for a Full Garden Landscaping Redesign?
You should budget $5,000–$30,000+ for a full garden landscaping redesign, depending on size, materials, and complexity.
For Budget considerations, separate costs into design fees (5–15%), hardscape (patios, walls), plants/soil, irrigation, lighting, and labor.
For accurate Cost estimation, get 3 itemized bids and price key materials yourself.
Add a 10–20% contingency for surprises like drainage fixes or grading.
When Is the Best Season to Begin a Major Landscaping Project?
Start in early fall or early spring—you’ll get mild temperatures, steadier rain, and easier scheduling. Crisp mornings, damp earth, and quiet afternoons help crews work fast and plants settle in.
Plan around seasonal planting: fall favors trees and shrubs, spring suits perennials and turf.
Prioritize soil preparation first (grading, drainage, compost), then hardscape, then planting.
You’ll avoid heat stress, reduce watering costs, and prevent costly rework later.
Should I Hire a Landscape Designer or Can I Plan It Myself?
You can plan it yourself if you’ve got time, basic design sense, and you’re doing straightforward DIY landscaping.
Hire a landscape designer when grading, drainage, permits, retaining walls, or major planting plans could get expensive to redo.
To stay budget-conscious, start with a scaled sketch, photos, and a clear wishlist, then pay for a one-time professional consultation to review layout, materials, and costs before you build.
How Do I Maintain the New Landscaping Design to Keep It Looking Great?
You keep it looking great by watering smart, mulching right, and pruning on schedule. Set a simple routine for garden watering: deep soak early mornings, adjust for rain, and group plants by needs to save water.
Do weekly walk-throughs to pull weeds, spot pests, and edge beds.
For mulch maintenance, top up thin spots, keep mulch off stems, and refresh yearly.
Clean hardscapes, sharpen tools, track tasks.
Conclusion
When you wrap up your landscaping design, you won’t just “improve” your yard—you’ll turn it into the kind of outdoor space that makes neighbors slow down and stare. Stick to your goals, read the sun and soil like a map, and keep paths and zones simple so you’re not wasting money fixing mistakes later. Balance plants with hardscape, add privacy where it counts, and choose four-season staples so your garden never looks empty.