Trendy Reclaimed Wood Cocktail Table
Table of Contents
Key Takeaways
- A reclaimed wood cocktail table sits at the intersection of furniture and statement piece — taller than a standard coffee table, it commands attention in a way that few other living room pieces do.
- The height distinction matters: a cocktail table typically sits at 60–75cm, making it better suited to bar stools, entertaining spaces, and open-plan layouts than a conventional low coffee table.
- Timber selection is everything — at this height and scale, the face of the timber is seen clearly and up close, so grain, patina, and surface character all need to be right.
- The base design carries more visual weight on a cocktail table than on a low piece — the proportions between top and base need careful thought.
- Finishing must account for the reality of the piece’s use: drinks will be placed on it, glasses will be set down, and the surface needs to handle that without demanding constant maintenance.
- This is a genuinely achievable DIY project that produces a result with real presence — the kind of piece that defines a room rather than simply furnishing it.
The Gap in the Room We Had Not Known Was There
It started with the layout. We had reconfigured our open-plan living and dining area to create a more defined entertaining space near the kitchen end — a spot where people could gather with a drink before sitting down to eat, without the slightly awkward formality of standing around with nowhere to set anything down.
What the space needed was a high table. Not a dining table — the dining table was already there. Not a coffee table — too low for standing. What it needed was a reclaimed wood cocktail table: something at bar height, solid enough to lean against, with a surface large enough to be genuinely useful and a presence substantial enough to anchor the space.
We could not find what we were looking for off the shelf — at least not in reclaimed timber and not at a price that made sense. So we built it. Here is how.
What Is a Cocktail Table and How Does It Differ From a Coffee Table?
The terminology can cause confusion, and it is worth being clear before the planning stage. A cocktail table and a coffee table are not the same thing, even though the terms are sometimes used interchangeably in furniture retail.
A traditional coffee table sits low — typically 40–50cm — and is designed for use from a seated position on a sofa or armchair. A cocktail table sits higher — generally 60–75cm — and is designed for standing use or use from a bar stool. In the context of home entertaining, cocktail tables occupy a specific and useful niche: they work in open-plan spaces as a casual gathering point, in home bars and garden rooms, in kitchens where people congregate while food is being prepared, and in any space where a surface at comfortable standing height is more useful than a low occasional table.
The design implications of this height difference are significant. At 65–75cm, the top of a cocktail table is at approximately the same height as a kitchen worktop or a lower bar surface. The proportions of the piece change — a taller base needs more visual interest or structural ingenuity to avoid looking spindly, and the top can often be slightly smaller in plan than a coffee table because it is serving a different social function.
Finding the Timber
We knew from previous projects that the sourcing stage is not the place to rush, and for a piece that would sit at standing eye level in a regularly used entertaining space, the standard we set for the timber was high.
What We Were Looking For
Our cocktail table needed a top of around 80cm by 55cm — generous enough to hold drinks and small plates for a group of four or five people gathered around it, compact enough not to dominate the space. We wanted a solid single-board top if possible, or two boards jointed together if a single piece of that width was not available.
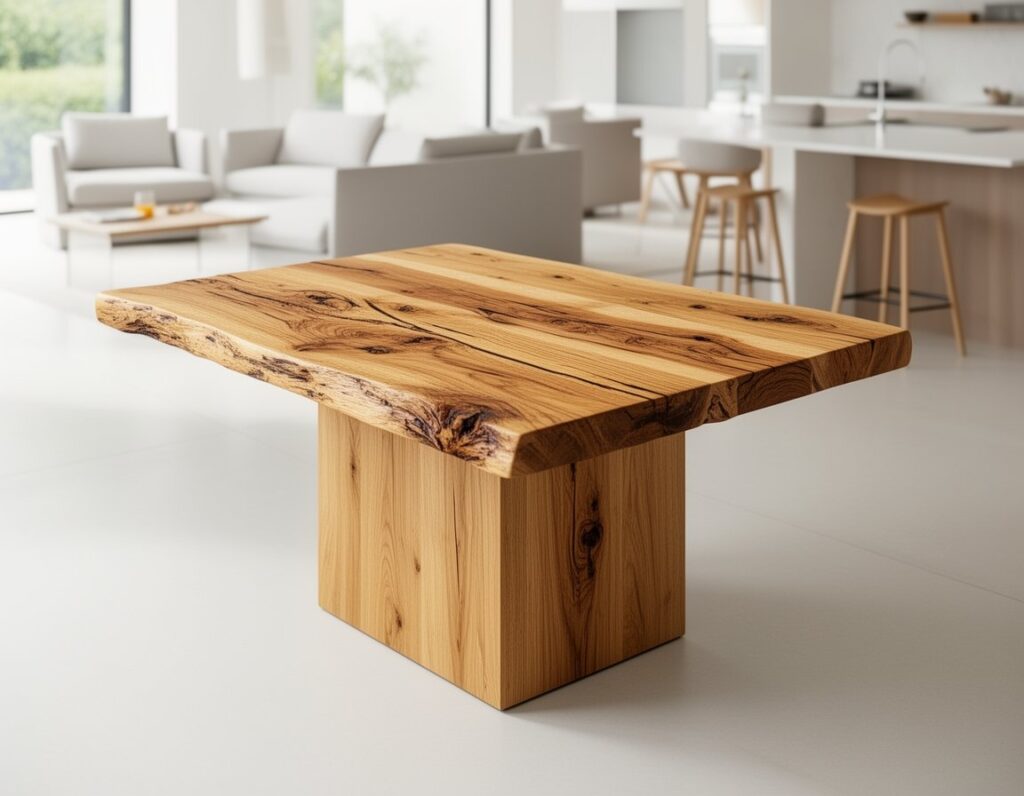
After visiting two yards and spending a patient hour working through stacked timber at the second, we found it: a single plank of English elm, 85cm wide, 38mm thick, and just over a metre long. The grain was wild and interlocking — characteristic of elm — and the surface showed the kind of complex, layered weathering that only genuinely old timber develops. It was not cheap, and it was not in perfect condition, but it was the right piece.
Species Options for a Cocktail Table
Elm
Our choice, and particularly well suited to a piece that will be seen and touched at close range. The grain of old elm is unlike any other British hardwood — it swirls and interlocks in patterns that seem almost deliberate, and the colour ranges from warm honey through to deep brown with occasional green and grey tones. At a surface that people will stand at and lean against, that visual interest is a genuine asset.
Oak
The reliable choice. Reclaimed oak in a piece this size is available in most well-stocked reclamation yards, and its combination of hardness, grain character, and warm colour makes it an excellent cocktail table material. Wide single-board oak in good condition is harder to find than jointed boards, but for a piece of this plan size it is a realistic target.
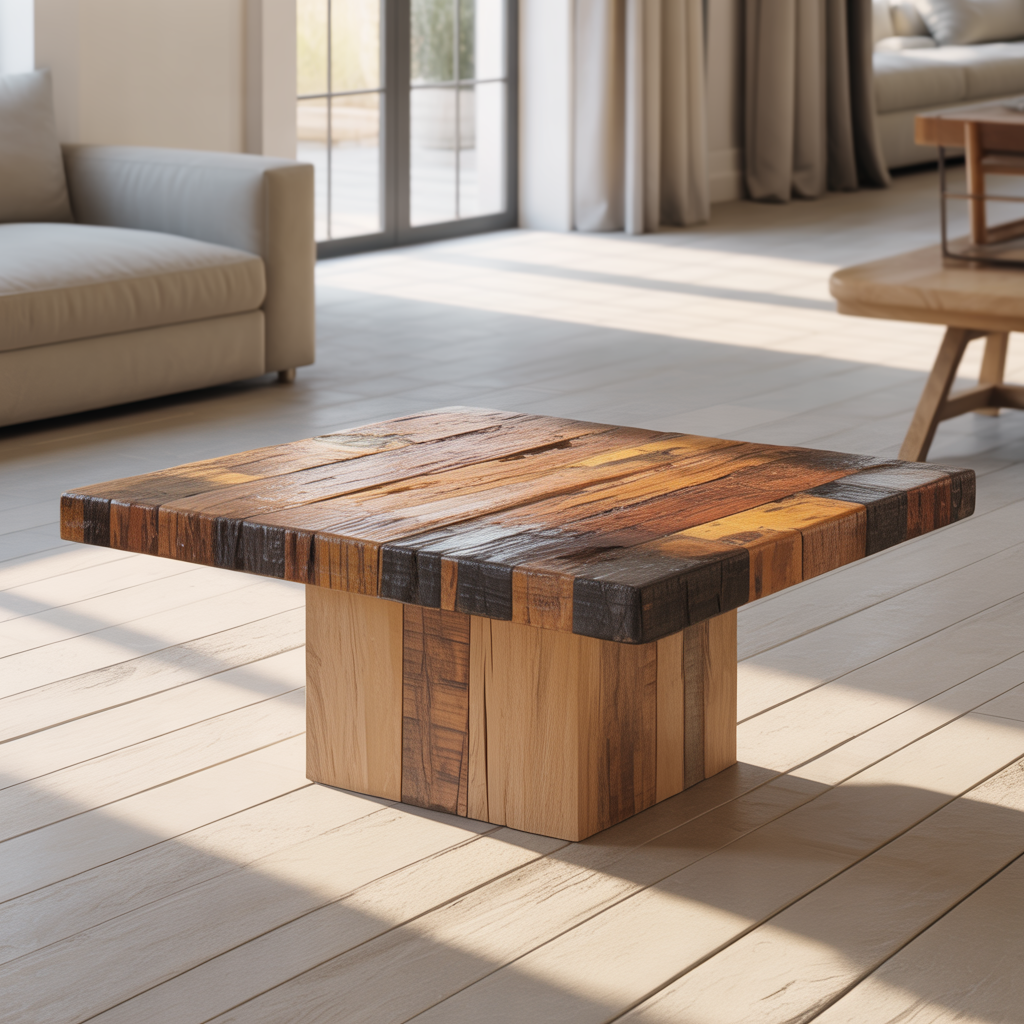
Scaffold Board Pine
For a more casual, industrial look — appropriate in a kitchen or utility entertaining space rather than a more formal living area — old scaffold boards have real character. At 38mm thick they are perfectly adequate for a cocktail table top, and the nail holes, paint splashes, and general marks of use that they carry are exactly what gives them their appeal. A pair of boards jointed together at this width can make a top that rivals more expensive hardwoods for raw visual interest.
Walnut
Reclaimed walnut is less commonly available than oak or pine, but when it appears it is worth the premium. The deep, chocolate tones of old walnut, combined with its very fine grain, produce a cocktail table surface with a sophistication that works in more formal or contemporary entertaining spaces. If your open-plan space leans towards refined rather than rustic, reclaimed walnut is worth seeking out.
Planning the Build
Height and Proportions
We settled on a finished height of 68cm — comfortable for most adults to stand at without stretching, and compatible with 65cm bar stools for those who prefer to sit. The top would be 82cm by 54cm after trimming — slightly smaller than the raw plank, with a clean square edge at each end and both long sides straightened.
Proportion between top and base is more critical on a cocktail table than on a lower piece. A top that is too small for the base looks unbalanced; a base that is too heavy visually for the top looks clumsy. We drew the profile to scale on paper before committing to anything, which is a step that takes twenty minutes and saves hours of second-guessing later.
Base Design Options
Pedestal Base
A central pedestal — either a single heavy timber post or a steel column — with a cross-foot base at the bottom gives a cocktail table a clean, uncluttered look that works well in tighter spaces because there are no legs to navigate around. The challenge is ensuring the base is heavy and wide enough to prevent tipping, particularly if people tend to lean on one edge of the top.
We made a pedestal base from two sections of reclaimed oak post — each 100mm by 100mm in section — laminated face-to-face to give a 200mm by 100mm central column. The foot was a cross of matching oak, half-lapped at the centre and fixed to the base of the column with structural screws and exterior PVA. The column was bolted through the top from below using two 10mm threaded rods countersunk into the top face and nutted off below the foot.
Four-Leg with Stretcher
Four legs — either timber or steel — with a stretcher connecting them at mid-height gives structural rigidity and a traditional furniture-maker look. At cocktail table height, a stretcher is more than decorative — it significantly increases the lateral stability of the piece. This is the most versatile base design for a cocktail table and suits a wide range of timber species and interior styles.
Industrial Pipe Frame
Black iron pipe and floor flanges assembled without welding into a square or rectangular frame gives an industrial look that suits reclaimed timber particularly well. This approach is especially popular for kitchen and bar-adjacent pieces where the aesthetic references the materials and forms of commercial kitchens and brewery spaces.
Cast Iron or Antique Base
Reclamation yards and architectural salvage companies occasionally carry original cast iron pub table bases — heavy, ornate, and virtually indestructible. Pairing a reclaimed timber top with an original cast iron base is one of those combinations that simply works, and it requires no fabrication beyond drilling the fixing holes in the top.
The Build Process
Step One: Timber Preparation
The elm plank came to us in better condition than expected for its age, but still needed careful attention before any work could begin. The full sweep with a strong magnet yielded four hidden fixings — three cut nails and one fragment of a larger spike, all invisible at a glance but potentially destructive to blades. All were punched out or extracted with pliers.
Moisture content read at 11% — within the acceptable range for indoor furniture — after two weeks of acclimatisation in the room where the table would live. We had given the plank that time deliberately, stickered on a flat surface to allow air circulation on all faces.
Step Two: Dimensioning the Top
The long edges of the plank were straightened on the jointer — elm’s interlocking grain means it can tear unpredictably if fed against the grain, so we took light passes and paid attention to the direction of the cut. The ends were cross-cut square using a circular saw guided by a reliable square and straightedge. The top went through the thicknesser in passes of no more than 0.5mm at a time — elm requires patience at this stage — until the face was clean and consistent at 34mm thickness.
Step Three: Surfacing and Sanding
Because elm’s grain runs in multiple directions across the face of the board, aggressive sanding with an orbital sander can create swirl marks that are difficult to remove entirely. We used a cabinet scraper to refine the surface after thicknessing, which gave a clean, tear-free result that the orbital sander alone would not have achieved. Final sanding was done by hand with 150 and 180 grit, working with the predominant grain direction and checking at a raking angle of light after each pass.
The edges were softened with a hand plane — a slightly more generous radius than we would use on a dining or coffee table, because people will lean against the edges of a cocktail table and a sharper profile is uncomfortable against forearms.
Step Four: Building the Pedestal Base
The two oak post sections were face-glued and clamped overnight, then the column face was cleaned up with a hand plane to ensure it was flat and square. The cross-foot pieces were cut to length — each arm of the cross extending 350mm from the centre — and the half-lap joint at the crossing point was cut carefully with a tenon saw and a chisel. The joint was glued and draw-bored with a pair of 10mm oak dowels before assembly, giving a foot structure that will not rack under load.
The column was fixed to the foot assembly using four 120mm structural screws driven at an angle through the base of the column into the arms of the foot cross — two into each arm on perpendicular faces — supplemented with PVA glue at the joint face.
The two threaded rods for fixing the top were set into the top face of the column using threaded inserts epoxied into pre-drilled holes. The protruding ends of the rods engaged with corresponding holes drilled into the underside of the top, and the assembly was pulled tight with nuts and large penny washers recessed into the underside.
Step Five: Finishing
The surface of a cocktail table takes more punishment than almost any other piece of furniture in a home. Drinks are set down without coasters. Glasses are slid across the surface. Spills happen. The finish needs to handle all of that without requiring constant attention.
We used Osmo Polyx-Oil in a satin finish — the same product we have used on other reclaimed timber projects and one we trust to perform well under daily use conditions. Three coats on the top face, with light abrading between coats: the first coat to seal and begin building protection, the second to consolidate, the third for the final surface quality.
The elm responded beautifully to the oil. The grain deepened and the colour separation between the different tones in the wood became more defined with each coat. The interlocking grain pattern, which had been impressive on the dry timber, became genuinely spectacular once oiled.
The base received two coats of the same product, which unified the colour of the laminated column and the foot cross and gave the whole piece a visual coherence that the two separate elements — top and base — needed.
Step Six: Final Assembly and Levelling
The base was positioned on the floor and the top lowered onto the threaded rod fixings, then tightened from below. The foot cross was checked for level across both axes using a digital level, and felt pads were applied to the underside of each foot arm. Small variations in floor level were addressed by trimming the relevant foot pad with a sharp knife — a detail that takes five minutes and makes the difference between a table that sits rock-solid and one that rocks with every touch.
The Finished Piece
The cocktail table has been in the space for just over a year. It has hosted more gatherings than we can count, absorbed its share of spilled drinks, and developed the particular quality that well-used reclaimed timber pieces acquire over time — a surface that looks better for having been lived with rather than worse.
The elm top is the conversation starter we knew it would be. People ask where it came from, how old it is, what the timber is. The grain pattern at the centre of the board — where the wild interlocking figure reaches its most complex — draws the eye in a way that is difficult to describe without sounding hyperbolic. It is simply beautiful wood, and the piece does justice to it.
Frequently Asked Questions
What is the correct height for a reclaimed wood cocktail table?
A cocktail table is typically designed for standing use or use with bar stools, which places the finished height in the range of 60–75cm. The most common cocktail table height is around 68–72cm — comfortable for most adults to stand at without stooping, and appropriate for use with standard 65cm bar stools which leave a workable clearance between seat and table surface. If the table will be used primarily with stools rather than for standing, the height of the stools should be confirmed before the base is designed. The general rule is a 25–30cm clearance between stool seat and table surface for comfortable seated use.
How do I stop a cocktail table from tipping?
Stability on a cocktail table is primarily a function of the base design — specifically the width of the footprint relative to the height of the piece. A taller piece with a narrow footprint is inherently less stable than a lower piece with the same footprint. For a pedestal base, the foot cross or plate needs to extend at least 40% of the table height in each direction from the centre to provide adequate stability. For a four-leg design, a stretcher connecting the legs at mid-height significantly increases lateral rigidity. Adding weight low in the base — heavy steel feet, a cast iron base — also improves stability by lowering the centre of gravity.
Can I use a reclaimed wood cocktail table outdoors?
With the appropriate timber species and an exterior-grade finish, a reclaimed timber cocktail table can work in a covered outdoor space — a garden room, a glazed extension, or a sheltered terrace. Oak and teak are the most suitable species for exposed conditions due to their natural weather resistance. Pine and elm are not appropriate for genuinely exposed outdoor use without extensive treatment. Any reclaimed piece used outdoors should be finished with an exterior-grade penetrating oil, stored inside or covered during sustained wet periods, and given a maintenance coat of finish at least once a year. A piece used in a fully exposed outdoor setting without a covered position will deteriorate significantly faster than one in a protected location.
How large should the top of a cocktail table be?
For a standing gathering table used by four to six people, a top of 75–90cm by 50–60cm is a practical target. This gives enough surface area for drinks and small plates without the table becoming unwieldy in the space. For a smaller two-person bar table, 60cm by 45cm is workable. The footprint of the base needs to be proportionate — a very wide top on a narrow base looks and feels unstable. For a pedestal design, a foot cross extending to at least 50cm across in each direction is a reasonable minimum for a top in the sizes described.
What finish is best for a cocktail table that will see regular drink use?
A hardwax oil — such as Osmo Polyx, Rubio Monocoat, or Treatex Hardwax Oil — gives the best balance of protection and repairability for a surface that will take regular drink contact. These products penetrate the timber and cure hard within the fibres, providing genuine resistance to water and mild spills without forming the brittle surface film of a lacquer. They can be refreshed with a maintenance coat without stripping back, which matters for a piece in regular use. For maximum protection in a high-use setting, three coats of a hardwax oil on the top face is the minimum — and a fourth coat is worth the extra hour it adds to the finishing process.
Conclusion
A reclaimed wood cocktail table occupies a specific and valuable role in the furniture of a home. It is functional in a way that a purely decorative piece is not — genuinely useful in a gathering space, at the right height for standing conversation, generous enough to hold what it needs to hold. And in reclaimed timber, it carries the character and visual weight to be the focal point of the space it sits in.
The build is not a beginner project, but it is well within reach of anyone who has worked through a furniture-making project before and is willing to take the timber preparation stage seriously. The pedestal base demands some precision; the elm top demands patience at the surfacing stage. Neither is beyond the reach of a careful, methodical DIYer.
Get it right and the result is a piece that earns its place in the room — not just as something useful, but as something genuinely worth having. For everything you need to know about sourcing, preparing, and working with the material, our complete guide to reclaimed wood covers the full process from salvage yard to finished surface.