Table of Contents
Key Takeaways
- A reclaimed wood desk is one of the most personally rewarding pieces of furniture you can build — you use it every day, it sits in front of you for hours at a time, and getting it right pays dividends that a shop-bought desk simply does not.
- The working surface demands more from the timber than almost any other furniture application — flatness, consistency, and a finish that handles the daily reality of a desk are all non-negotiable.
- Depth and height are the two dimensions most often underestimated; a desk that is too shallow or too low is a frustration you will feel every single working day.
- Cable management is worth planning from the outset — a beautiful reclaimed desk undermined by a tangle of cables behind it is a missed opportunity.
- The base can be as simple as hairpin legs or as ambitious as a full timber frame with integrated storage — the right choice depends on the space, the use, and the builder’s confidence.
- The result, when the timber is right and the build is considered, is a workspace that makes you want to sit down at it — and that is worth more than any specification on a product page.
The Desk That Changed How We Feel About Working From Home
We had been working from home for long enough to know that the desk mattered. Not in a vague, it-would-be-nice way — in the very specific sense that a desk you do not want to sit at is a daily friction, and a desk you actively want to use changes the entire character of working from home.
The corner of the spare room that had become our home office was functional, in the same dispiriting way that a beige rental flat is functional. The desk was a flat-pack affair in white-grey laminate that had looked acceptable in the showroom and had looked wrong in the room from the day it arrived. The chair was fine. The monitor was fine. The desk was the problem.
We decided to make a reclaimed wood desk. Not as a weekend project thrown together from whatever was to hand, but as a proper piece of furniture — something built to the right dimensions, from the right timber, with a surface finish that would handle years of daily use and look better for it. This is the full account of what we made and how we made it.
Getting the Dimensions Right
Before a single piece of timber is sourced, the dimensions of the desk need to be established with precision. This is not a stage to rush or approximate — a desk built to the wrong depth or the wrong height is a problem you will live with every working day.
Height
Standard desk height in the UK is 72–75cm, designed around the ergonomic requirements of a seated adult of average build. If you are significantly taller or shorter than average, the standard height may not suit you — and one of the genuine advantages of building a bespoke desk is that you can set the height to suit the person who will use it rather than a statistical average.
The correct desk height is determined by your seated elbow height. Sit in your working chair with your feet flat on the floor and your upper arms relaxed at your sides. The desk surface should be at or very slightly below the height of your elbows in this position, so that your forearms rest on the surface without your shoulders hunching. Measure this height and build to it — a 2cm difference from the standard matters when it is your body that has to accommodate the error every day.
We built our desk at 73cm, which suited both of us within the normal range of adjustment. The legs were designed to be slightly adjustable — a detail explained in the base section below.
Depth
This is the dimension most often sacrificed to space constraints, and most often regretted. A desk depth of 60cm — which is the minimum for comfortable use with a monitor — feels cramped within weeks. 70cm is workable. 80cm begins to feel genuinely generous, with room for a monitor at a proper viewing distance, a keyboard and mouse in front of it, and space for a notebook or documents alongside without everything feeling crowded.
Our desk is 82cm deep — slightly more than we initially planned, enabled by a choice to push it closer to the wall than the original layout assumed. That extra depth changed the desk from a functional workspace to a genuinely comfortable one.
Width
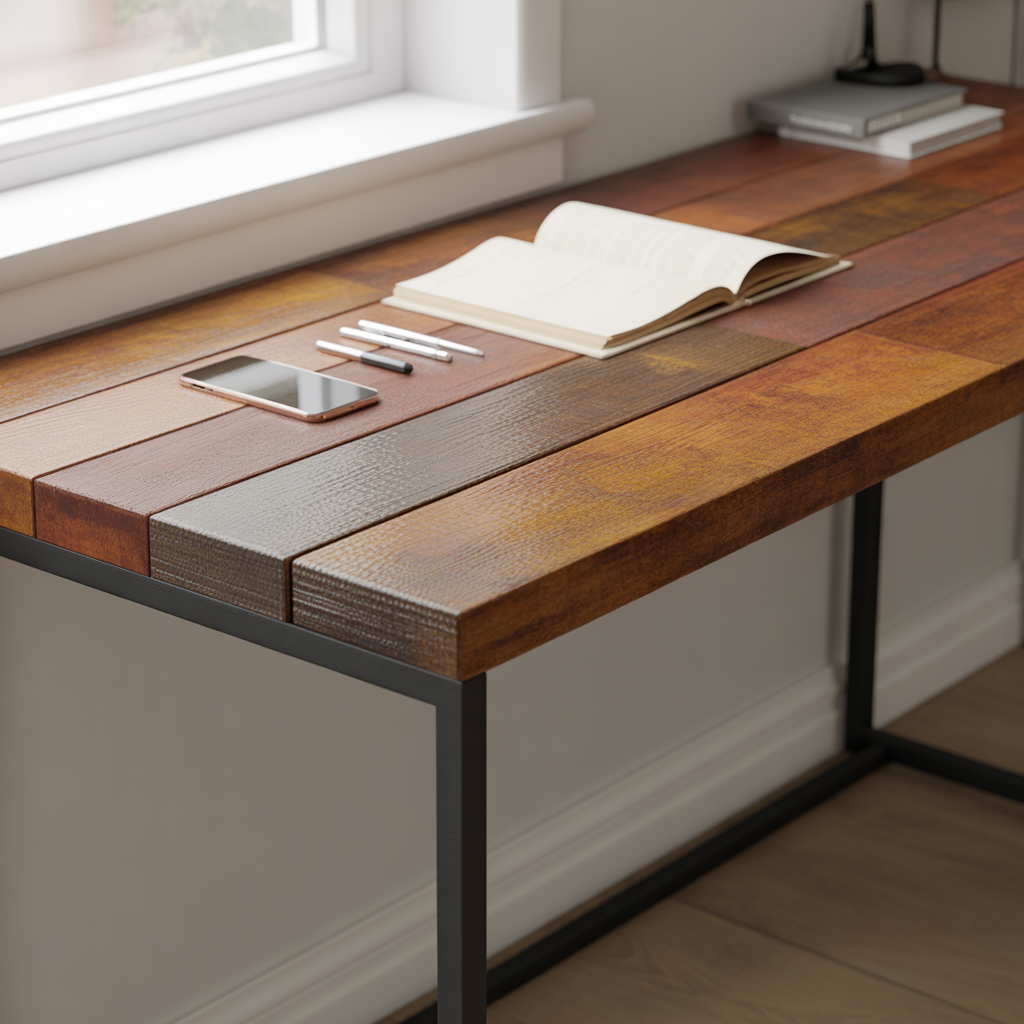
Width is determined primarily by the available wall space and the number of users. A single-user desk needs a minimum of 120cm of working width to avoid feeling constrained. 150cm begins to feel spacious. Our desk is 165cm wide — enough for a monitor position, a writing area to the right, and still room for a lamp and a few books without the surface feeling cluttered.
Sourcing the Timber
A desk surface asks a great deal of its timber. It needs to be genuinely flat — not approximately flat, not flat-after-a-fashion, but properly flat across its full width and length, because a surface that rocks under keyboard or writing pressure is deeply frustrating in daily use. It needs to be hard enough to resist denting from the ordinary objects that get put on it. And it needs a grain and character that rewards the hours you spend looking at it.
We spent three visits across two reclamation yards before we found the right timber. We were looking for a set of boards from the same source — ideally the same original floor — wide enough that we would need no more than three to make up the full desk width, and in consistent condition across their lengths.
What we found on the third visit was a short stack of reclaimed Douglas fir from a demolished Victorian municipal building — boards 220mm wide, 38mm thick, and just over 180cm long, showing the tight, straight grain of genuinely old timber and a surface that had been protected from the worst of the weathering by a covering of old linoleum. The colour was a warm, reddish amber. The grain was fine and consistent. Three boards jointed together would give us a top of exactly the width we needed.
Species Worth Considering for a Desk Surface
Douglas Fir
Our choice, and one we recommend for a desk specifically. Old-growth Douglas fir is significantly denser than modern commercially grown fir, and the tight grain gives it a hardness and resistance to denting that belies its classification as a softwood. The colour — warm amber with a slight reddish cast — deepens beautifully with oil, and the straight grain means it machines and finishes cleanly without the tearing and grain reversal that can make more dramatic species difficult to work.
Oak
The premium choice for a desk surface. Reclaimed oak is extremely hard, exceptionally stable once dried, and develops a patina over years of use that becomes more beautiful with time. A wide desk surface in old oak is a genuinely spectacular piece of furniture. It is also heavy, demanding to machine, and at the upper end of the cost range for reclaimed timber. For a desk that will be in use for decades and where quality is the primary consideration, it is difficult to argue against.
Pine
Reclaimed pine — particularly wide boards from Victorian or Edwardian buildings — is softer than the alternatives listed above and will dent and scratch more easily than oak or fir under the daily contact of a working desk. It is not disqualified by this: many of the most characterful and characteristically aged desks are in pine, and the marks of use contribute to the surface in the same way they do on any reclaimed timber piece. The compromise is between the availability and affordability of pine and the greater durability of harder species.
Walnut
Reclaimed walnut is the choice for a desk with a darker, more refined aesthetic. The deep chocolate tones and fine, straight grain of old walnut are genuinely beautiful, and the hardness of the species makes it well suited to a working surface. It is less commonly available than oak or pine in reclamation yards, and commands a premium when it appears, but for a desk in a formal study or a space where a refined, contemporary aesthetic is the goal, it is worth seeking out.
Planning the Base
The base of a desk is more than a structural element — at the desk height at which you work, the base is visible and present in a way that lower furniture is not. It needs to be designed as part of the piece rather than as an afterthought.
Hairpin Legs
The simplest and most popular option for a reclaimed timber desk. Four hairpin legs in 12mm or 16mm steel — the heavier gauge for a desk of this width and depth — give a clean, versatile base that works across a wide range of interior styles. They are available with adjustable feet, which allows for minor height correction and compensation for uneven floors. The leg height should be selected to give the finished desk surface at the correct ergonomic height once the top is in place.
The limitation of hairpin legs on a wide desk is lateral rigidity. A 165cm desk on four hairpin legs will have some flex under load applied to the front edge — acceptable for many users, less so for those who work with significant downward pressure on the surface. Adding a central rear leg eliminates this, as does a perimeter frame.
Steel Perimeter Frame
A welded steel frame — two short end frames and two long stretchers connecting them, forming a rectangular base — gives the rigidity that hairpin legs alone cannot provide on a wide desk. It can be fabricated by a local metalworker to precise dimensions and powder-coated in any finish. For a desk with cable management requirements, a perimeter frame with cut-outs or cable clips integrated into the design is a more considered solution than legs alone.
Trestle Base
A pair of timber trestles — either in reclaimed timber matching the top, or in new oak or pine — gives a desk a furniture-maker quality and eliminates the leg-under-corner constraint that makes some desk configurations awkward. A trestle base also provides natural space for a modesty panel or a drawer unit if storage is required. The challenge is ensuring the trestles are rigid enough laterally — a diagonal brace or a through-tenoned stretcher between the two trestles is usually necessary.
Integrated Storage
For a home office desk that needs to carry significant storage, a base that incorporates drawers, a cabinet section, or open shelving is worth designing from the outset rather than trying to add later. This is the most ambitious base option and the one that requires the most careful planning, but a reclaimed timber desk with integrated storage built from the same timber batch is a genuinely exceptional piece of furniture.
The Build Process
Step One: Timber Preparation
Three boards of Douglas fir, each swept for fixings, cleaned, and checked for moisture content — 9%, 10%, and 9% across the three boards after two weeks of acclimatisation in the room. Good readings, consistent across the batch, and a signal that the timber was ready to work.
Each board went through the thicknesser to a consistent 34mm. The face of old Douglas fir, as it comes off the machine and the weathered surface layer is removed, is one of the most rewarding moments in any reclaimed timber project — the colour goes from grey and muted to warm, vivid amber in a single pass, and the grain pattern becomes suddenly clear and defined.
The edges were shot on the jointer to give clean, gap-free joint faces. Douglas fir machines well and does not tear at the jointer the way elm or some oaks can — the three boards produced clean, consistent edges in a single pass on each face.
Step Two: Jointing the Top
The three boards were laid out in their final arrangement — we spent time getting this right, trying different configurations to optimise the grain flow across the full width. Biscuit slots at 250mm intervals along each joining edge, a dry fit to confirm the boards pulled together without gaps, then glue, biscuits, and clamps.
We used five sash clamps across the width and two pipe clamps running along the length to prevent any tendency to bow during clamping. The assembly was left on a flat surface — a critical detail, since clamps can introduce a twist to a jointed top if it is not supported truly flat during curing.
Twenty-four hours before the clamps came off. No rushing this stage.
Step Three: Flattening the Top
The jointed top, once out of the clamps, was flat across most of its width but showed a slight misalignment at one of the joints — less than 1mm, but visible when a straightedge was laid across it. We addressed this with a hand router and a wide spoilboard sled, skimming the face in passes of 0.3mm until the surface was genuinely flat across its full 165cm width. A winding sticks check confirmed there was no twist remaining before we moved to sanding.
Step Four: Sanding
Belt sander with 80 grit to remove the router tracks and level the surface. Orbital sander through 80, 120, and 180 grit, vacuuming and tack-clothing between each. The edges received a light round with a hand plane — not a full radius, just enough softening to prevent the sharpness of a freshly cut edge without losing the honest, rectilinear quality of the piece.
The underside was sanded to 120 grit — not the fine finish of the top face, but smooth enough to take finish properly.
Step Five: Cable Management
Before the legs went on, we addressed cable management — a step that is far easier at this stage than after the desk is assembled and in position.
We drilled two cable grommets through the top — one at the right rear corner, one at the left rear corner — using a 60mm hole saw and fitting standard brushed steel grommet inserts. A small channel routed into the underside of the top along the rear edge, from grommet to grommet, allows cables to run horizontally out of sight before dropping to the floor. A cable tray fixed to the underside of the rear stretcher of the steel frame holds a power strip and the bulk of the cable runs.
This is the detail that separates a desk that looks right in use from one that looks right only when empty. Plan it before the base goes on.
Step Six: Fitting the Base
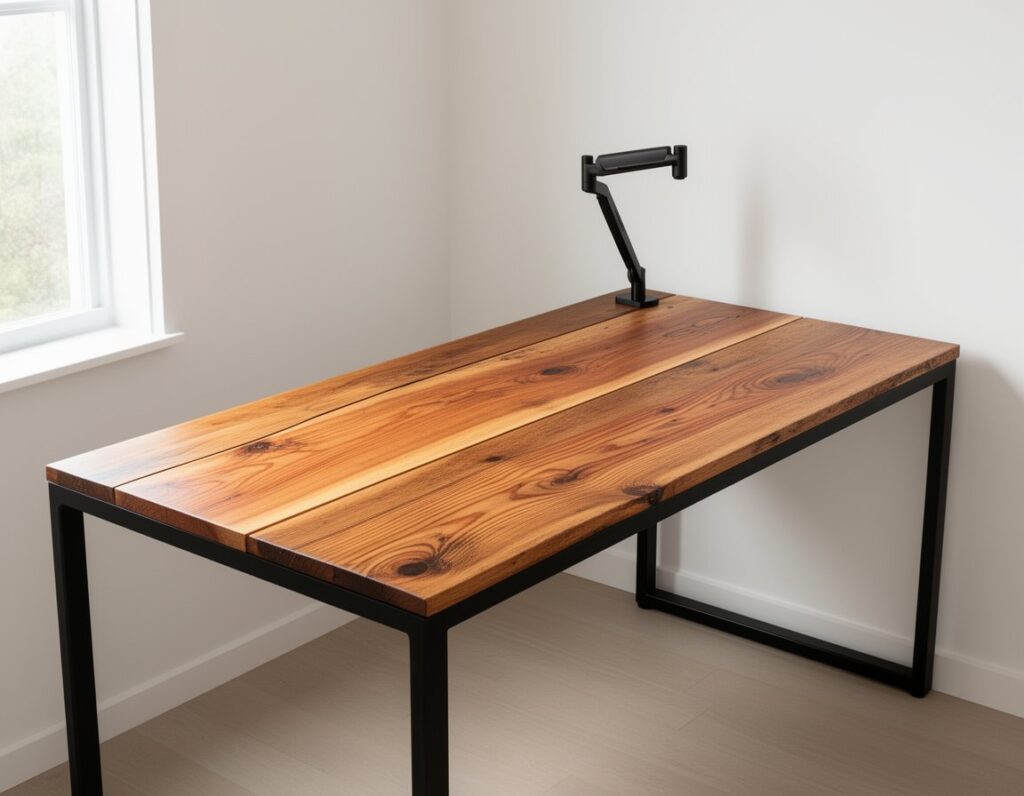
Our base was a welded steel perimeter frame — two end frames of 40mm square box section at 82cm depth, connected by two stretchers along the 165cm length, powder-coated in matte black. The frame was fabricated by a local metalworker to our drawings and arrived with slotted fixing holes along the top face of the stretchers.
The frame was positioned centrally on the underside of the top, the fixing positions marked through the slotted holes, pilot holes drilled, and the frame fixed with M6 bolts and penny washers. Slotted holes allow the timber to expand and contract seasonally without the fixings fighting the wood — on a desk top of this width, seasonal movement of 3–4mm across the grain is realistic, and a rigid fixing on a metal frame will cause cracking over time.
Adjustable rubber feet on the base allowed us to level the desk precisely once it was in position.
Step Seven: Finishing
The desk surface is the most-touched, most-used horizontal surface in the house. The finish needs to be durable, repairable, and appropriate to the aesthetic of the piece.
We used Rubio Monocoat Oil Plus 2C in a pure clear finish — a single-coat product that bonds at the molecular level with the timber fibres and cures hard within twenty-four hours. It is not the most affordable finishing product on the market, but the result is exceptional: the surface feels like oiled wood rather than coated wood, the grain and colour of the Douglas fir are fully visible and enhanced, and the protection is genuinely superior to a single coat of a conventional hardwax oil.
The first component was mixed with the activator and applied with a cloth in circular motions, then wiped back along the grain to remove excess. Left for twenty-four hours to cure, then a light buff with a clean white cloth to burnish the surface. The underside received two coats of a standard hardwax oil — less demanding to finish than the top, but finished nonetheless.
A maintenance coat of the same product once a year will keep the desk surface in the same condition indefinitely.
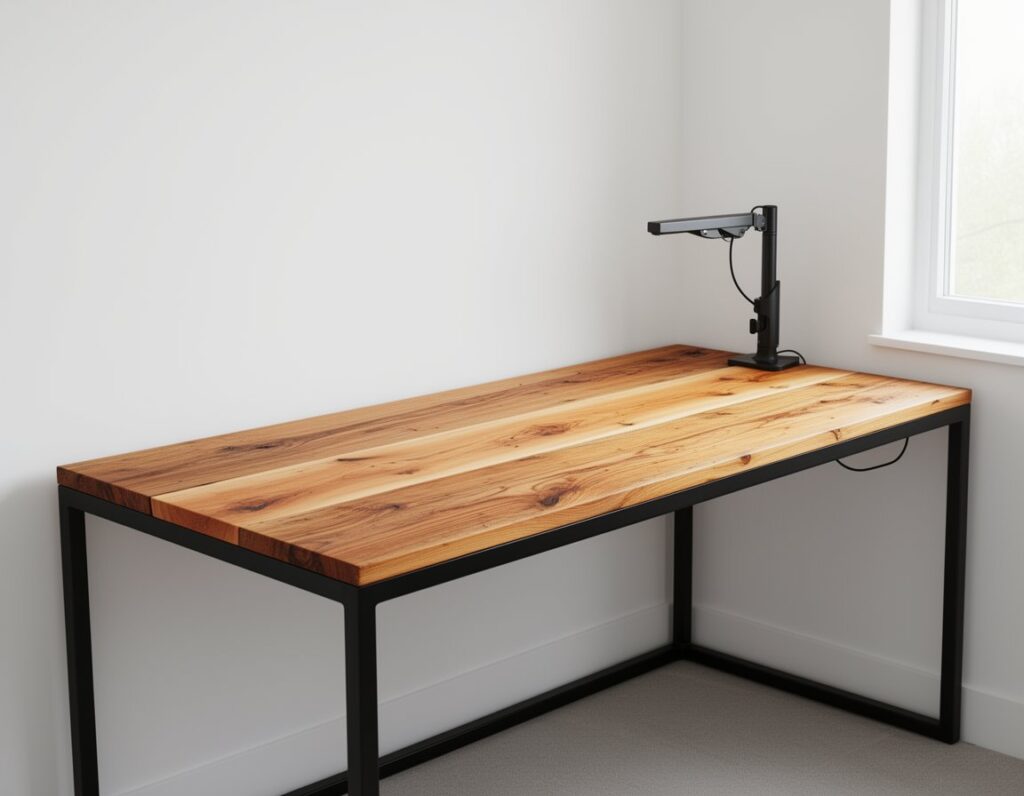
The Finished Desk
The desk has been in daily use for fourteen months. It is where this article was written. The Douglas fir surface has deepened slightly in colour — the amber is richer and more complex than it was when new — and the grain has become more defined as the oil has cured fully into the timber.
There is a small mark near the left grommet where something sharp was put down without care early in the desk’s life. It is barely visible and entirely in keeping with the surface. Reclaimed wood desk surfaces do not need to be preserved from marks. They need to be protected from moisture and maintained against dust, and everything else becomes part of the record.
It is, without question, the most satisfying piece of furniture we have made. We sit at it every day and it is right every day — the right height, the right depth, the right surface, the right material. That is what a proper reclaimed wood desk delivers.
Frequently Asked Questions
What thickness should a reclaimed wood desk top be?
For a solid timber desk top, 36–44mm is the practical range. Thinner than this and the top will flex noticeably under typing pressure, especially over a wide span. Thicker than this and the desk begins to look and feel disproportionately heavy, and the weight makes installation more demanding. 38–40mm is the sweet spot for most desk builds — substantial enough to look properly solid, light enough to handle without specialist equipment. If the base includes a perimeter frame that provides additional support, a slightly thinner top — 30–34mm — is workable.
How do I keep a wide reclaimed timber desk top flat?
Three factors determine whether a wide solid timber top stays flat: moisture content before construction, consistent finishing on both faces, and base fixings that allow seasonal movement. Get all three right and a well-jointed hardwood top will be stable in normal domestic conditions. Timber must be at 8–12% moisture content before construction — check with a calibrated meter. Both the top and underside must receive the same number of coats of finish — uneven moisture absorption between faces causes differential movement and cupping. Base fixings into a steel frame must use slotted holes to allow the timber to expand and contract across the grain without the fixings introducing stress.
Can I add drawers to a reclaimed wood desk?
Yes, and the approach depends on the base design. If the desk sits on legs, a pedestal drawer unit — a separate piece of storage furniture that slides under the desk — is the most straightforward option and requires no modification to the desk itself. If the desk has a trestle or frame base, drawers can be incorporated into the base structure during the build by designing a carcass section into one or both of the base panels. Integrating drawers into a reclaimed timber desk from the outset produces the most considered result; retrofitting them is possible but rarely looks as resolved.
What finish is best for a reclaimed wood desk that sees heavy daily use?
A penetrating hardwax oil — Rubio Monocoat, Osmo Polyx, or a comparable product — gives the best combination of durability and repairability for a desk surface in daily use. These products cure hard within the timber fibres rather than forming a surface film, which means they do not chip, peel, or cloud under normal use conditions. They can be refreshed with a maintenance coat without any stripping or sanding back, which matters enormously for a piece used every day. Avoid lacquer and water-based polyurethane on reclaimed timber desk surfaces — both sit on the surface, both are prone to peeling on porous or open-grained wood, and neither can be maintained without full stripping and refinishing.
How do I manage cables on a reclaimed wood desk?
The most effective approach is to plan cable management before the desk is assembled. Two cable grommets through the top — one at each rear corner — allow cables to drop from the surface to beneath the desk out of sight. A cable tray or basket fixed to the underside of the desk, running along the rear edge, collects the bulk of cable runs and power strips where they are invisible from any normal viewing position. Velcro cable ties keep individual cables organised within the tray. Addressing cable management as an afterthought — once the desk is built and in position — almost always produces a less satisfactory result than designing for it from the outset.
Conclusion
A good quality reclaimed wood desk does not happen by accident. It requires the right timber, found with patience at the right source. It requires preparation that takes longer than the build itself. It requires dimensions designed for the person who will use it rather than a statistical average. And it requires a finish chosen for the reality of daily use rather than the appearance of a product photograph.
Get those things right and the result is a piece of furniture that changes the experience of working from home — not dramatically, not overnight, but in the consistent, daily way that only a workspace you genuinely want to sit at can do. It is furniture that earns its place.
For everything you need to know about sourcing the right timber, understanding the species, and preparing it correctly for a project like this, our complete guide to reclaimed wood covers the full process from salvage yard to finished surface.