

Start with safety and function: tighten loose hinges, knobs, and outlet covers, then stop wobbling furniture and add felt pads. Patch nail holes with lightweight spackle, sand flush, spot-prime, and touch up paint to match color and sheen. Replace cracked caulk—silicone for tubs, acrylic for trim—using tape for crisp lines. Swap dated switch plates, fix sticky latches, and wipe trim, handles, and grout for a brighter finish. Keep going to pick the fastest wins next.
Key Takeaways
- Tighten hinges, knobs, outlet covers, and wobbly furniture, replacing missing screws and adding felt pads to prevent damage and noise.
- Fix small leaks fast by replacing faucet washers and re-caulking sinks to prevent water damage and keep surfaces looking clean.
- Patch nail holes and dents with the right filler, sand flush, spot-prime porous repairs, and touch up with matched color and sheen.
- Remove cracked or moldy caulk, clean with alcohol, tape edges, and reapply the correct caulk type for crisp, professional-looking joints.
- Deep-clean trim, baseboards, grout, and high-touch areas with microfiber and mild cleaners to restore sharp lines and a fresh, polished look.
Pick the Best Quick Home Repairs First
Although it’s tempting to tackle whatever looks worst, you’ll get faster, cheaper wins by choosing quick repairs that prevent bigger damage and improve daily use right away. Start with safety and function: tighten loose door hinges, stop wobbling chairs, replace missing cabinet screws, and add felt pads to protect floors. Fix drips by swapping worn faucet washers and sealing around sinks with fresh caulk. Silence rattles by tightening outlet covers and installing door bumpers.
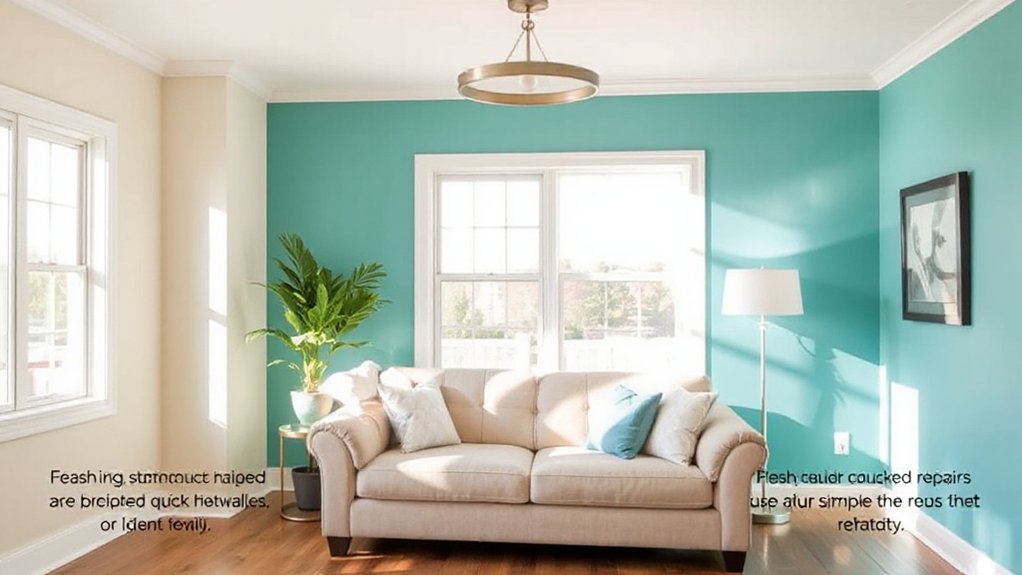
Replace burnt bulbs and add a brighter, matching color temperature for cleaner home decor. Then improve flow: shift furniture arrangement to open walkways, square rugs, and keep frequently used items within reach. These small fixes cost little, save materials, and make the room feel instantly more finished.
Patch Nail Holes and Small Wall Dents
For nail holes and small dents, you’ll save time and money by choosing the right filler—lightweight spackle for tiny marks and setting-type compound for deeper ones.
You apply it in thin layers, let it dry fully, then sand flush with fine grit so the patch disappears.
You finish with a quick touch-up of matching paint (and primer if needed) to blend the sheen and color cleanly.
Choose Proper Filler
Where do you start when a wall’s peppered with nail holes or a small dent? You start by choosing proper filler for the surface and the depth.
For tiny nail holes, lightweight spackle works fast, costs little, and shrinks less on shallow spots.
For dents or slightly wider gaps, use a premixed vinyl or acrylic patching compound; it grips better and holds shape.
If you’re repairing cracked plaster or deeper voids, choose setting-type joint compound (powder you mix) because it hardens chemically and resists future sink-in.
Keep a small tub for quick fixes and a powder bag for bigger touch-ups.
Check labels for “paintable” and “low shrink,” and avoid exterior fillers indoors unless you need extra hardness.
Sand And Touch Up
Once you’ve picked the right filler and it’s fully dry, sanding and touch-up turn the patch from “fixed” to invisible.
Start with light surface preparation: wipe dust, then use 180–220 grit on a small sanding block so you don’t dish the wall. Feather the edges 2–3 inches past the patch until you can’t feel a ridge with your fingertips.
Vacuum or tack-cloth the powder; leftover dust ruins paint adhesion.
For paint, spot-prime if the filler is porous or you’re covering a dark color. Use a small roller or stipple with a brush to mimic surrounding texture. Apply two thin coats, letting each dry.
If sheen differs, blend farther out. This sand and touch up step saves money by avoiding full-wall repainting.
Match and Touch Up Paint on Scuffs
Even if a scuff looks like it’s gone through the paint, you can usually make it disappear with a close color match and a careful touch-up. Start by cleaning the mark with mild soap and water, then let it dry fully.
For Color matching, take a small chip from a hidden spot or bring the paint can label to the store; match sheen too, since flat, eggshell, and satin reflect differently.
Lightly feather the scuffed edge with fine sandpaper, wipe dust, and spot-prime if drywall shows.
Apply paint with a small foam roller or angled brush, working from the center out.
For Paint blending, use thin coats and soften edges with a nearly dry brush so the patch fades into the wall completely.
Remove Old Caulk and Re-Caulk Clean Lines
Because cracked or moldy caulk lets water in and makes trim look sloppy, you’ll get a cleaner, longer-lasting seal by removing it completely and laying a fresh bead. Score edges with a utility knife, then pull the strip with a caulk remover tool; scrape residue and wipe with rubbing alcohol so the new caulk bonds. Let the area dry.
Tape both sides of the joint for crisp lines, cut the tube tip small, and run a steady bead you can control. Tool it once with a damp finger or caulk tool, then peel tape immediately.
Choose silicone for tubs and showers, paintable acrylic for trim. You’ll Seal gaps, Prevent drafts, and make corners look new fast.
Tighten Loose Handles, Knobs, and Hinges
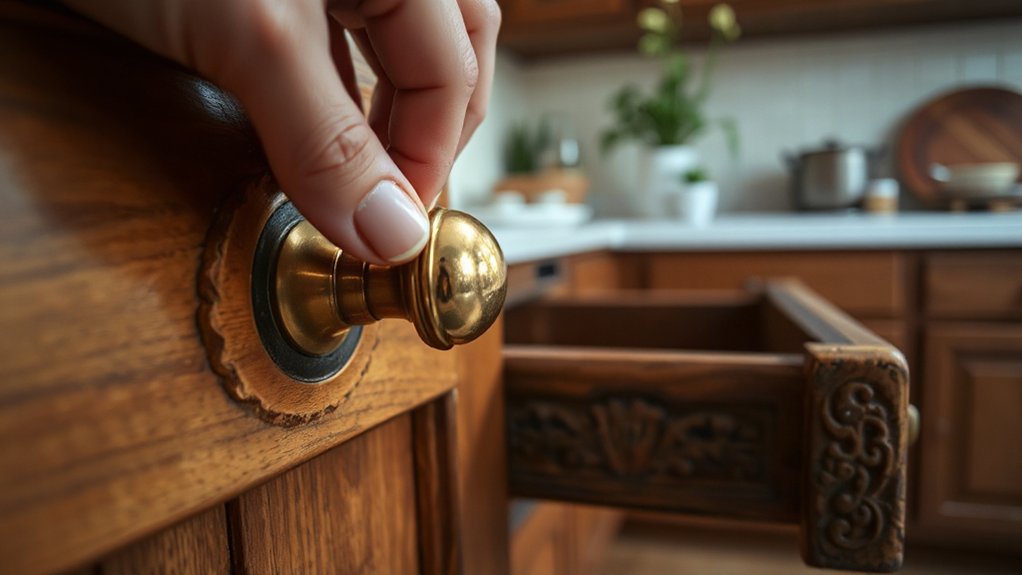
When handles, knobs, or hinges start to wobble, they quickly turn into stripped screws, sagging doors, and bigger repairs, so tighten them as soon as you notice play. Grab a screwdriver that fits snugly, then check every screw on door handles, cabinet knobs, and hinge plates. Tighten each screw evenly; don’t crank so hard you strip the head.
If a screw keeps spinning, remove it and plug the hole with a wooden toothpick dipped in wood glue, snap it flush, and re-drive the screw once it sets.
On cabinet doors, adjust hinge screws to realign gaps and stop rubbing. For loose knobs with through-bolts, hold the back nut with pliers while you tighten from the front.
Swap Dated Switch Plates and Outlet Covers
How much fresher can a room feel for just a few dollars? Swapping yellowed, cracked, or paint-splattered switch plates and outlet covers is a fast upgrade you’ll notice every day.
First, match the configuration (toggle, rocker, dimmer, GFCI) and count screws so replacements fit. Turn off power at the breaker, then remove the old plates and wipe the wall edge clean.
If the box sits recessed, add inexpensive spacer rings so the new cover sits flat. Choose simple white for a crisp reset, or install decorative switch plates that echo your hardware finish.
For a subtle style boost, coordinate outlet decor across the room so everything looks intentional, not patched together. Tighten screws just until snug.
Fix Sticky Doors and Misaligned Latches
Fresh plates and covers make the walls look cleaner, but a door that drags or won’t latch still makes a room feel worn.
Start with door alignment: tighten every hinge screw, then replace any stripped ones with longer 3-inch screws that bite into framing.
If the door rubs at the top, snug the top hinge; if it rubs on the latch side, shim behind the hinge with thin cardboard.
For a latch that won’t catch, mark where it hits the strike plate. Loosen the plate and nudge it up or down, or file the opening slightly.
That latch adjustment costs almost nothing and usually fixes the problem fast.
Finish by checking the latch bolt moves freely and quiets, too.
Finish With a Quick Detail Clean (Grout, Trim)
Wrap up your quick repairs by making grout lines look new again with a fast scrub and wipe, so the whole room reads cleaner for almost no cost.
Run a damp microfiber along trim edges to lift dust and grime and bring back crisp lines without repainting.
Then spot-clean high-touch areas like switches, handles, and door frames to remove smudges that make everything feel unfinished.
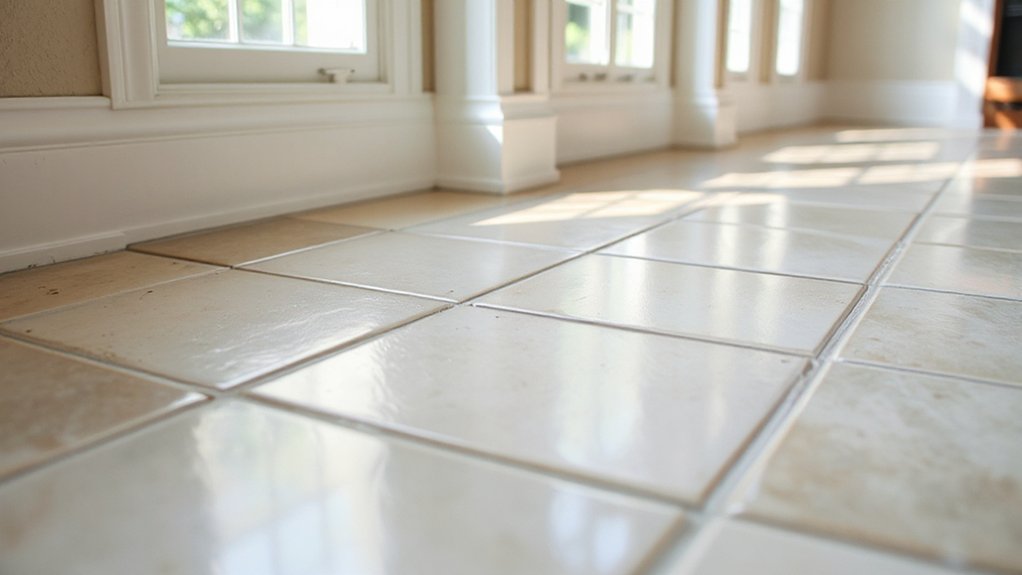
Brighten Grout Lines Fast
After you’ve handled the main cleanup, brighten grout lines fast with a simple spot-treatment and a quick detail pass on nearby trim.
Mix baking soda with a little hydrogen peroxide into a paste, then press it into stained Tile grout with an old toothbrush. Let it sit 5–10 minutes, scrub lightly, and wipe with a damp microfiber.
For greasy kitchen grout, swap in a drop of dish soap. Rinse again so residue doesn’t attract dirt.
For quick color enhancement, dry the joints, then rub a grout pen or matching grout sealer along the worst lines only—no need to coat the whole floor. Buff off any overlap from tile faces immediately.
Finish by vacuuming edges and wiping adjacent trim with a barely damp cloth.
Restore Crisp Trim Edges
Once the grout looks brighter, sharpen the whole room by restoring crisp trim edges with a quick, controlled clean. Vacuum baseboards and casings using a brush attachment to lift grit that smears when wet.
Mix warm water with a few drops of dish soap; dampen (don’t soak) a microfiber cloth and wipe along the trim grain. For stubborn scuffs, use a melamine sponge lightly, then follow with a clean damp cloth to remove residue.
Run a cotton swab along tight corners and around door hinges for sharp lines. Dry immediately with a towel to prevent swelling and streaks.
Finish by straightening Decorative accents and aligning Window treatments so the newly clean edges read intentional and crisp throughout the room.
Spot-Clean High-Touch Areas
Even if the room looks clean overall, high-touch spots collect oils and show grime fast, so hit them with a quick targeted wipe-down before your final grout-and-trim detail pass. Start with door handles, light switches, drawer pulls, remotes, and faucet levers. Mist a microfiber cloth with Antibacterial sprays (don’t soak surfaces), then wipe, flip the cloth, and buff dry to prevent streaks.
For sticky buildup, add one drop of dish soap to warm water and spot-scrub with a soft toothbrush.
Next, detail the edges: run a damp cloth along baseboards and trim, then use a grout brush plus baking soda paste on dingy lines. Rinse, dry, and leave Hand sanitizers by entries to slow re-griming.
Frequently Asked Questions
How Do I Estimate Total Repair Costs Before Starting?
Start by listing every task.
Then measure quantities and price materials using Budget planning.
Get at least three quotes for labor and do Cost comparison across contractors and big-box stores.
Add permits, tool rentals, delivery, disposal, and tax.
Include a 10–20% contingency for hidden issues.
Build a simple spreadsheet with line items and dates, then total it.
Finally, confirm what’s included in each quote so you don’t pay twice.
Which Repairs Add the Most Value Before Selling a Home?
You’ll add the most value by boosting curb appeal, revitalizing kitchens and baths, and fixing obvious defects. NAR reports 92% of agents recommend improving curb appeal before listing, and it often pays back quickly.
Start with exterior paint touch-ups, landscaping, and a new front door handle. Inside, use neutral paint, updated lighting, and modern hardware.
Spend on minor kitchen upgrades, recaulk bathrooms, and complete home staging to showcase space.
What Tools Should Every Beginner Keep for Quick Home Fixes?
Keep a claw hammer, tape measure, utility knife, adjustable wrench, screwdriver set, stud finder, level, and cordless drill/driver with bits.
Add a putty knife, spackle, sandpaper, and painter’s tape for fast patch-and-paint jobs—use these Painting tips: feather edges, prime spots, and cut in cleanly.
Stock a voltage tester, pliers, and flashlight.
Don’t skip Tool maintenance: wipe tools dry, oil pivots, and recharge batteries.
How Can I Repair Walls Safely in Older Homes With Lead Paint?
Sure, go ahead and “just sand it”—if you enjoy inhaling toxins. You’ll repair older walls safely by testing first, then isolating the area with plastic, sealing vents, and wearing a P100 respirator.
Keep surfaces damp, scrape gently, and bag debris twice. For Lead paint removal, use EPA-approved methods or hire certified pros.
After cleanup with HEPA vacuum and wet wipes, focus on Wall stabilization: patch cracks, prime, and repaint. Cheap insurance.
When Should I Hire a Professional Instead of Doing DIY Repairs?
Hire a professional when the repair affects safety, structure, or hidden systems you can’t verify. Call pros for lead paint disturbance, extensive mold, electrical or plumbing work, or cracks that keep growing.
If pests return after DIY traps, schedule Pest control before you seal walls.
For valuable antiques, use a specialist in Furniture restoration instead of sanding or stripping. You’ll avoid costly rework, fines, and health risks.
Conclusion
You don’t need a full remodel to make a room feel new. If you’re thinking, “I don’t have time,” start with one 15‑minute win: patch a few nail holes, touch up scuffs, or replace a yellowed switch plate. Re-caulk a tub edge, tighten loose hardware, and sand a sticking door for smoother daily use. Finish by scrubbing grout and wiping trim. These cheap fixes stack up fast—and you’ll notice the difference immediately.

