

You can instantly refresh your home with a few simple carpentry wins: grab a tape, speed square, level, clamps, and safety glasses, then add matching trim and paintable acrylic latex caulk for crisp seams. Mount stud-safe floating shelves by finding a stud, leveling a line, and screwing in a cleat before sliding on a hollow shelf box. Build a quick 1×12-and-2×4 entry bench, install a hook rail, and tighten or upgrade door and drawer hardware—more easy upgrades are next.
Key Takeaways
- Install floating shelves using a stud-mounted cleat; build hollow box shelves for a clean, modern upgrade in one afternoon.
- Add or replace trim to match existing profiles; measure twice, test-fit, then caulk seams with paintable acrylic latex for a crisp finish.
- Build a simple entryway bench from 1×12 and 2x4s; use screws, glue, and poly, leaving storage space for boots and bins.
- Mount a wall rail with hooks into studs or anchors; space hooks 4–6 inches apart and add felt pads to protect the wall.
- Refresh cabinets by tightening hinges, repairing stripped holes with toothpicks and glue, replacing drawer slides, and upgrading knobs or pulls.
Basic Tools for Simple Carpentry Projects
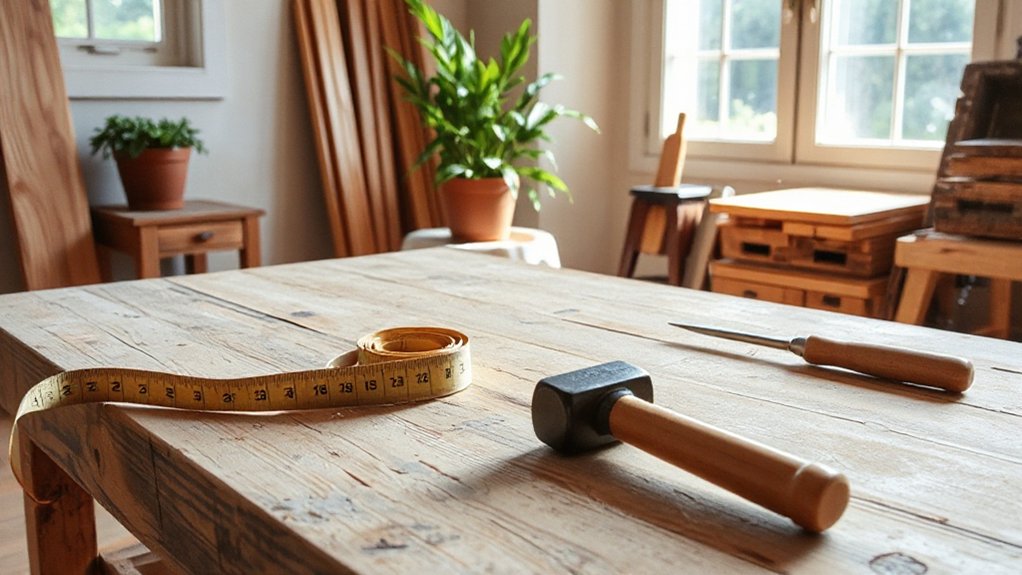
Although you can build plenty of simple carpentry projects with a small kit, the right basic tools will save you time, reduce mistakes, and keep costs under control.
Start with a reliable measuring tape and a speed square so you can mark straight, repeatable cuts without wasting lumber.
Buy a midrange power drill/driver and a small set of bits; it’ll handle pilot holes, countersinks, and driving screws without stripping heads.
Add a hand saw or circular saw (rent if you’ll use it once), plus clamps to keep boards from shifting while you fasten.
Keep a level, utility knife, pencil, and sanding block for fit and finish.
Round it out with safety glasses and hearing protection—you won’t redo work due to injury.
Upgrade Walls Fast With DIY Trim and Caulk
You can upgrade plain walls fast by picking a simple, in-stock trim profile that matches your room and budget. You’ll measure twice, cut clean, and test-fit each piece so gaps stay small and waste stays low.
Then you’ll run a smooth bead of paintable caulk along seams and nail holes to get a crisp, finished look without expensive materials.
Choose Trim Profiles Fast
How do you pick a trim profile fast without second-guessing every aisle? Start by matching what’s already in the room. If your baseboards are plain, choose a simple modern casing; if they’re ornate, echo that with subtle curves. Bring a photo and measure the visible face width so you don’t buy trim that looks skinny or bulky.
For Choosing trim profiles, limit yourself to two options: square-edge for clean lines or ogee for traditional. Compare only primed finger-joint pine and MDF; both paint well, but MDF costs less and stays straight indoors.
Save money by using stock lengths and skipping custom millwork. When you add decorative molding, keep it consistent on every wall for a built-in look.
Measure, Cut, And Fit
With a trim profile picked, the job turns into accuracy: measure the wall runs and openings, plan where joints will land, then cut and test-fit before you commit to nails and caulk.
Use a sharp pencil and a steel tape; hook it the same way every time to protect measuring accuracy. Mark stud locations lightly so you don’t waste fasteners.
For long runs, account for out-of-square corners by taking two measurements and splitting the difference, or scribing if needed.
Cut slightly long, then sneak up on the line with a miter saw or sanding block.
Dry-fit each piece, check reveals with a small square, and adjust miters with tiny recuts.
These fitting techniques save material, reduce gaps, and keep your trim looking intentional.
Caulk Seams For Finish
Once the trim fits tight and sits flat, caulk turns the remaining hairline seams into a clean, paint-ready finish. Use paintable acrylic latex caulk for interior work; it’s cheap, sands lightly, and cleans up with water.
Cut the nozzle small, run a steady bead where trim meets wall and at miter joints, and keep pressure even. Tool it immediately with a damp finger or caulk tool, then wipe excess with a wet rag so you don’t build ridges that show later.
Don’t overfill gaps; two thin passes beat one messy one. Let it dry per the tube before primer.
Tight caulk seams stop shadow lines and make finish painting look crisp, even on uneven walls.
Add Easy Storage With Floating Shelves (Stud-Safe)
Even if you don’t have perfect stud spacing or want to avoid opening up drywall, you can add sturdy floating shelves using stud-safe anchors and a simple cleat system.
Start by finding at least one stud, then mark a level line and predrill. Install a 1×2 cleat with screws into the stud plus heavy-duty toggles or strap anchors where studs miss. This gives you hidden mounting options without bulky brackets.
Build the shelf as a hollow box (1x lumber or plywood) that slides over the cleat, then pin it with a few brad nails or underside screws.
Keep weight capacity considerations in mind: anchors vary widely, so match the hardware to your load and wall type.
Paint or edge-band for a clean, built-in look.
Build a Simple Entryway Bench in an Afternoon
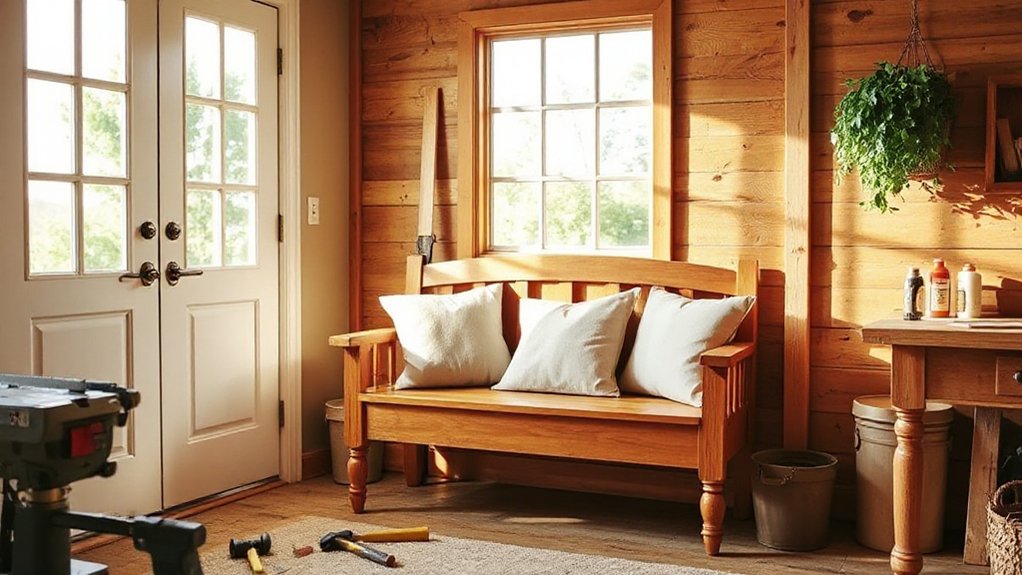
Floating shelves clean up wall clutter, but an entryway bench handles the daily pileup of shoes, bags, and backpacks at floor level. Build one from a 1×12 top and 2×4 legs, and you’ll boost entryway comfort fast.
Cut the top to 42 inches, add two 16-inch stretchers, and screw everything together with 2-1/2-inch construction screws after drilling pilot holes. Use glue at joints to stop wobble.
For a budget finish, sand to 120 grit and roll on water-based poly; it dries quickly and won’t yellow.
Leave a 10-inch under-bench bay for bins or boots. Style it with a small tray for seasonal decor, swapping greenery for pumpkins as weather shifts.
Install a Wall Rail With Hooks (Bags, Coats, Keys)
Because entryway clutter usually lands at eye level and on the floor, a simple wall rail with hooks gives you a dedicated drop zone for coats, bags, and keys without eating up space.
Pick a straight 1×4 or 1×6, sand it smooth, then paint or clear-coat to match trim.
Locate studs, mark a level line, and mount the board with two to three 3-inch screws.
If studs don’t line up, add heavy-duty anchors rated for the load.
Space wall hooks 4 to 6 inches apart: double hooks for backpacks, single hooks for keys.
Keep the bottom of the rail around 60 inches high so coat racks stay reachable and don’t snag shoulders.
Add felt pads behind corners to protect paint.
Quick Door and Drawer Fixes That Feel “New”
If your doors sag or drawers stick, you can make them feel new again with a few low-cost fixes and basic tools. Tighten and align the hinges first.
Then replace worn drawer slides so everything closes smoothly and sits square.
Finish by installing fresh cabinet hardware, and you’ll get a noticeable upgrade without buying new cabinets.
Tighten And Align Hinges
When a door or drawer starts sagging, sticking, or rubbing, loose hinges are usually the cheapest fix you can make in minutes. Grab a screwdriver, open the door, and snug every hinge screw—top hinge first, since it carries most of the weight.
If screws spin, pull one at a time and pack the hole with a toothpick and wood glue, then reinstall; it’s a near-free upgrade. For hinge maintenance, check for bent leaves, cracked knuckles, or missing screws before forcing anything.
For hinge alignment, loosen the screws slightly, shift the hinge leaf until the gap around the door looks even, then retighten while holding position. Test, adjust in tiny moves, and you’ll restore smooth, “new” operation.
Replace Worn Drawer Slides
Even though a sticky drawer often looks like a warped box, worn slides usually cause the grinding, wobble, and halfway-close feel. Pull the drawer out and inspect for bent rails, missing bearings, or oval screw holes. Compare measurements and pick compatible Drawer slide types: side-mount ball-bearing for durability, epoxy roller for budget fixes, or under-mount if you already have the notched drawer bottom and matching clearances.
For cost-smart Replacement procedures, remove the old slides, saving one screw as a size reference. Mark level lines inside the cabinet, then screw the cabinet members first. Attach the drawer members flush and square, using existing holes when possible; otherwise drill pilot holes.
Test-fit, adjust for parallel spacing, and re-tighten so it closes smoothly and fully.
Install Fresh Cabinet Hardware
Smooth slides solve the function, but fresh cabinet hardware upgrades the feel every time you open a door or drawer.
Start by measuring the existing hole spacing (center-to-center) so you can reuse holes and avoid patching. If you’re changing sizes, use a simple drilling template or a scrap-wood jig to keep holes aligned and prevent tear-out.
Choose knobs or pulls that match your budget: boxed multipacks cut costs, while heavier metal feels sturdier.
For hardware installation, remove one piece at a time so doors stay aligned. Hand-start screws, then snug them with a screwdriver—don’t over-torque and strip particleboard.
Add a dab of wood glue in worn holes, let it set, and re-screw for a tight, “new” close.
Frequently Asked Questions
What Permits or HOA Rules Might Apply to Indoor Carpentry Upgrades?
You’ll often need a permit if you change structural framing, add built-ins tied to walls, move electrical for indoor lighting, or coordinate plumbing upgrades behind cabinets.
Your HOA may require approval for visible changes, noise hours, debris disposal, and contractor insurance.
Check your city’s permit portal and your HOA’s architectural guidelines before buying materials.
Budget for inspection fees, plan review time, and any required licensed trades to avoid costly rework.
How Do I Estimate Total Project Cost Before Buying Materials?
Start by listing every component and step, then price each line item. Measure twice, calculate board feet/sheet goods, and add 10–15% waste.
Compare material sourcing options (lumberyard, big-box, reclaimed) and note delivery fees.
Include fasteners, glue, finish, blades, and tool rental.
Build budget planning around labor time you’ll spend, plus a 10% contingency for surprises.
Total it in a spreadsheet before checkout.
What Are Beginner-Safe Ways to Remove Lead Paint Risks in Older Homes?
Treat lead paint like glitter: once it spreads, you’ll find it everywhere—my friend skipped plastic sheeting and vacuumed dust for weeks.
For beginner-safe Lead paint removal, you shouldn’t sand or dry-scrape.
You should test first, then encapsulate with approved coating or cover with new drywall/trim.
You should wet-clean, seal vents, tape plastic, and use a HEPA vac.
Hire an EPA RRP pro for large areas or deteriorated surfaces.
Older home safety wins.
Which Projects Add the Most Resale Value for the Least Effort?
You’ll add the most resale value fast by boosting first impressions: repaint the front door, swap dated hardware, and install bright, consistent lighting.
Inside, update baseboards and trim, add closet shelving, and refresh kitchen pulls and a faucet—small costs, big impact.
Use DIY toolkits for clean installs, and don’t skip safety gear when cutting, sanding, or drilling.
Stick to neutral finishes and fix obvious defects.
How Can I Match New Wood Finishes to Existing Floors and Cabinets?
Want your new trim to look like it’s always belonged? Start by identifying the existing sheen (matte, satin, gloss) and undertone (warm, cool) under neutral light.
For Finish matching, take a cabinet door or floor scrap to a paint store for scanning, then test on offcuts.
Use layered Wood staining (dye, then stain) to dial in color.
Seal with the same topcoat type to prevent mismatch.
Conclusion
Coincidentally, the same few tools you used to caulk trim can also level floating shelves, square up a quick entryway bench, and mount a wall rail where you always drop your keys. You don’t need fancy lumber—use straight 1x boards, budget hooks, and a small tube of paintable caulk. As you tighten loose hinges and adjust drawer slides, everything feels new again. Spend a little, measure twice, and you’ll notice the upgrade daily.

