
You’ll lay or repair patio slabs best with accurate set-out tools: tape measure, string line, square, and a 600–1200 mm spirit level or laser level to hold line and fall. Dig and prep with a spade, shovel, and mattock, then compact using a hand tamper or plate compactor and screed bedding with straightedges. Lift and reset slabs using slab lifters or suction cups, plus pry bars and timber packers. Cut neatly with a diamond grinder or wet saw, and finish joints with pointing tools and PPE—keep going for a tighter, longer-lasting result.
Key Takeaways
- Use tape measures, string lines, squares, and spirit or laser levels to set out accurate lines, falls, and corners.
- Excavate efficiently with trenching spades, shovels, and mattocks, checking for utilities and maintaining planned drainage gradients.
- Create a stable base using a plate compactor or hand tamper, then screed bedding evenly with straightedges, rails, and rakes.
- Lift and reset slabs safely with slab lifters or suction cups, pry bars, timber packers, rubber mallets, and cut-resistant gloves.
- Cut and finish neatly using an angle grinder or wet saw with diamond blades, then point joints with trowels and jointing tools.
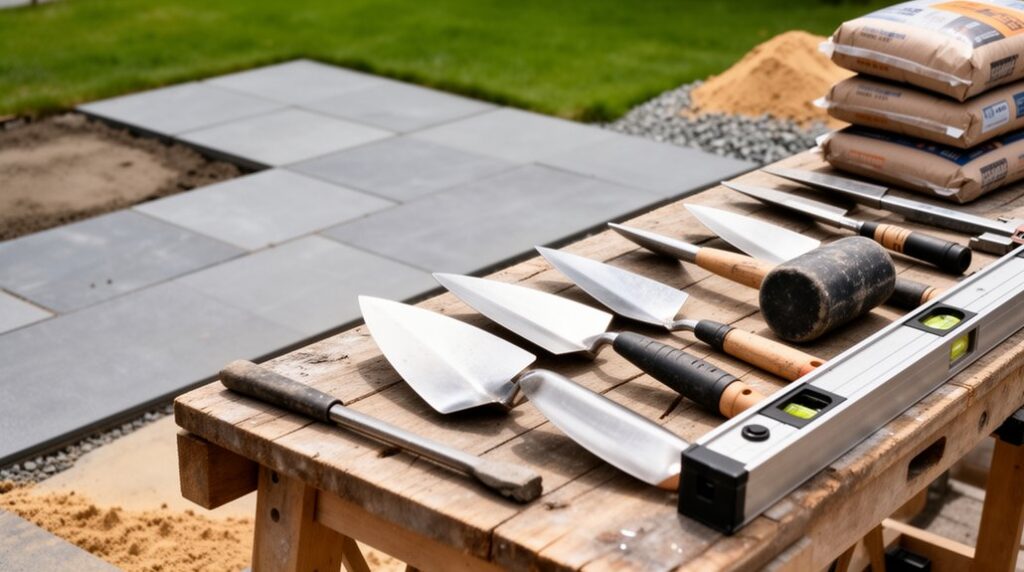
Essential Patio Slab Tools (Must-Haves vs Extras)
Whether you’re laying new patio slabs or repairing a few loose ones, you’ll get better results—and avoid injuries—if you separate must-have tools from nice-to-haves before you start.
Must-haves: PPE (gloves, goggles, ear defenders, dust mask), a lump hammer and cold chisel for lifting, a brick trowel, pointing trowel, and bucket trowel for bedding and joints, a stiff broom, and a rubber mallet to bed slabs without cracking.
Use a spirit level and straightedge for checking flatness, not full set-out.
Keep a hose or sprayer to control dust and clean joints.
Extras: a slab lifter, knee pads, and a mixer drill.
For finishes, add Decorative edging tools and a caulking gun for sealing and sealing products.
Patio Slab Set-Out and Measuring Tools
You can’t lay or repair patio slabs accurately unless you set out the area and verify dimensions before you cut or bed anything.
Use tape measures and rules for consistent checks. Then run string lines off stakes to lock in straight edges and safe working clearances.
Confirm level and squareness with a spirit level and a square so you don’t build in trip hazards or drainage problems.
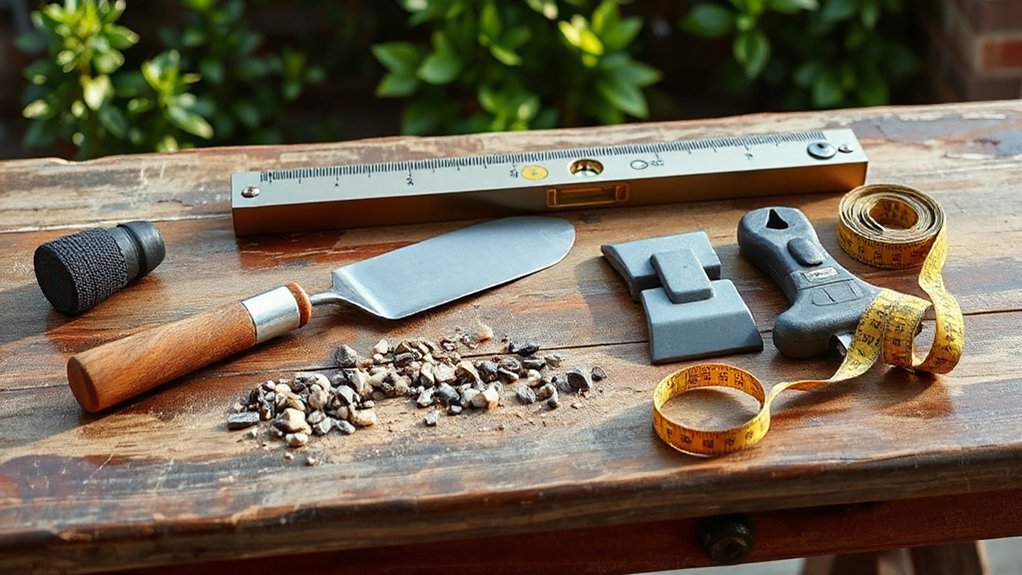
Tape Measures And Rules
Before any slab goes down, accurate set-out and measuring keep joints consistent, falls correct, and cuts to a minimum. Use a quality 5–8 m tape with a sturdy end hook and clear markings; check the hook hasn’t bent, because it ruins measuring accuracy.
Back it up with a 300 mm or 600 mm steel rule for short checks, setting spacers, and confirming saw marks.
Do quick tool calibration: compare your tape and rule against a known straightedge or factory reference, and replace anything worn or kinked.
Keep tapes clean of grit so the blade retracts safely, and lock the blade before you mark to prevent snap-back cuts.
Measure twice, mark with a fine pencil, and record critical dimensions immediately.
String Lines And Stakes
Accurate tape and rule readings only help if you project them onto the site, and that’s where string lines and stakes earn their keep. Set Stakes beyond the dig so you don’t disturb them while excavating and compacting.
Run String lines between profiles or pegs to mark slab edges, fall lines, and joint runs, then pull them taut to remove sag. Use bright, non-stretch builder’s line and tie off with clove hitches so it won’t slip.
Check diagonals along the strings to confirm your set-out is square before you cut or bed anything. Keep lines high enough to avoid trip hazards, and cap exposed stakes or flag them.
Re-check tension after knocks, wind, or rain frequently.
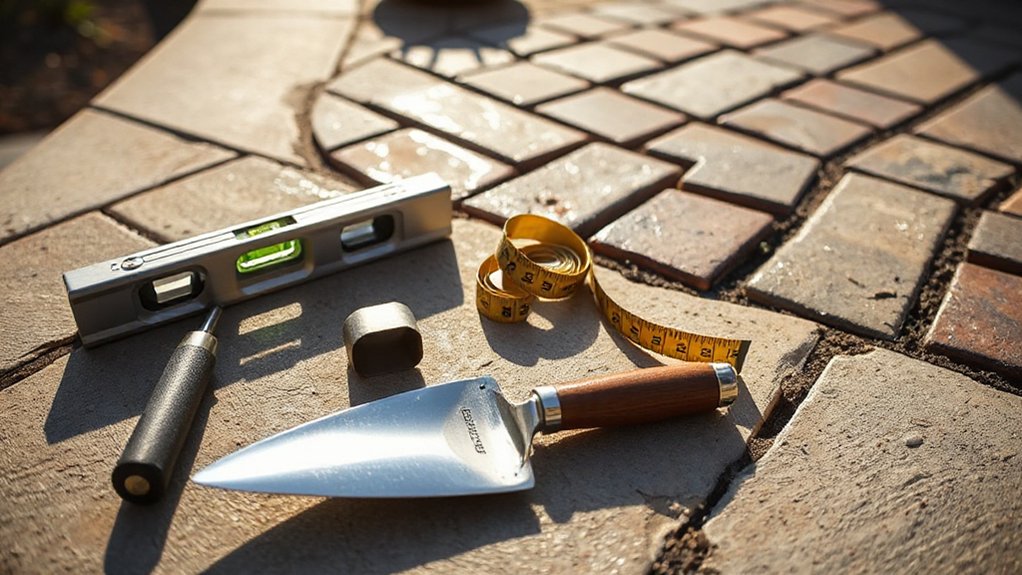
Spirit Levels And Squares
Once your string lines define the slab edges and fall, a good spirit level and a reliable square confirm the set-out matches the real world.
Use a 600–1200 mm level for slabs; longer spans bridge hollows and improve measuring accuracy. Check the sub-base, bedding, and each slab as you tap it down, reading both vials to maintain leveling precision across the surface and along the drainage gradient. Keep the level clean; grit under the edge gives false readings.
Use a builder’s square or speed square to verify corners at 90° and keep joint lines true. Recheck after compacting or cutting.
Wear gloves when handling cut slabs, and don’t trust cracked vials or bent squares—replace them.
Patio Slab Base Prep Tools (Dig, Compact, Bed)
Even if your slabs look fine on top, the base needs the right tools to dig to depth, compact evenly, and place a consistent bedding layer without disturbing your grades.
For soil excavation, use a trenching spade, round-point shovel, and a mattock for roots and hardpan; wear boots and gloves, and locate utilities before you dig.
For drainage planning, keep a string line and tape measure handy so you can confirm dig depth and edge clearances around drains and thresholds.
Compact with a hand tamper for small patches or a vibrating plate compactor for larger runs; make multiple passes and check for soft spots.
Then screed your bedding with straightedges and rails, using a rake and trowel to spread and trim without overworking the sand.
Patio Slab Levelling Tools for the Right Drainage Slope
Because a patio that’s level can still trap water, you’ll need levelling tools that let you set and verify a consistent fall away from the house (typically about 1:80 to 1:40, depending on exposure).
Start with a long spirit level or straightedge plus wedge shims to establish the target drop across each run. Use a laser level or line level on string lines to transfer heights from fixed datum points, then check every slab as you bed it.
For Drainage slope adjustment, pair a digital inclinometer with a measuring tape so you can confirm ratios instead of guessing.
For Water runoff optimization, recheck after tapping slabs down with a rubber mallet—settlement can steal your fall.
Keep hands clear and wear eye protection when striking.
Patio Slab Cutting Tools for Neat Edges
For neat patio slab edges, you’ll rely on an angle grinder when you need precise trimming and a wet saw when you want cleaner cuts with better dust control.
Fit the right diamond blade for the material, check the RPM rating, and use a straightedge guide or cutting jig so the blade tracks true.
You’ll also need eye, hearing, and respiratory protection, plus stable slab support to prevent binding and kickback.
Angle Grinders For Precision
When you need clean, accurate cuts on concrete or stone patio slabs, reach for an angle grinder fitted with a diamond blade. Mark your line with a chalk or grease pencil, clamp the slab, and score a shallow pass before cutting to depth, keeping the guard between you and the wheel. Use two hands, maintain steady RPM, and let the blade do the work to prevent kickback and glazing.
For Decorative edge trimming, switch to a segmented or continuous-rim blade sized for your grinder and work in short, controlled sweeps.
Pair cuts with surface finishing techniques using a diamond cup wheel to ease sharp arrises and blend repaired corners.
Wear eye, hearing, and respiratory protection, and check discs for cracks before every start.
Wet Saws For Cleanliness
Although an angle grinder handles quick trims, you’ll get the cleanest, least dusty patio-slab cuts by switching to a wet saw that feeds water directly onto the diamond blade. Set the saw on level ground, confirm the pump primes, and keep the reservoir topped up so slurry stays controlled.
You’ll reduce airborne silica, but you still need eye protection, hearing protection, and a proper respirator for setup and cleanup. Use a GFCI-protected supply, route the cord away from standing water, and never reach across the cutting path.
Support the slab fully to prevent pinch and kickback, and rinse residue before it hardens. Cleaner edges make outdoor sealing more reliable and help decorative edging sit tight without gaps.
Diamond Blades And Guides
Because the blade and the guide control both accuracy and edge quality, you’ll get neater patio-slab cuts by pairing the right diamond blade with a solid straightedge or track.
Choose Diamond blades rated for concrete or stone, with a continuous rim for smooth edges or a segmented rim for faster, rougher cuts.
Match blade diameter to your saw’s RPM rating, and never exceed it.
Clamp guide rails or a rigid straightedge so the baseplate can’t wander; verify square with a framing square before you cut.
Score a shallow first pass, then deepen gradually to reduce chipping and kickback.
Keep the blade cool with light, steady feed and periodic pauses if you’re dry cutting.
Wear eye, ear, and respirator protection, and control dust.
Patio Slab Repair Tools to Lift, Re-Bed, and Re-Joint
If your patio slabs have sunk, rocked, or opened up at the joints, you’ll need tools that let you lift the slab safely, re-bed it on a stable base, and then re-joint without trapping moisture. Start with slab lifters or twin suction cups, plus pry bars and timber packers, so you don’t crack edges. Wear cut-resistant gloves and eye protection, and keep hands clear of pinch points.
For re-bedding, use a mixing tub, gauge rake, and screeding bar to level sharp sand or mortar. A rubber mallet and spirit level help you reset to falls for drainage—supporting creative design without trip hazards. Finish with a pointing trowel, jointing iron, and a stiff brush to pack weatherproof materials like polymeric sand or flexible jointing compound.
Frequently Asked Questions
Do I Need Planning Permission to Lay or Replace Patio Slabs?
You usually don’t need planning permission to lay or replace patio slabs at home, but check local Permitting requirements if you change levels, add drainage, or work near boundaries, listed buildings, or conservation areas.
You must follow Building regulations for surface water: don’t direct runoff to the highway or neighbors; use permeable paving or a soakaway for areas over 5m² in front gardens.
Confirm with your council before starting.
What’s the Best Weather or Season for Laying Patio Slabs?
Shoot for spring or early autumn: you’ll get mild, stable conditions and predictable curing. Crisp, calm, clear days keep your sub-base solid and your mortar workable.
Seasonal considerations matter—avoid winter frost (it can heave slabs) and mid-summer heat (it can flash-dry mortar).
Watch weather impact: don’t lay on saturated ground or before heavy rain.
You’ll improve bond strength, reduce slip hazards, and prevent cracking.
How Long Should I Wait Before Walking on or Using the New Patio?
You should wait 24–48 hours before light foot traffic, and 7 days before placing furniture.
Wait 14–28 days for full cure and heavy loads, depending on mix, thickness, and weather.
Keep joints protected and don’t hose it down early—moisture can weaken bedding and mortar.
Build patio design around curing time, and start maintenance routines after cure: sweep grit, seal if specified, and re-check joint integrity.
Should I Seal Patio Slabs, and When Is the Right Time?
You should seal patio slabs; it’s like fitting your patio with invisible armor against stains, algae, and freeze–thaw damage.
For Sealing benefits, you’ll cut water absorption, simplify cleaning, and reduce salt scaling.
For sealing timing, wait until the slabs and joints cure fully—typically 28 days for concrete, and 7–14 days for many mortars—then make sure they’re bone-dry.
Wear gloves, ventilate, and test a small area first.
How Do I Prevent Weeds, Ants, or Moss Between Patio Slabs?
Prevent weeds, ants, or moss by keeping joints tight, dry, and filled.
For Weed prevention, rake out debris, then top up polymeric sand or mortar and mist-set it per label.
For Moss control, scrub with a stiff brush and apply a patio-safe biocide; avoid bleach near plants.
Improve drainage and sun exposure where possible.
For ants, disrupt nests with boiling water or bait stations.
Wear gloves, eye protection.
Conclusion
With the right kit, you’ll lay or repair patio slabs faster, flatter, and safer. Use must-haves first: tape, string line, square, shovel, rake, tamper/plate compactor, spirit level, and rubber mallet. Add extras only when they solve a problem—diamond blade cutter for clean edges, lifters for resets, and jointing tools for durable pointing. Check slope with a level and straightedge, wear PPE, and remember: measure twice, cut once.

