
Start by inspecting your door in good light for peeling finish, stains, dents, and loose joints, then choose paint to hide flaws or stain to highlight nice grain. Remove hardware, vacuum edges, and wash with soapy water or a diluted degreaser, then let it dry. Fix sticking by tightening hinges (swap in 3-inch screws) and adjusting the strike plate. Fill dents, sand 120 then 150–180 grit, prime, and finish with durable enamel or sealed stain—next up, pro-level shortcuts.
Key Takeaways
- Inspect doors for peeling finish, stains, dents, and loose joints, then choose paint to hide flaws or stain to highlight grain.
- Remove hardware, vacuum dust, and wash with warm soapy water; degrease with diluted TSP or vinegar solution for stubborn grime.
- Fix sticking by tightening hinges, using 3-inch screws into framing, lubricating hinge pins, and adjusting strike plates for smooth latching.
- Fill dents with spackle or wood filler, then sand repairs 120-grit and blend 150–180 grit; vacuum and tack-cloth before finishing.
- Prime bare or patched areas, then apply durable enamel or stain plus clear coat; update knobs and hinges for an instant facelift.
Inspect Interior Doors and Choose Paint vs Stain
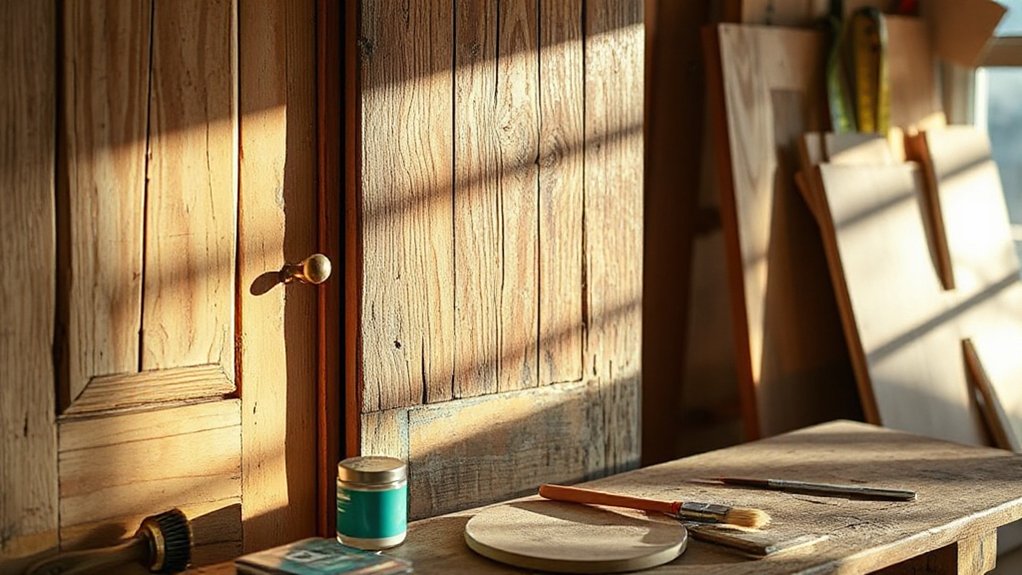
Before you buy a single can of paint, take ten minutes to inspect each door in good light: check for peeling finish, water stains, deep dents, and loose joints, then decide whether paint or stain makes more sense.
If the door is patched, mismatched, or has uneven grain, paint will hide flaws cheaply and let you fix color coordination with trim, walls, and hardware.
If the wood shows attractive grain and the damage is minor, stain costs less in materials and keeps a natural look, but you’ll need to match existing tones across rooms.
For older homes, consider historical accuracy: a flat, period-appropriate paint may suit plain doors, while stain may fit original oak or fir.
Price out primer, topcoat, and replacement knobs before committing.
Clean and Degrease Doors Before Sanding
Once you’ve decided whether you’re painting or staining, start with a thorough clean—sandpaper can’t cut through hand oils, cooking film, or old polish without smearing that grime into the surface. Remove knobs if you can, then vacuum edges and panels to lift dust before you add water.
Use simple cleaning techniques: wipe with warm water plus a drop of dish soap, then rinse with a damp cloth. For stubborn buildup, step up to budget-friendly degreasing solutions like diluted TSP substitute or a 50/50 mix of white vinegar and water.
Work from top to bottom, keep the surface just damp (not dripping), and change rags often so you’re not redistributing grease. Let the door dry fully—at least 30–60 minutes—before sanding.
Fix Sticky Doors: Hinges, Latch, and Rub Spots
If your door sticks, track down the exact contact point first so you don’t waste time sanding the wrong area. Close it slowly and watch the reveal; mark rub spots with painter’s tape or a pencil.
If the door drags at the hinge side, tighten loose hinge screws, then swap one short screw per hinge for a 3-inch screw to bite framing and pull the jamb straight.
For door squeaks, start with hinge lubrication: remove a hinge pin, wipe it clean, add a drop of light oil or silicone, and reinstall.
If the latch binds, tighten the strike plate, then shift it by loosening screws and nudging it, or file the opening slightly.
Check weather changes too.
Patch Dents and Sand Doors Smooth

After you’ve fixed sticking hinges and a fussy latch, tackle the dents, dings, and rough paint that make an interior door look worn. Lay the door flat or brace it open, then wipe it clean so fillers bond well.
For small dents, press in lightweight spackle with a putty knife; for deeper gouges, use wood filler in thin layers, letting each layer firm up. Keep filler tight to the door design, especially around panels and decorative accents, so you don’t blur crisp edges.
Once it’s dry, sand flush: start with 120-grit on repairs, then blend with 150–180-grit over the face. Use a sanding block on flats and a folded sheet on profiles. Vacuum dust, then tack-cloth lightly.
Paint or Stain Interior Doors (Primer, Sheen, Cure Time)
Before you crack open a can of paint or stain, pick a finish plan that matches the door’s condition and how hard it’ll get used: prime patched or bare spots with a bonding primer (or stain-blocking primer for knots and old tannins), then topcoat with a durable enamel in satin or semi-gloss so it cleans easily without highlighting every flaw like high-gloss does.
For color matching, box your paint (mix cans together) and keep a wet edge to avoid lap marks. Roll with a foam roller, then tip off with a quality brush; it’s faster and wastes less paint.
If you stain, use conditioner on softwoods, wipe evenly, and seal with water-based poly in satin. Don’t rush cure time: handle lightly after 24 hours, but wait 7–14 days for full finish durability.
Update Interior Door Hardware: Knobs, Hinges, Strike Plates
Even when the door itself still looks fine, swapping tired knobs, hinges, and strike plates can make it feel newer and work better for less than a can of paint.
Start by checking backset and latch style so the new knob fits the existing bore holes.
If you want Decorative hardware, match the finish to nearby fixtures, but prioritize durability: satin nickel and brushed bronze hide fingerprints.
Replace bent hinges or upgrade to ball-bearing hinges for heavy doors; reuse existing screw holes, or fill stripped ones with wood glue and toothpicks.
For Material compatibility, don’t mix aluminum with steel in damp areas where corrosion can start.
Finally, align the strike plate: mark rub spots, chisel shallowly, and tighten screws into the stud for a crisp latch.
Frequently Asked Questions
How Do I Soundproof an Interior Door Without Replacing It?
You can soundproof an interior door by sealing gaps and adding mass. Install weatherstripping on the jamb, plus a door sweep to block the bottom gap.
Apply Door insulation: stick-on acoustic foam or mass-loaded vinyl to the door’s interior side, then cover with a thin panel or fabric for looks.
Use Soundproofing techniques like sealing the frame with acoustic caulk and adding heavy curtains nearby to reduce reflections.
Can I Add Decorative Molding to Create a Paneled Door Look?
Yes, you can add decorative molding to mimic a paneled door. Plan, prep, and measure meticulously: mark a grid with a level, then cut thin MDF or pine strips.
Dry-fit first, then glue with construction adhesive and pin with brads.
Fill nail holes, caulk seams, and sand smooth before priming and painting.
Keep costs low by using pre-primed trim and a miter box instead of a saw.
What’s the Best Way to Fix a Hollow-Core Door Hole?
Patch it with expanding foam and a thin surface filler. You’ll trim loose fibers, tape a backing inside the hole, then inject low-expansion foam and let it cure.
Cut it flush, skim with lightweight spackle or Bondo, sand smooth, then prime and do a careful paint touch up.
If the damage sits by hardware, handle door hinge repair too: tighten screws, add longer ones, and re-drill as needed.
How Can I Make a Door More Pet-Resistant to Scratches?
Make your door more pet-resistant by adding a kick plate and upgrading the lower section with Scratch resistant panels (PVC or hardboard).
Sand, prime, then roll on Pet proof paint in a semi-gloss for easier wipe-downs.
Protect corners with metal edge guards, and apply a clear polyurethane topcoat for extra hardness.
Keep nails trimmed and add a nearby scratching post to redirect habits.
This combo stays tough and affordable.
When Should I Replace a Door Instead of Refinishing It?
Replace the door when it’s so warped it looks like a potato chip and won’t latch no matter what you do.
If the core’s swollen, rotted, delaminated, or cracked through, refinishing won’t last.
Replace if the door frame is twisted or you’ve got repeated hinge repair that can’t hold screws.
Also swap it when patching, planing, and hardware costs approach a new slab’s price.
Conclusion
You don’t need to replace every tired door to make your rooms feel updated—even if they’re scuffed, sticky, or dated. A quick inspection helps you choose paint or stain, and a proper clean, patch, and sand keeps the finish from failing. Tighten hinges, adjust the latch, and shave rub spots before you coat. Let primer and paint cure fully. Finish on a budget with new knobs, hinges, and strike plates for a crisp, solid close.