Start by defining clear outdoor zones (dining, lounging, play, garden) and set measurable goals so you don’t overbuild. Sketch how you actually move through the yard, then turn “desire paths” into pavers or stepping stones and keep sightlines purposeful. Match shapes to your home’s style and repeat a tight palette of colors, textures, and edging for unity. Handle slopes with consistent steps, low walls, and drainage. Soften edges with groundcovers and add low-voltage lighting—next, you’ll see how to pull it all together.
Key Takeaways
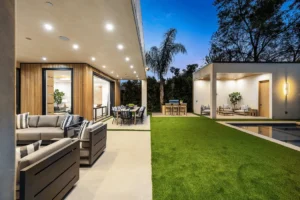
- Plan distinct outdoor zones and desire-path circulation first, aligning surfaces and lighting with each area’s function and traffic.
- Match hardscape style to your home and repeat a tight palette of colors and textures across patios, paths, borders, and walls.
- Choose climate-appropriate materials with good traction and durability, balancing premium accents with cost-effective basics for larger areas.
- Integrate grading, swales, and drainage behind walls to manage runoff, prevent pooling, and keep hardscape stable over time.
- Use consistent edging and layered planting beds to soften hard lines, contain mulch or gravel, and visually tie separate zones together.
Define Your Outdoor Zones and Goals
Before you buy furniture or start planting, map out how you actually want to use your yard. List your top three activities—dining, lounging, grilling, kids’ play, gardening—and assign each a simple zone. Keep zones tight to reduce hardscape costs: a small patio for meals, a compact pad for a fire pit, and a defined bed for herbs.
Set measurable goals, like seating for six or storage for tools, so you don’t overspend. Choose surfaces that match use: pavers for high-traffic areas, gravel for low-cost secondary spots.
Plan outdoor lighting early to avoid rewiring later; mark outlets and fixture locations. Lock in plant placement last, aligning shade, privacy, and maintenance needs.
Map Circulation, Views, and “Desire Paths
Walk your yard like you’re heading to the grill, the shed, and the gate, then sketch the routes you naturally take so you can place paths where they’ll actually get used.
Stand at key spots—patio chair, kitchen window, entry—and mark what you want to see first and what you’d rather screen out.
Line up those sightlines with clear destinations, and you’ll avoid wasted paving, reduce trampling, and make every step feel intentional.
Chart Movement And Flow
Where do people naturally enter, pause, and cut across your yard? Watch a normal day, then sketch a quick map of real footsteps, not ideal ones. Mark doors, gates, driveway drops, and where guests drift toward shade, grills, or kids’ zones. Those lines become your primary routes, so keep them direct and wide enough for two people (about 4 feet) to prevent worn turf and awkward detours.
Choose pathway materials that match traffic and budget: compacted gravel with edging for low cost, concrete pavers for durability, or salvaged brick for character. Place seating arrangements where people already stop—near passages, corners, or a mid-path rest point—so circulation stays clear and furniture doesn’t pinch the walk.
Align Sightlines And Destinations
Even if you don’t change a single plant, you can make the yard feel more intentional by lining up what you see with where you’re meant to go. Stand at key entries (door, gate, driveway) and note the first focal point; make it a destination like a bench, boulder, water bowl, or grill pad.
Then map your desire paths: where you already cut corners, stop, and turn. Convert those lines into hardscape with pavers, decomposed granite, or stepping stones to save money and reduce wear on turf. Keep sightlines straight when you want speed, and bend them when you want pause and privacy.
Use landscape symbolism and cultural influences—like a lantern, courtyard axis, or threshold stone—to cue arrival without extra planting.
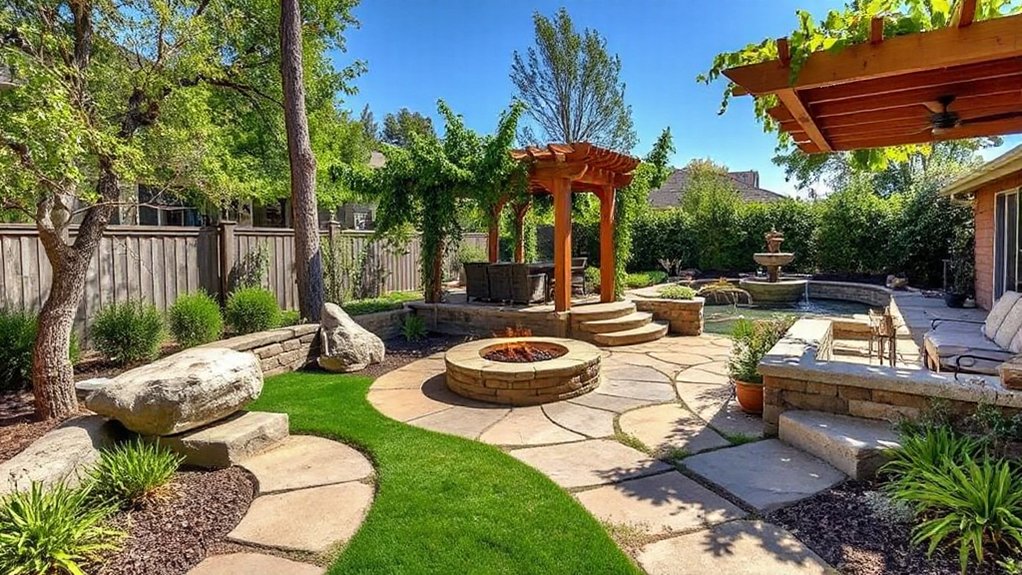
Match the Hardscape Look to Your Home
Although you can mix styles outdoors, your hardscape looks best—and costs less to redo later—when it clearly matches your home’s architecture and finishes. Start by identifying your home’s dominant cues: roofline, trim profile, window grids, and exterior texture. Then mirror those cues in your layout: clean rectangles suit modern homes, while gentle curves and framed borders fit traditional or cottage styles.
Use Color coordination to tie everything together without extra spending. Pull two or three tones already on the house—siding, brick, trim, or shutters—and repeat them in edging, gravel accents, or joint sand. When you shop Hardscape materials, bring paint chips and a photo in daylight so you don’t overbuy mismatched pieces. Keep details consistent; too many patterns read messy.
Choose Coordinated Materials (Cost + Durability)
Before you fall in love with a paver style, line up materials that share the same “family” of color and texture while fitting your climate and budget. Smart material selection starts with performance: choose freeze-thaw rated pavers in cold regions, salt-resistant surfaces near pools, and slip-resistant finishes on steps and landings.
For retaining walls, prioritize engineered blocks with proper caps and geogrid compatibility, not bargain masonry.
Balance cost considerations by mixing tiers: use premium stone where you see and touch it most, and select durable concrete pavers for larger runs. Compare lifecycle costs, not just price per square foot—base prep, edging, drainage, and sealing often outweigh the surface material.
Ask for warranty terms and ASTM ratings before you buy.
Align Colors, Texture, and Pattern for Unity
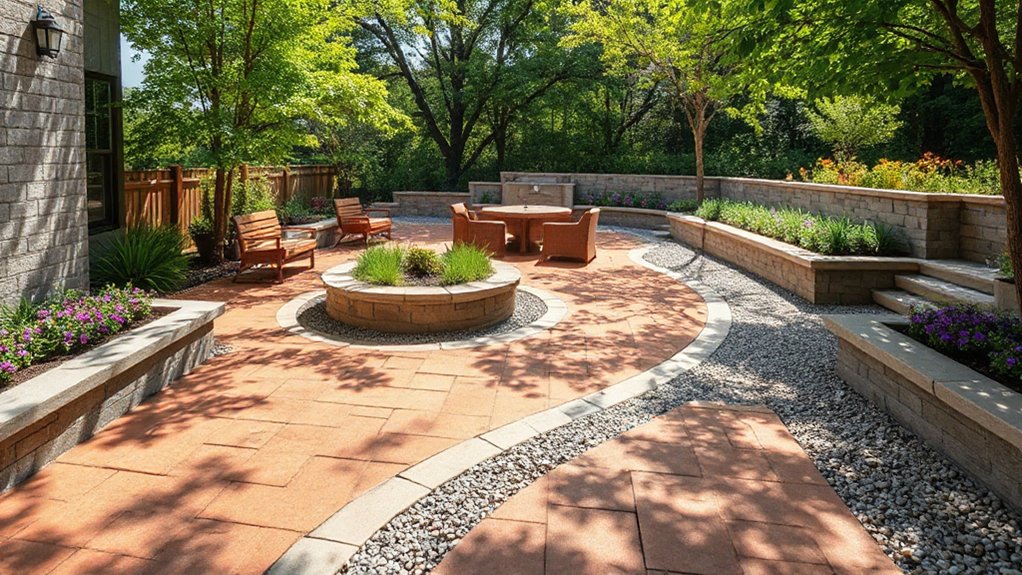
Once you’ve picked materials that can handle your climate and your budget, make them read as one plan by aligning color, texture, and pattern. Start with a tight palette: repeat one dominant tone across paving, wall caps, and edging, then add one accent for interest. That Color harmony keeps mixed price points from looking pieced together.
Use Textural contrast on purpose. Pair smooth pavers with a rough stone band, or mix tumbled and sawn finishes, but limit it to two textures per zone so it stays calm. Match joint color to the paver for a seamless look, or choose a darker grout to outline geometry.
Finally, repeat patterns: run the same bond, border width, or module size on patios and paths to unify cuts and reduce waste.
Handle Slopes With Steps, Walls, and Drainage
On sloped ground, you’ll get a cleaner, safer layout by setting step runs and rises consistently and adding solid edge support where you need it.
You can stabilize the grade with a properly sized retaining wall that matches your budget, whether that’s stacked block, timber, or stone.
You’ll also protect your investment by shaping simple drainage paths and swales that move water away from steps, walls, and patios instead of letting it erode the slope.
Step Layout And Safety
Although a sloped yard can make an outdoor space feel awkward and risky, you can turn it into a safe, easy-to-use layout by adding properly sized steps, low retaining walls, and simple drainage that moves water away from walking paths.
Keep risers consistent (about 6–7 inches) and treads deep enough (11–14 inches) so your stride stays natural. Add a handrail on longer runs, and choose textured pavers to prevent slips.
Set steps where you already walk, then land them on small, level pads for garden furniture and a spot for outdoor art. Use gravel or perforated pipe behind edges to route runoff to a dry well, not across stairs.
Install inexpensive step lights or solar markers to guide night traffic.
Retaining Walls For Stability
Why do retaining walls make a sloped yard feel instantly more stable? They stop soil creep and let you terrace the grade into usable, level zones for seating, planting, or steps.
Start by choosing wall type by height: small timber or modular block works for low runs, while taller walls often need engineered block or poured concrete.
Build for soil reinforcement, not looks. Excavate to firm subgrade, set a compacted gravel base, and keep courses level. Use geogrid where recommended, and backfill in compacted lifts to prevent bulging.
Add a gravel zone and perforated drainpipe behind the wall to reduce pressure; you’ll boost erosion control and extend wall life. Compare materials locally to cut freight costs.
Drainage Paths And Swales
Because gravity will always send water downhill, you’ll get a more durable sloped yard when you give runoff a planned route with drainage paths and shallow swales instead of letting it carve its own.
Map where puddles form, then grade a gentle, grass-lined swale (1–3% slope) to a safe outlet like a street drain, dry well, or rain garden.
Keep paths stable by crowning them slightly and tying them into steps or low walls. Use permeable pavements for walkways so water soaks through instead of rushing along edges.
Add a gravel trench or perforated pipe only where soil stays saturated.
For rainwater harvesting, direct swales to a barrel-fed basin that overflows to the next catchment.
Edge with stone to prevent erosion and reduce maintenance.
Soften Hard Edges With Plants and Groundcovers
When hardscape lines feel too sharp, you can soften them fast and affordably with plants and low groundcovers. Start by carving shallow flower beds along patios, walks, and retaining walls so greenery overlaps the edge by a few inches. Choose tough, spreading options like creeping thyme, sedum, or ajuga for sunny spots, and sweet woodruff or liriope for shade.
Plan shrub placement to break up long, straight runs: set small shrubs in staggered groups, not a single row, and keep mature widths in mind to avoid constant trimming.
Use mulch to unify beds and cut watering needs, then add a few perennials for seasonal color. Buy small starts or divide plants to save money.
Finish With Edging and Hardscape-Focused Lighting
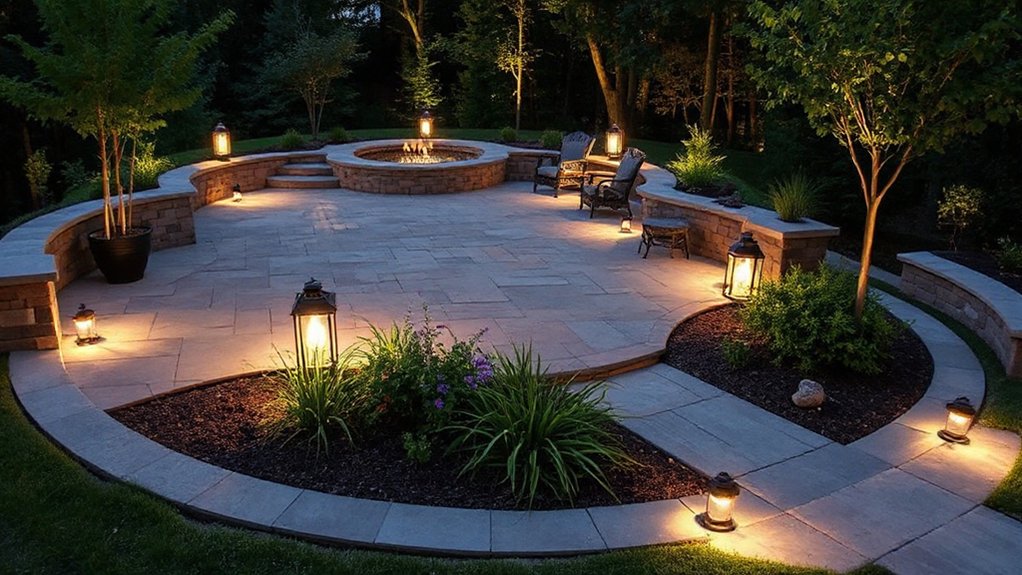
After you’ve softened the lines with plants, lock in that clean, finished look with simple edging and a few well-placed lights. Choose edging that matches your hardscape: steel for crisp modern patios, brick for traditional paths, or concrete pavers for a seamless border. Set edging 1–2 inches above grade to hold mulch and keep gravel from creeping onto walks.
For tight budgets, use spade-cut trench edging, but refresh it each season.
Next, add Hardscape lighting to highlight steps, corners, and changes in elevation. Install low-voltage path lights 6–8 feet apart, or use compact wall lights under caps on seat walls. Aim beams across texture, not straight up, to avoid glare and stretch fewer fixtures further.
These Edging styles unify zones.
Frequently Asked Questions
Do I Need Permits or HOA Approval for Patios, Walls, or Walkways?
Yes—you often need permits and/or HOA approval, depending on your project and location. Check local Permitting requirements for patios, retaining walls (especially over 3–4 feet), drainage changes, and walkways tied to public sidewalks.
If you’re in an HOA, get HOA approval in writing before you buy materials or hire a contractor. To save money, submit a clear site plan and specs once, avoiding costly redesigns.
Also ask about inspections and fees upfront.
What Is the Best Season to Install Hardscaping in My Climate?
You’ll get the best results installing hardscaping in early fall or late spring: mild days, workable soil, fewer weather delays. Heat bakes base material, while freeze-thaw cracks fresh work—two extremes, one headache.
With climate considerations, schedule around your area’s first frost and wet season, and order materials early to lock pricing.
Pair construction with seasonal planting afterward so new beds don’t get trampled.
How Do I Estimate My Hardscaping Budget and Labor Costs?
Start by measuring square footage, then price materials per unit and add 10–15% waste for cuts and breakage.
Your material selection drives costs: pavers and natural stone run higher than concrete.
For budget planning, list base prep, edging, drainage, delivery, and rentals.
Labor often equals 50–100% of materials, more for curves, stairs, or excavation.
Get 3 bids, compare inclusions, and set aside a 10% contingency.
Should I Hire a Designer, Landscape Architect, or Hardscape Contractor?
You should hire a hardscape contractor for straightforward installs, a designer for layout and Design style, and a landscape architect when grading, drainage, permits, or structural walls matter.
To stay budget-conscious, start with a paid consultation and a simple concept plan, then bid it out.
Ask who handles Material selection, sourcing, and substitutions.
Verify licensing, insurance, and references, and request line-item quotes so you control scope and costs.
How Do I Maintain Pavers and Stone to Prevent Weeds and Stains?
An ounce of prevention is worth a pound of cure. You’ll maintain pavers and stone by sweeping weekly, rinsing debris, and topping joints with polymeric sand for Weed prevention.
You shouldn’t use pressure washers too close; they’ll blast out joint sand.
Seal porous stone every 2–3 years to block spills.
For stain removal, blot fast, use a pH-neutral cleaner, and spot-test.
Pull weeds early, then re-sand gaps.
Conclusion
When you tie your zones, paths, and materials together, your yard stops feeling pieced‑together and starts working like an outdoor room. Keep slopes safe with steps, walls, and drainage so water doesn’t undo your budget. Then soften edges with plants and finish with crisp edging and low‑glare lighting. A well‑planned layout can cut walking distance by up to 30%, so every trip feels smoother—like paths snapping into place.