Start by mapping your traffic flow so you’ve got a 36-inch clear path, then zone the space: daily grab-and-go items by the door, wet gear at the threshold, and kid-height hooks where little hands can reach. Choose closed storage like deep drawers, lidded baskets, and pull-out trays to hide clutter fast. Add a bench with cubbies, a slim key ledge, and a charging spot. Finish with slip-resistant flooring, mid-tone grout, and layered 2700–3000K lighting—next up, the easy upgrades that make it feel custom.
Key Takeaways
- Map traffic flow with a 36-inch clear path, zoning daily-drop items by frequency to prevent bottlenecks and visual chaos.
- Add a cohesive landing zone—bench, hooks, and tray—so shoes, bags, keys, and mail have an immediate, tidy home.
- Choose closed or hidden storage like deep drawers, lidded baskets, and pull-out trays to keep clutter out of sight.
- Upgrade flooring to waterproof, slip-resistant tile or LVP with stain-proof grout and low-profile mats for easy cleanup.
- Layer warm, high-CRI lighting with dimmers, motion sensors, and matching finishes to make the entry feel polished and intentional.
Map Your Mudroom Zones and Traffic Flow
Before you buy a single hook or bench, map how you actually move through the mudroom—because the best-looking setups still fail if they bottleneck at the door. Stand at the entry, then walk your real routine: shoes off, bag down, keys out, dog leash grabbed. Mark pinch points with painter’s tape and keep a 36-inch clear path for two-way passing.
Next, assign zones by frequency. Put daily-drop items closest to the door, wet gear near the threshold, and kid-height landing spots where they naturally stop. Use traffic pattern design to place seating parallel to the flow, not across it.
For trend-savvy entryway organization, plan wall space for a mirror and slim sconce, and leave one “breathing” section for calm.
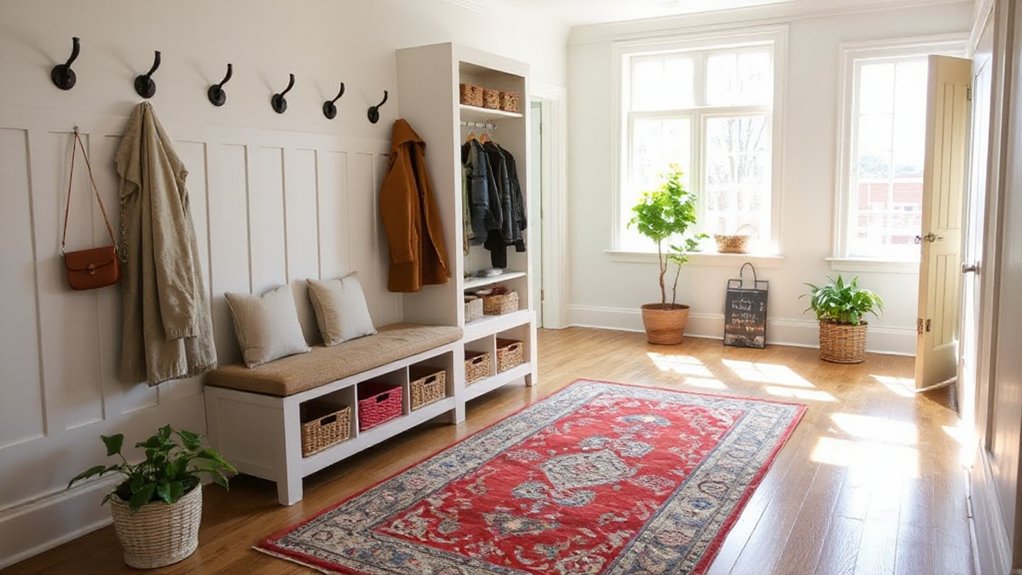
Choose Mudroom Storage That Hides Clutter
Where does your clutter actually go when you walk in—on the floor, on the bench, or straight into view? Choose storage that closes, slides, or tucks away so the entry reads calm and intentional.
Prioritize deep drawers or doors with adjustable shelves to swallow bulky items without visual noise. Add Hidden compartments in a lift-top cabinet or a shallow toe-kick drawer for keys, pet gear, and spare chargers.
Use pull-out trays inside lower cabinets to corral muddy accessories and keep cleanup easy. Mix in decorative baskets on upper shelves for soft, flexible storage; pick lidded styles to conceal mismatched pieces.
Keep finishes cohesive—matte fronts, slim pulls, and matching labels—so even packed storage looks polished daily.
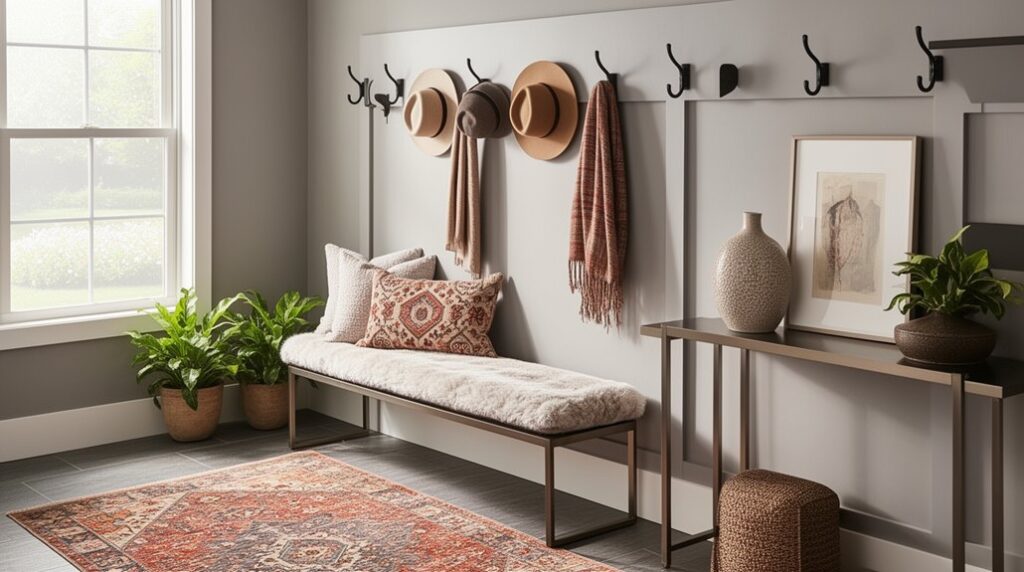
Add Mudroom Hooks, Benches, and Drop Spots
Even if your mudroom is tight on square footage, you can make it feel custom by building a simple “landing zone” with hooks, a bench, and a dedicated drop spot. Mount Decorative hooks in a clean grid, spacing them 6–8 inches apart, so coats don’t overlap and bags hang straight. Stagger kid-height and adult-height rows to keep traffic moving.
Add Stylish benches with hidden storage or open cubbies below, and size the seat 17–19 inches high for easy shoe changes.
Anchor everything with a slim ledge or tray for keys, mail, and sunglasses, plus a small bowl for earbuds and coins. If you’ve got outlets nearby, tuck in a charging shelf so devices never wander.
Finish with matching hardware for a polished look.
Pick Mudroom Flooring That Handles Wet Boots
You’ll want mudroom flooring that’s truly waterproof and tough enough to take daily grit, salt, and soggy boots without warping or scratching.
Choose a slip-resistant finish—think matte or textured surfaces—so you don’t skate across puddles on busy mornings.
If you’re using tile, pick a stain-proof, easy-clean grout (like epoxy or a high-performance sealable option) to keep the whole entry looking sharp with minimal upkeep.
Waterproof, Durable Materials
Because mudrooms take the brunt of wet boots, dripping umbrellas, and muddy paws, your flooring has to do more than look good—it has to shrug off water and abrasion without warping or staining.
Choose porcelain or ceramic tile for true waterproof performance and a crisp, modern look that pairs with matte black hardware.
Prefer a warmer feel? Go with luxury vinyl tile or plank; it resists swelling, hides grit, and installs fast over many subfloors.
For a seamless, design-forward option, sealed concrete delivers industrial polish and easy cleanup.
Whichever you pick, prioritize Weatherproof finishes at seams and edges, and specify Impact resistant surfaces that won’t chip under dropped keys, sports gear, or boot heels.
Match durability with style.
Slip-Resistant Surface Finishes
Durable, waterproof flooring still has to keep you steady when wet boots track in rain and snow. Choose tile, LVP, or sealed concrete with a higher slip rating, and prioritize matte over glossy surfaces that get slick fast. Look for textured finishes—subtle embossing on vinyl, honed stone, or broom-finished concrete—so the floor grips without feeling rough underfoot.
For extra insurance, add non slip coatings designed for entry zones; they’re nearly invisible, UV-stable, and won’t yellow in daylight. If you’re renovating, consider micro-texture porcelain that mimics limestone or oak, a current favorite for clean, modern mudrooms.
Keep progressions flush at door thresholds to prevent skids, and place a low-profile, rubber-backed mat to catch runoff.
Easy-Clean Grout Choices
When wet boots and gritty slush hit your tile floor, the grout lines usually fail first—staining, darkening, and trapping grime. Choose epoxy or urethane grout for a true stain resistant grout upgrade; they don’t need sealing and they shrug off salt, mud, and detergents.
If you prefer cement grout, pick a high-performance, polymer-modified version plus a penetrating sealer, and re-seal on schedule.
Dial in grout color options to hide wear: mid-tone warm gray masks grit better than bright white, while charcoal looks sleek with concrete-look porcelain. Match grout to tile for a seamless, modern field, or go one shade darker to outline patterns without looking dirty.
Keep joints narrow, and you’ll clean faster.
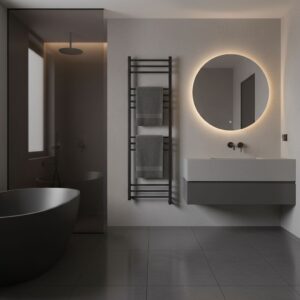
Use Mudroom Lighting to Brighten Dark Corners
Even if your mudroom has great storage, dim corners can make it feel cramped and chaotic, so lighting needs to do more than “look nice.” Start by layering sources: a flush-mount or semi-flush ceiling fixture for overall brightness, targeted wall sconces or a slim picture light above hooks and cubbies for task lighting, and an LED strip under a bench or shelf to eliminate shadows where you actually drop bags and shoes.
Then dial in control. Put the ceiling fixture on a dimmer so ambient lighting stays bright for morning rushes but soft at night. Choose 2700–3000K LEDs for a warm, clean look, and aim for high CRI (90+) so colors don’t look muddy.
Add a motion sensor for hands-full arrivals, and angle sconces downward for true task illumination without glare.
Make the Mudroom Look Intentional With Finishes
Good lighting shows everything—so if your finishes feel mismatched, the mudroom can still read as an afterthought. Pick one core palette and repeat it: warm oak with brushed brass, or matte black with pale wood and crisp white. Then unify every surface. Match trim paint to built-ins, and use the same sheen (often satin) on doors, panels, and baseboards for a seamless look.
Upgrade hardware so hooks, pulls, and hinges share a finish and scale. Add a durable wall treatment—beadboard, shiplap, or a washable eggshell paint—at consistent height to visually “wrap” the space.
Finish with tight finishing details: aligned reveal gaps, clean caulk lines, and sharp corners. Keep decorative accents minimal but intentional.
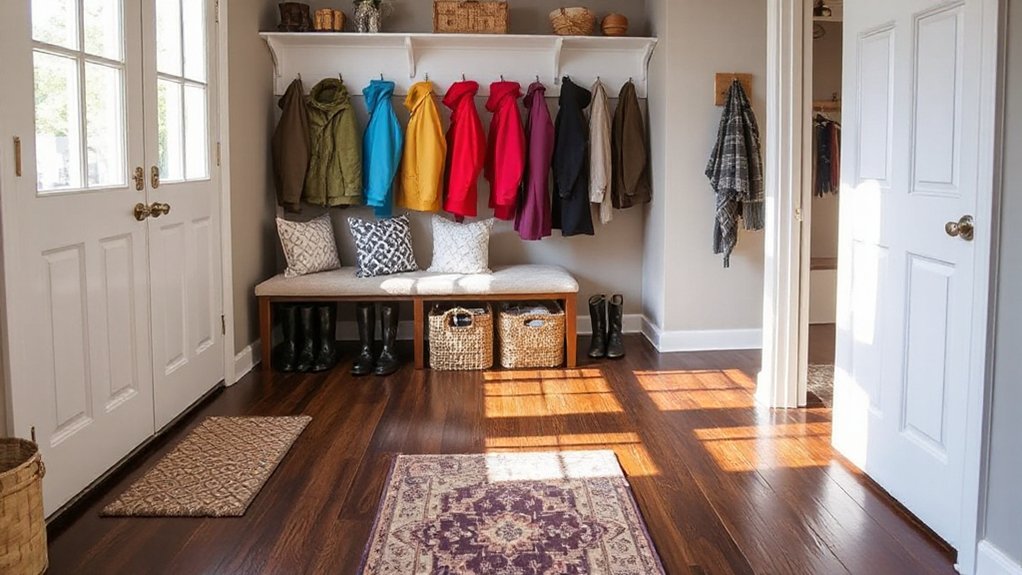
Style Your Mudroom Without Adding Maintenance

Because a mudroom sees every muddy boot and dripping umbrella, you’ll get the most style by choosing upgrades that don’t create extra chores: swap in wipeable performance textiles, add a patterned indoor/outdoor runner that hides grit, and rely on closed storage (baskets with lids, pull-out bins) to keep visual clutter off your sightlines.
Keep color coordination tight: repeat one wall color in hooks, bins, and a bench cushion, then add a single contrasting tone in a durable runner stripe. Choose matte, fingerprint-resistant hardware and a washable semi-gloss on trim so scuffs disappear fast.
For decorative accents, use a framed, glass-front print, a lidded ceramic catchall for keys, and a small, hardy plant in a waterproof tray. Install a drip pan under umbrellas and a boot tray with raised ribs so cleanup stays quick.
Frequently Asked Questions
What’s the Average Cost to Remodel a Mudroom on a Budget?
You’ll typically spend $1,500–$5,000 to remodel a mudroom on a budget, depending on storage and finishes.
Keep costs down with budget friendly upgrades like paint, hooks, and durable vinyl flooring.
Add flat-pack cubbies or a bench instead of custom built-ins.
Use DIY renovation tips: reuse existing cabinets, swap hardware, and install peel-and-stick tile.
Plan lighting and washable mats for a modern look.
Do I Need a Permit to Add Built-In Mudroom Cabinets?
Sometimes, like Pandora’s box, one small change can release big consequences—so yes, you might need a permit for built-in mudroom cabinets.
If you’re altering walls, adding electrical outlets, moving plumbing, or affecting egress, building codes usually trigger the permit process.
If you’re just anchoring prefabricated units to studs, you often won’t.
Call your local building department, share a sketch, and confirm load, fastening, and spacing rules.
How Can I Make a Tiny Mudroom Feel Larger Without Renovations?
You can make a tiny mudroom feel larger by keeping the floor clear and the palette light. Choose cohesive color schemes—soft neutrals or pale grays—and match baskets and hooks for a streamlined look.
Add a tall mirror to bounce light, and use slim, wall-mounted storage instead of bulky benches.
Upgrade entryway decor with one vertical artwork piece and a narrow runner to visually stretch the space for you.
What Are Kid-Friendly Mudroom Organization Rules That Actually Stick?
Set three non-negotiable rules: one item, one home; drop-zone only; reset nightly.
You’ll make it stick by labeling Kids’ storage with pictures, not words, and matching each kid to one color-coded bin and one hook at their height.
Keep shoes in a low tray, backpacks in open cubes, and add a two-minute timer.
Use Entryway decor like a simple checklist board that looks cool, not kiddy.
How Do I Prevent Mudroom Odors From Wet Coats and Sports Gear?
You’ll prevent mudroom odors by drying everything fast and keeping air moving.
For Odor prevention, hang coats on spaced hooks, use a drip tray, and stash charcoal or baking-soda sachets in cubbies. Add a boot dryer or place gear on a slatted rack so moisture can escape.
For Ventilation solutions, run a quiet exhaust fan, crack a window, or use a slim dehumidifier daily.
Conclusion
When you map zones, hide clutter, and add hooks, benches, and a quick drop spot, your mudroom starts working like a mini command center. Choose durable, wipeable flooring for wet boots, then layer in bright lighting to eliminate shadowy corners. Finish with cohesive paint, hardware, and baskets so it looks designed, not improvised. Keep styling low-maintenance—think one plant and a tray. You’ll hit the ground running every day.