First, check for moisture damage: press near grout lines for softness, look for staining, musty odors, crumbling grout, or tiles sitting high; fix leaks before you proceed. If the substrate is firm and dry, remove the loose tile with PPE, scrape off all old thinset, vacuum grit, and dry-fit for alignment. Spread fresh thinset (or mastic where appropriate), back-butter if needed, set flush with spacers, then regrout, seal, and let it cure undisturbed to prevent failure. Keep going to learn the telltale signs and pro prep steps.
Key Takeaways
- Identify the cause first: water damage, substrate movement, or adhesive failure; fix moisture or structural issues before resetting tiles.
- Test tiles by tapping and pressing grout lines; hollow sounds or rocking suggest bond failure, while softness or musty odors indicate water damage.
- Remove loose tiles safely, then scrape all old thinset/mastic and grout from tile backs and the substrate for a clean bonding surface.
- Confirm the substrate is solid, dry, and properly fastened; patch damaged backerboard/drywall and dry-fit tiles to match alignment and spacing.
- Reset with correct thinset and trowel, clean joints, grout after curing, then seal cement grout and keep the area dry until fully cured.
Common Reasons Tiles Come Loose in Bathrooms
Because bathrooms stay wet and see constant temperature swings, tiles can come loose when the materials beneath them fail or shift. You’ll often find the cause in poor thinset coverage, skipped back-buttering, or setting tile over dusty, damp, or flexible surfaces.
Movement from undersized joists, deflecting subfloors, or wall studs that aren’t rigid can shear the bond and crack joints. If installers rush curing time, use the wrong trowel size, or mix mortar too wet, adhesion drops fast.
Failed caulk at corners also lets movement stress the field. Changes in tile pattern can hide lippage until a tile rocks, and dark grout color can mask early hairline cracks.
Wear gloves and eye protection.
Can You Fix Loose Tiles or Is It Water Damage?
Before you reattach a loose tile, you’ve got to check for water damage—look for soft or swollen drywall, crumbling grout, musty smells, staining, or persistent dampness.
If the substrate feels solid and dry and only the tile or adhesive failed, you can usually repair it safely with proper PPE and ventilation.
If you find spongy backing, mold, or widespread movement, stop and address the moisture source first because a patch won’t hold and it can worsen hidden damage.
Signs Of Water Damage
How can you tell if a loose tile is just an adhesive failure—or a warning sign of water damage underneath? Start by pressing near grout lines: if the tile “squishes,” rocks, or you hear a dull thud, the substrate may be softened.
Watch for darkened grout, powdery joints, persistent mildew odor, or tiles that sit slightly higher than the surrounding tile patterns, breaking your color coordination. Check for hairline cracks that reappear after cleaning and for grout that stays wet hours after use.
Inspect nearby baseboards and drywall for bubbling paint, staining, or swelling. In showers and sinks, look for slow-draining water, missing caulk, and rusted fasteners.
If you see black staining or feel spongy flooring, treat it as a moisture hazard.
When Loose Tiles Are Repairable
Even if a tile feels loose, you can usually repair it when the surrounding grout stays dry, the subfloor or wall beneath feels firm (no flex or “squish”), and the problem is limited to a few tiles with intact, clean joints.
Confirm by tapping: a hollow sound with no cracking nearby often means failed thinset, not rot. Remove the tile carefully, wear eye protection and cut-resistant gloves, and control dust when scraping old adhesive.
If the backerboard isn’t crumbling and fasteners feel tight, you can reset the tile with fresh mortar and regrout. Match tile patterns and account for aesthetic considerations by dry-fitting first, checking alignment, spacing, and lippage before it cures.
Stop if you smell mustiness or see damp.
Tools and Materials to Fix Loose Tiles
Before you reset that loose tile, you’ll need the right hand tools—like a putty knife, grout saw, margin trowel, and level—to lift, clean, and seat it accurately.
Stock the correct adhesive (thinset or mastic, as appropriate), matching grout, spacers, and a sponge so you can bond and finish the repair without rushed substitutions.
Protect yourself and the area with gloves, safety glasses, a dust mask, knee pads, and drop cloths, and keep a vacuum handy to control debris as you work.
Essential Hand Tools
Although loose tiles can look like a big repair, you can tackle most fixes with a small set of dependable hand tools: a margin trowel or putty knife for scraping out old adhesive and spreading new mortar, a grout saw or carbide scraper for cleaning joints, a rubber mallet and tapping block to seat the tile without cracking it, a level to confirm it sits flush, and a utility knife for trimming backer material or mesh.
Add safety glasses, cut-resistant gloves, and knee pads, and keep a shop vacuum close to control grit. Use a straightedge to check neighboring tiles so your tile patterns stay aligned, and label each tile’s position before lifting it. Keep a small flashlight handy to inspect edges and joint depth, especially when matching grout color later.
Clean tools immediately after use.
Adhesives And Grout Supplies
Once you’ve got the loose tile lifted and the area scraped clean, the right adhesive and grout supplies determine whether the repair lasts or fails again. Choose thinset mortar for most floors and wet zones, and use mastic only where the label allows moisture exposure.
Check adhesive compatibility with your tile type (ceramic, porcelain, stone) and the substrate, and don’t mix systems from different manufacturers unless they’re rated to work together.
Keep a polymer-modified grout that matches your joint width, plus matching colorant if you must blend into an existing tile pattern. Grab grout additive or sealer when the product requires it.
Use a small batch so it doesn’t skin over, and follow water ratios and cure times exactly.
Safety And Prep Gear
When you gear up with the right safety and prep tools, you cut the risk of silica dust exposure, sharp-edge cuts, and messy adhesive failures.
Start with Safety precautions: ventilate the room, shut off nearby power if you’ll use water, and clear trip hazards.
Wear protective gear—N95 or P100 respirator, safety glasses, cut-resistant gloves, and knee pads for floor work. Add hearing protection if you’ll grind or chisel.
For prep, keep a spray bottle to dampen debris, plus a shop vac with a HEPA filter to capture dust.
Use painter’s tape to protect edges and mark loose tiles.
Have a stiff nylon brush, putty knife, and scraper to remove old grout safely.
Keep a bucket and microfiber towels for cleanup.
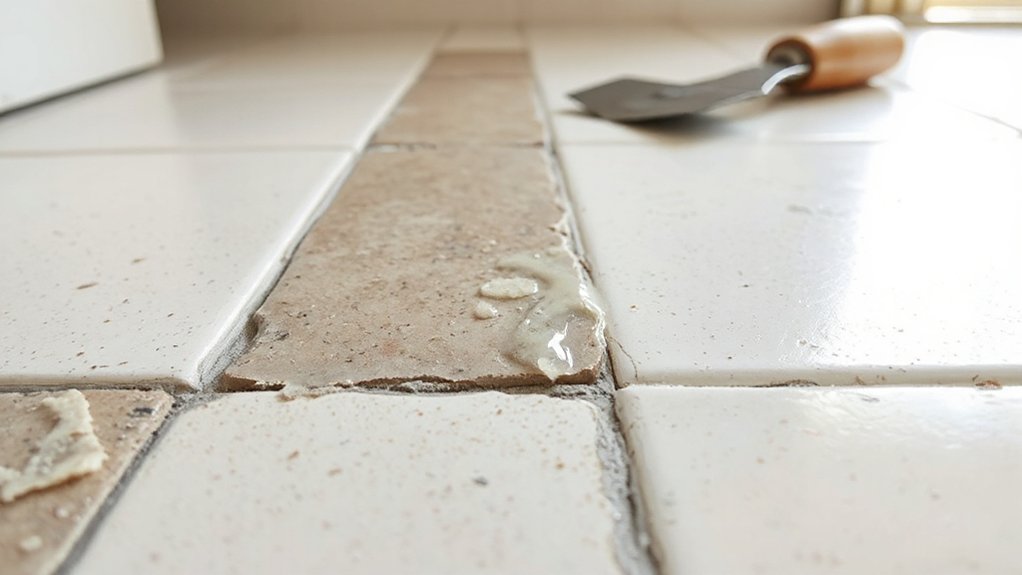
Lift a Loose Tile Without Chipping It
How do you lift a loose tile without cracking the glaze or chipping the edges? Start by confirming it’s truly loose: press each corner and listen for hollow sounds. Score the grout line with a utility knife, then deepen it with an oscillating multi-tool grout blade to isolate the tile. This is one of the safest tile removal techniques for preventing tile damage.
Slide a thin putty knife under the loosest edge and wiggle gently; don’t pry hard. Work around the perimeter, adding a second knife to spread force. If the tile won’t budge, warm it with a hair dryer to soften old mastic, then try again.
Lift straight up once it releases, and set it on a towel.
Clean and Prep the Surface for Thinset
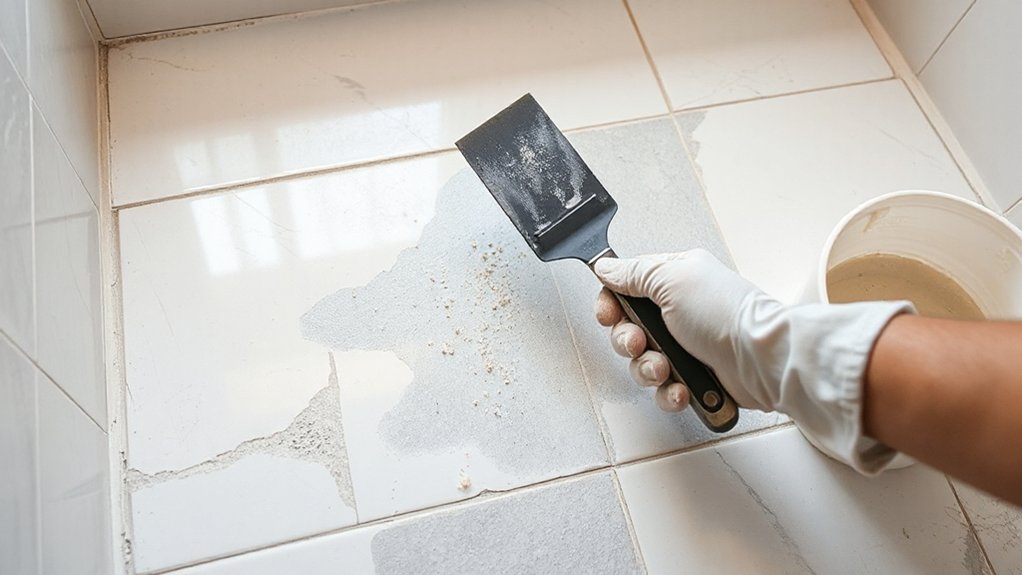
Before you spread thinset, strip the substrate down to clean, solid material so the new bond won’t fail. Put on safety glasses, gloves, and a dust mask, then scrape off old thinset, mastic, grout crumbs, and paint with a stiff putty knife or oscillating tool held flat. Vacuum as you go so grit doesn’t get ground into the surface.
For surface preparation, check for soft drywall, crumbling cement board, or loose backer; cut out and patch any unstable spots instead of coating over them.
Use cleaning techniques next: wipe with a damp sponge and a degreasing cleaner, rinse, and let it dry completely. Finish by lightly abrading glossy areas and vacuuming again for proper adhesion.
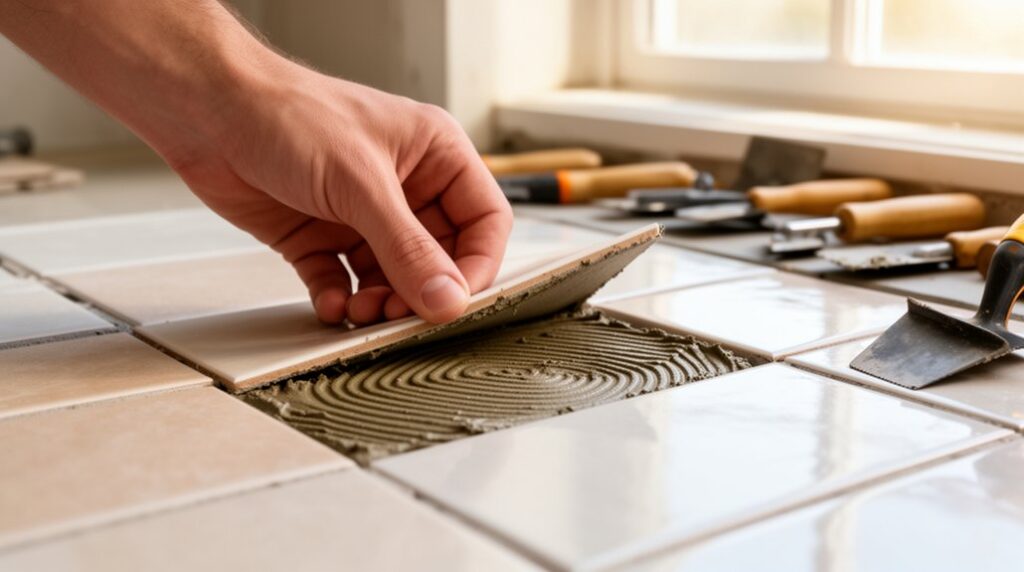
Reset the Tile With Thinset or Mastic
With the substrate clean, solid, and dry, you’re ready to bond the loose tile back in place. Dry-fit it first to confirm alignment and check for rocking.
Wear gloves and eye protection, then mix thinset to a peanut-butter consistency, or choose premixed mastic for small, dry-area wall tiles.
Key mortar into the substrate with the flat side of a trowel, then comb fresh ridges with a notched edge sized to the tile.
Back-butter the tile if coverage was poor. Press in, slide slightly to collapse ridges, and remove squeeze-out from the face and joints.
Use spacers and a straightedge for tile leveling.
If the tile edge is chipped, do an epoxy repair before setting.
Regrout, Seal, and Wait for Cure Time
Once the tile feels firm and sits flush, clean any thinset or mastic that squeezed into the joints so grout can bond properly. Use a utility knife, grout saw, and vacuum; wear eye protection and a dust mask. Mist the joints lightly to reduce dust and improve adhesion.
Apply grout using solid Regrout techniques: pack joints diagonally with a rubber float, then scrape excess at 90 degrees. Let it firm up, wipe with a damp sponge, and buff haze with a dry towel.
After the grout cures per the bag (often 24–72 hours), choose among sealant types: penetrating sealer for cement grout, or skip sealing if you used epoxy grout. Keep the area dry, avoid foot traffic, and don’t run water until full cure.
Frequently Asked Questions
Can I Fix Loose Tiles Over Radiant Floor Heating Systems Safely?
Yes, you can fix loose tiles over radiant floor heating safely if you work carefully. Turn off Radiant heating, lock out power, and let the floor cool fully.
Lift only the loose tile, avoid nicking heating wires, and scrape old thinset to protect Tile adhesion.
Use a flexible, polymer-modified thinset rated for heated floors, then regrout.
Keep heat off until mortar cures per label, typically 7 days.
How Do I Match Discontinued Tile Styles or Colors for Replacements?
Sure, matching discontinued styles is “easy”—like finding a twin for a stranger. Start by pulling one intact tile and photographing it in daylight.
Bring the sample to a tile shop for matching color scans, then check online salvage yards, marketplace listings, and manufacturer archives for close lots.
If you can’t match, buy a contrasting accent tile and replace a full row for symmetry.
Wear gloves, control silica dust.
Will Insurance Cover Tile Repairs Caused by Hidden Plumbing Leaks?
Insurance may cover tile repairs if hidden plumbing leaks caused sudden, accidental damage, but it often won’t cover long-term seepage or poor maintenance.
You’ll need photos, a plumber’s report, and receipts to support Insurance claims.
Shut off water, avoid using the area, and dry surfaces to prevent mold.
Read your policy’s “water damage” limits and deductible.
Report quickly, document everything, and don’t discard damaged materials.
How Can I Prevent Future Loose Tiles With Underfloor Movement?
Like a shaky bridge under your feet, underfloor movement will keep loosening tiles unless you stop the flex. You prevent it by improving floor stabilization: secure subfloor panels with proper screws, add blocking, and level low spots with approved compound.
Use a decoupling membrane or backer board before retiling.
Finish with grout reinforcement using flexible, polymer-modified grout and perimeter movement joints.
Wear eye protection, and shut off power when working.
Should I Hire a Professional if Tiles Are Loose Near Electrical Outlets?
Yes—you should hire a professional if loose tiles sit near electrical outlets, because movement can expose wiring, crack boxes, or let moisture in.
Don’t attempt DIY removal until you’ve shut off the circuit and verified it’s dead.
A licensed electrician can secure the outlet and assess damage, then a tiler can reset with the right tile adhesive.
You’ll avoid shock risk and guarantee the outlet sits flush and safe.
Conclusion
You’ve now tackled loose tiles safely and correctly, so your bathroom or kitchen won’t keep inviting water underneath. Double-check that the tile sits level, grout lines are even, and all thinset or mastic squeeze-out is removed before it cures. Let everything cure fully, then regrout and seal to block moisture. Wear gloves and eye protection when scraping and mixing—dust and shards bite. Done right, this repair can feel rock-solid forever.