Lock the window, then run your fingertips around the frame and meeting rails; use tissue or incense to spot and mark leaks. Don’t seal until you rule out rot, binding, or failed double-pane seals. Caulk stationary gaps with paintable acrylic-latex indoors and exterior-grade silicone/polyurethane outside; use weatherstripping for moving parts. Remove old caulk, clean and dry surfaces, apply a smooth continuous bead, then tool it. Test again and manage humidity to avoid trapped moisture—there’s more you can do next.
Key Takeaways
- Lock windows, then use fingertips, tissue strips, or incense smoke to pinpoint draught gaps around frames, sashes, corners, and meeting rails.
- Diagnose causes like cracked caulk, missing weatherstripping, warped frames, wood rot, or failed double-glazing seals before resealing.
- Remove old caulk carefully, clean and dry surfaces thoroughly, and avoid sealing drainage paths like weep holes.
- Caulk stationary joints with a continuous, tooled bead; weatherstrip moving parts using foam, V-strip, brush, EPDM, or bulb seals.
- Retest for leaks and smooth operation, then control indoor humidity (30–50% RH) with fans or dehumidifiers to prevent condensation and mold.
Find Window Draughts in Five Minutes
Where’s that cold air really coming from? You can find window draughts fast with a simple, safe check.
First, shut the window and lock it, since loose hardware can mimic leaks. Wash your hands, then run your fingertips slowly around the frame, sash, and meeting rails to feel temperature changes.
Next, hold a tissue strip near corners and along the bottom rail; if it flutters, air’s moving.
For a clearer read, use a smoke pencil or an incense stick in a fire-safe holder, keep it away from curtains, and watch for smoke pulling toward gaps. Mark spots with painter’s tape.
Note damaged insulation materials like cracked caulk or missing weatherstrip; fixing these later improves Energy efficiency.
Reseal or Repair? Diagnose the Real Cause
Before you reach for caulk or new weatherstripping, confirm whether you’re dealing with an air-seal failure or a mechanical/window-condition problem. Start by checking operation: if the sash binds, won’t lock, or shows uneven gaps, you’ve likely got hinge, balance, or frame-settlement issues that sealing won’t fix.
Inspect Window frame materials for rot, swelling, cracked welds, or failed glazing; probe wood with an awl and stop if it sinks. Look for condensation between panes—seal failure in insulated glass needs replacement.
Outside, verify the cladding-to-frame joint and flashing: missing drip cap or torn exterior insulation can drive drafts and moisture behind trim. If you see water staining, mold, or soft drywall, address leaks first and wear gloves, eye protection.
Pick Sealant vs Weatherstrip (And Tools)
Once you’ve ruled out rot, glazing failure, and flashing leaks, match the fix to the gap you’re sealing: use sealant (caulk) for stationary joints like trim-to-siding, frame-to-masonry, and small exterior cracks, and use weatherstripping for moving parts like sashes, doors, and tracks where compression and sliding will tear caulk.
For sealant options, choose paintable acrylic-latex for interior trim lines, siliconized acrylic for light movement, and 100% silicone or polyurethane for exterior exposure and larger joints. Check temperature and cure times, and ventilate well.
For weatherstrip types, pick adhesive foam for quick, low-wear gaps; V-strip for sash edges; felt for light-duty; and EPDM or bulb seals for long-lasting compression.
Tools you’ll want: a caulk gun with a smooth-rod, utility knife, measuring tape, scissors, and nitrile gloves and eye protection.
Prep Frames Fast for a Clean Reseal
Start by cutting and scraping off the old caulk as fast as you can without gouging the frame—wear gloves and eye protection, and keep your blade angled away from the glass.
Then scrub the channel to remove dust, paint chips, and residue, and wipe it down so the new sealant can bond.
Finish by drying the frame completely (especially corners) before you reseal, or you’ll trap moisture and weaken the bead.
Remove Old Caulk Quickly
Although it’s tempting to caulk right over the old bead, you’ll get a longer-lasting seal if you strip it out fast and clean.
Start with smart tool selection: a sharp utility knife for scoring both edges, a caulk removal tool or stiff putty knife for lifting, and needle-nose pliers for pulling long strips.
Wear cut-resistant gloves and safety glasses, and keep your free hand behind the blade path.
Score lightly to avoid gouging vinyl, wood, or aluminium. Pry at a loose end, then pull steadily while you scrape the channel clean.
For stubborn silicone, use a silicone remover per the label, and check sealant compatibility so you don’t soften painted or plastic surfaces.
Stop once you’ve removed all loose material and residue.
Clean And Dry Frames
Before you lay down new caulk, scrub the frame and joint so the sealant can actually bond. Vacuum loose grit, then wipe with a damp microfiber cloth.
For greasy film, use mild detergent or isopropyl alcohol on a rag; keep it off painted walls and test a small spot first. Use a nylon brush to lift dirt from corners and the sash track, and scrape any remaining residue you missed. Rinse lightly and wipe again so you don’t leave soap behind.
Drying matters for sealant longevity. Pat everything dry, then let the area air out until it’s fully moisture-free.
In cold weather, use a hair dryer on low and keep it moving to protect Frame durability.
Reseal Window Frames With Caulk: Step-by-Step
Start by cutting and scraping away the old caulk with a utility knife and putty knife, and wear cut-resistant gloves and safety glasses to protect your hands and eyes.
Vacuum and wipe the joint so the new bead bonds well, then let the surface dry completely.
Run a steady, continuous bead of fresh caulk along the frame seam and tool it smooth right away to seal gaps before it skins over.
Remove Old Caulk
How do you know it’s time to remove old caulk? When you see cracking, gaps, peeling, mold, or feel draughts around the frame, your window insulation suffers and energy efficiency drops. Don’t patch over failing beads; remove them so the seal can bond to clean surfaces.
Start by ventilating the room and wearing cut-resistant gloves and safety glasses. Use a utility knife to score both edges of the caulk line, keeping the blade angled away from the glass. Slide a caulk remover tool or stiff putty knife under the bead and lift it in strips.
For stubborn spots, apply a caulk softener, wait as directed, then scrape gently. Vacuum debris and wipe residue with mineral spirits on a rag, avoiding painted surfaces. Let everything dry fully.
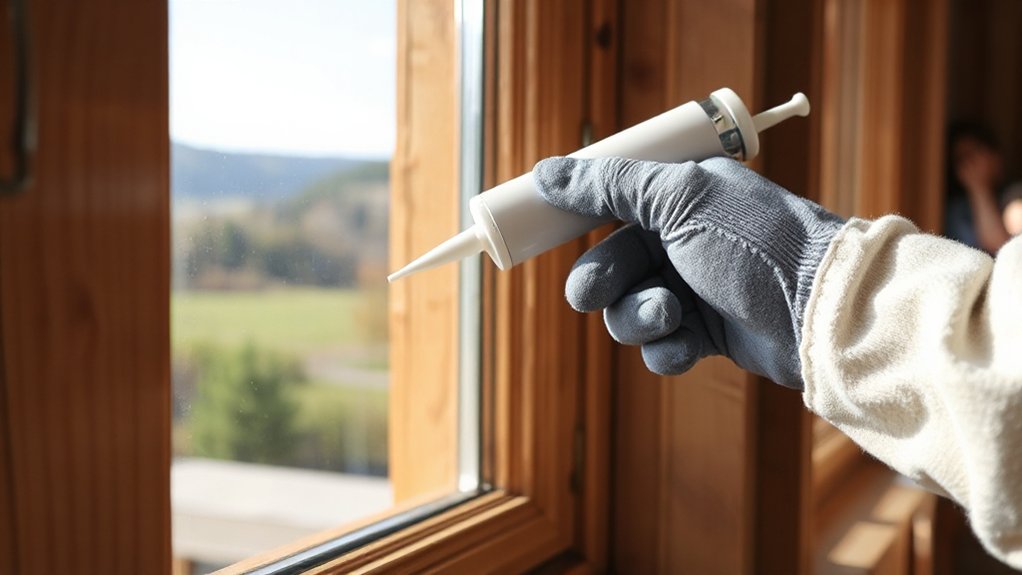
Apply New Caulk
Once the frame is clean and completely dry, you’re ready to lay a fresh, continuous bead that restores the window’s weather seal. Choose a paintable, exterior-grade acrylic latex or silicone caulk rated for your climate.
Cut the nozzle at a 45° angle to match the joint width, then puncture the seal. Load the tube into a caulk gun and keep steady pressure as you run one smooth line along the frame-to-trim gap. Work from top to sides to bottom to limit drips.
Tool the bead within minutes using a damp finger or caulk tool, pressing it into the joint for better window insulation. Wipe excess immediately, ventilate the area, and wear gloves.
Let it cure fully to protect energy efficiency.
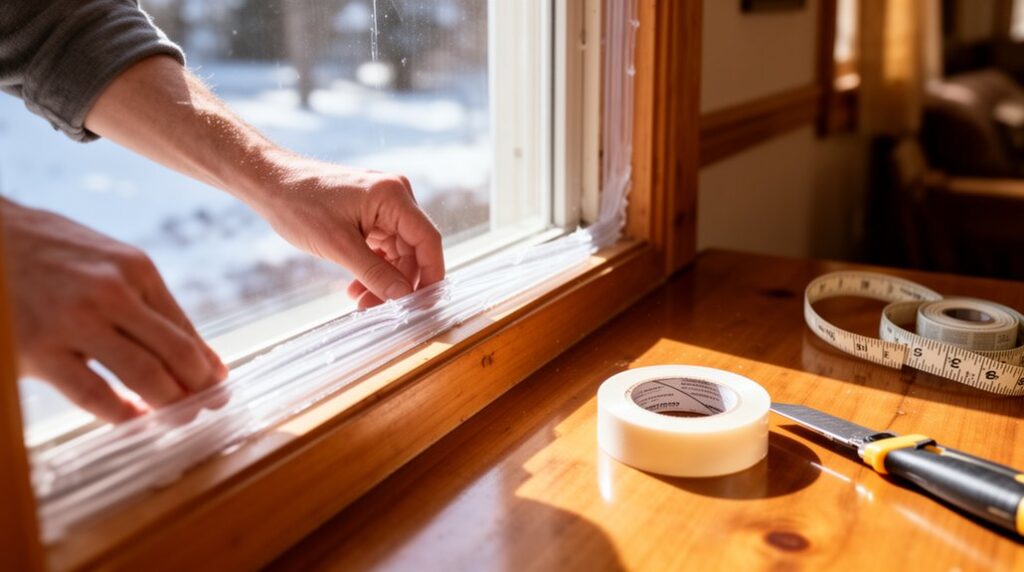
Replace Window Seals and Weatherstrips Cleanly
Before you apply any new caulk or insulation, replace worn window seals and weatherstrips so you don’t trap dirt, moisture, or air leaks under fresh material.
Cut power to nearby window units, wear gloves, and use a plastic scraper to lift old foam, vinyl, or rubber without gouging paint. Clean residue with mild detergent, then wipe with isopropyl alcohol and let surfaces dry fully.
Match replacements to Window frame materials: use adhesive-backed EPDM for metal, silicone for vinyl, and compressible foam for painted wood.
Measure twice, cut square ends, and press firmly with a roller for full contact. Don’t stretch strips; they’ll shrink later.
For Seasonal insulation, choose removable rope caulk or magnetic strips you can swap out cleanly each year. Inspect corners for gaps.
Fix Draughts at Sashes, Sills, and Meeting Rails
Although a window can look tightly shut, most draughts sneak in at three pinch points—the sash edges, the sill, and the meeting rail—so start by finding exactly where air moves. On a calm day, run a damp hand or a smoke pencil around each joint; mark leaks with painter’s tape.
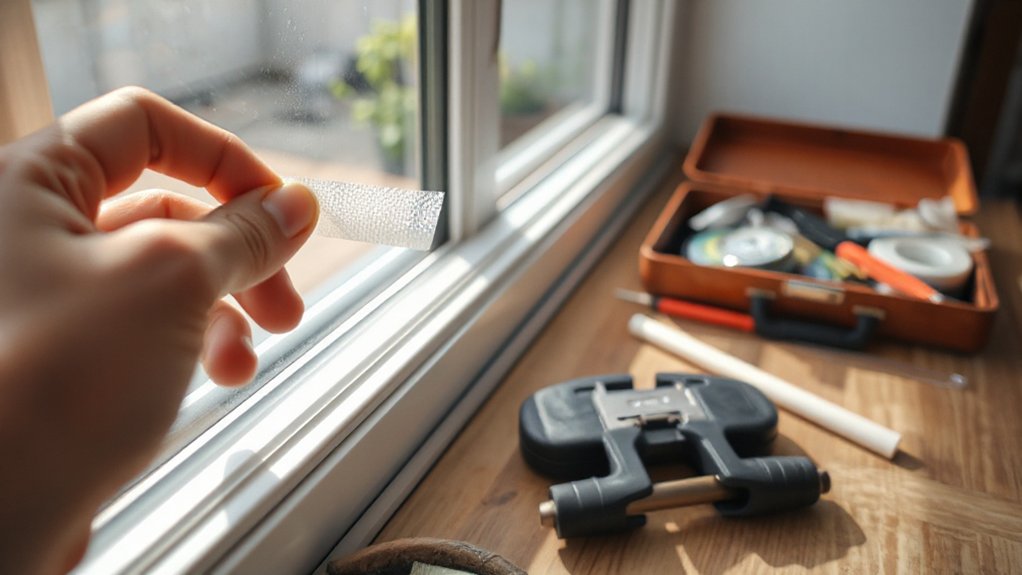
For sash edges, do a sash adjustment: check that the sash sits square in the frame, then tighten loose stops or sash locks so the rails pull together. If gaps persist, add low-friction brush pile or V-strip for window insulation without binding the sash.
At the sill, scrape old caulk, vacuum dust, then lay a smooth exterior-grade bead.
At the meeting rail, replace worn interlocks and add thin adhesive foam only where the lock compresses it. Wear gloves.
Cut Condensation After Resealing (Don’t Trap Moisture)
After you tighten up air leaks, you need to manage indoor humidity so you don’t seal moisture into the window pocket and create condensation, mildew, or even rot. Aim for 30–50% RH; use a hygrometer and run bathroom and cooker extract fans during and 20 minutes after use.
If you don’t have fans, crack a window briefly or use a dehumidifier.
For condensation control, keep warm air moving across glass: open blinds, don’t block radiators, and avoid drying clothes on heaters. Wipe any water daily and check corners, sash channels, and the sill for dampness.
Don’t caulk weep holes or drainage paths—moisture trapping starts when water can’t escape. When cleaning mould, wear gloves, ventilate, and follow product labels carefully.
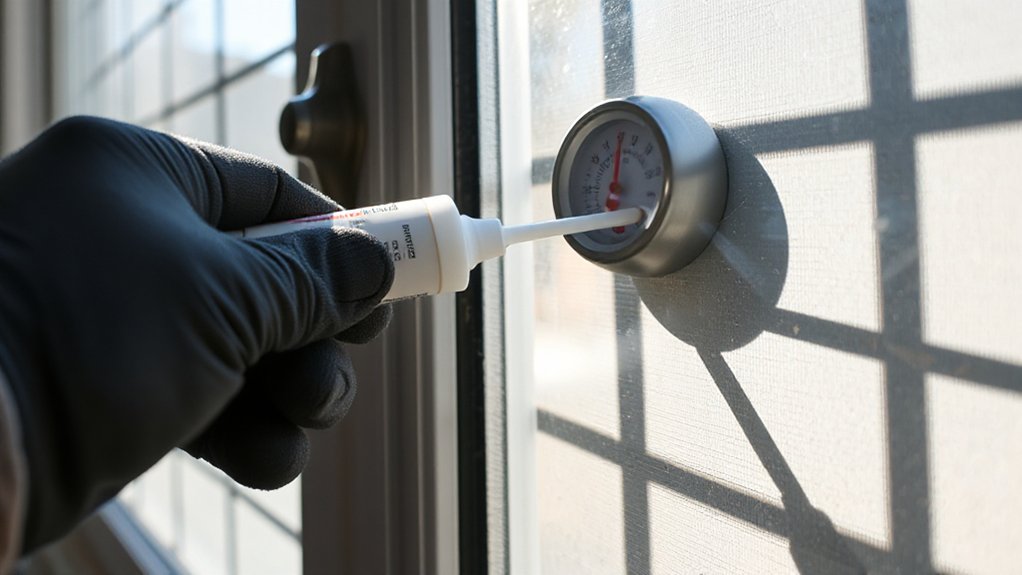
Test Your Window Reseal and Measure Heat Loss
How do you know your reseal actually worked? Start with a simple draught check: on a windy day, hold a tissue or incense stick near the sash, frame, and lock points. Movement or smoke pull means air is still leaking. Keep flames away from curtains and don’t use incense if you’ve got respiratory sensitivities.
Next, measure heat loss. Use an infrared thermometer or thermal camera and compare temperatures along the seal versus the center of the glass. Big cold spots at edges suggest gaps or poor window insulation.
For a quick baseline, log indoor and outdoor temps and note how fast the room drops after heating turns off.
Finally, re-check operation: open, close, and lock the window smoothly. A good seal boosts energy efficiency without binding.
Frequently Asked Questions
Can Resealing Windows Reduce Outside Noise as Well as Draughts?
Yes, resealing windows can reduce outside noise as well as draughts, but it won’t match full acoustic glazing. You’ll get the best results when you stop air leaks, since gaps transmit sound.
Use soundproofing techniques like fitting new compression seals, applying acoustic caulk, and adding draft excluders.
As noise reduction methods, also check frame joints and lock points.
Work safely: ventilate, wear gloves, and cut sealant carefully.
Is Window Resealing Safe for Lead-Painted or Historic Timber Frames?
Yes, you can reseal them safely, but you must take precautions.
About 87% of U.S. homes built before 1940 still contain some lead-based paint, so treat Lead paint concerns seriously: don’t sand or scrape dry, mist surfaces, use HEPA vacuuming, and dispose debris properly.
For historic preservation, choose reversible, paint-compatible sealants, avoid trapping moisture, and keep original profiles intact.
When unsure, hire an EPA RRP-certified pro.
How Long Should I Wait Before Painting Over Fresh Caulk?
Wait until the caulk fully cures: typically 30–60 minutes to paint for “paintable” latex, but 24 hours (and up to 7 days) for full cure. Silicone usually won’t accept paint.
Check the tube’s label and do a light fingernail test—no tackiness.
For Painting preparation, keep the room ventilated and mask edges.
Proper cure improves Caulk durability and reduces cracking or peeling.
Will Resealing Affect Window Warranties or Landlord Responsibilities?
Yes—resealing can affect a window warranty and shift landlord responsibilities, so you can’t assume it’s harmless.
Test the theory: “It’s just caulk, so it won’t matter.” Some manufacturers void coverage if you seal weep holes, alter glazing, or use unapproved products.
If you rent, get written permission; many leases require the landlord to handle window repairs.
Use labeled, paintable sealant, ventilate, and keep drainage paths clear.
What’s the Typical Cost to Reseal Windows Professionally per Window?
You’ll typically pay $150–$400 per window for professional services, depending on size, access, and whether you need sash, frame, or exterior joint work.
For cost estimation, expect caulk-only touchups near $75–$150, full perimeter reseal with prep and cleanup $200–$500, and glass unit reglazing $300–$800.
You should request itemized quotes, confirm lead-safe practices in older homes, and guarantee safe ladder setup.
Conclusion
Once you’ve resealed, you’ll feel the difference straight away. Do a final smoke or tissue test around the frame, sashes, and meeting rails, then lock the window and recheck for movement. Keep trickle vents clear so you don’t trap moisture, and watch for fresh condensation over the next week. For example, after you recaulk a gappy kitchen frame and replace a worn brush strip, the whistling stops and the room holds heat overnight.