

You’ll get accurate DIY measurements by confirming you’re on inches or metric, then counting from the nearest whole mark (1/2, 1/4, 1/8, 1/16 or mm). Seat the sliding hook flat and square so its play compensates for thickness, and don’t measure off a bent hook. Keep the blade straight, untwisted, and under steady tension, supporting long spans to prevent sag. Push the case into inside corners; hook edges for outside. Next, you’ll pick up solo measuring tricks and cleaner mark transfers.
Key Takeaways
- Read from the nearest whole inch/centimeter, count subdivisions carefully, and confirm you’re using the correct units before cutting.
- Seat the sliding hook flat and square; its play compensates for hook thickness in both inside and outside measurements.
- Keep the blade straight, untwisted, and under steady tension; support long spans to prevent sag and false readings.
- Measure inside corners by pushing the case into the corner or adding the case length when needed; hook cleanly over edges for outside corners.
- Calibrate and maintain the tape: compare to a steel rule, replace bent/loose hooks, retract slowly, and keep the blade clean and dry.
Read Tape Measure Markings (Inch + Metric)
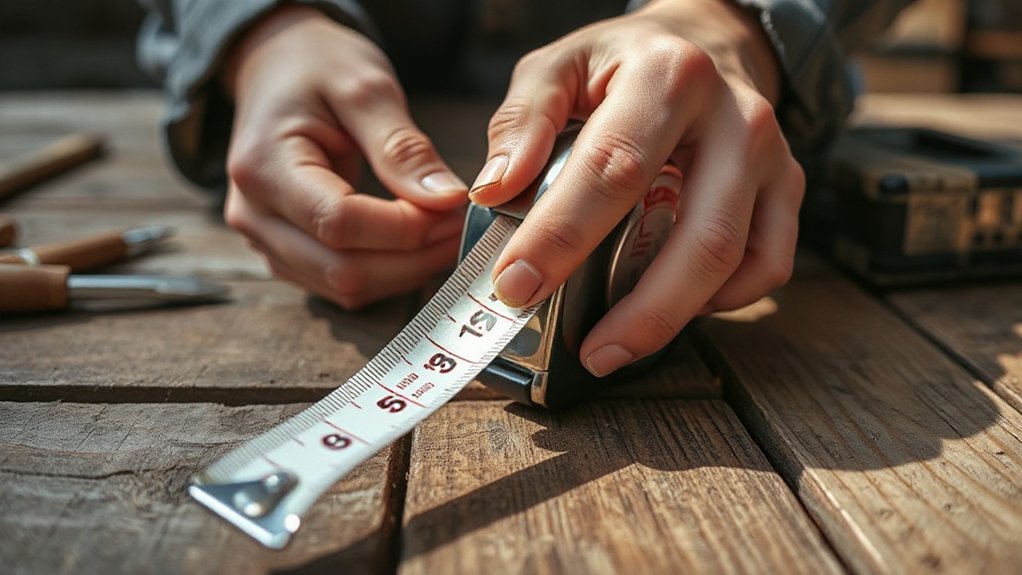
Although tape measures look busy at first glance, you can read them quickly once you know what the lines mean. On inch scales, the longest numbered marks are whole inches; the next longest are 1/2, then 1/4, 1/8, and 1/16.
Count subdivisions from the nearest inch number and say the fraction aloud before you cut. On metric scales, numbered marks are centimeters, small ticks are millimeters, and ten millimeters equal one centimeter.
Use marking techniques that reduce slip: keep your pencil sharp, mark with a V, and extend the mark with a square. Confirm accuracy with simple calibration methods: compare your tape to a steel rule and recheck after drops.
Lock the blade, wear eye protection, and cut safely.
Use the Tape Measure Hook Without Errors
When do tape-measure readings go wrong by a frustrating 1/16 in. (or a millimeter)? Most often when you ignore the sliding hook. That little play is intentional: it compensates for the hook’s thickness whether you “push” against an inside surface or “pull” from an edge.
For accurate hook placement, seat the hook flat and square to the work, not on a rounded corner, burr, or loose paint. If you’re measuring from a screw head or nail, don’t—start from a clean edge or mark a true baseline.
Check the rivets; if the hook feels sloppy or bent, replace the tape. Keep fingers clear when retracting so the hook doesn’t snap back and cut you. This is simple error prevention.
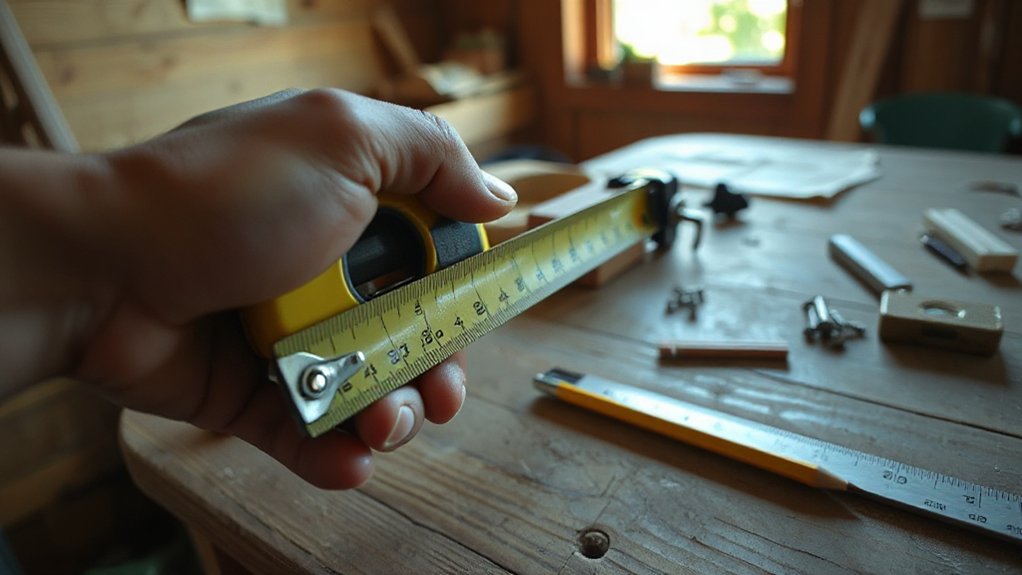
Keep the Tape Measure Straight and Under Tension
Keep the tape aligned in a straight line between the hook and your mark, and don’t let it twist or bow.
Apply steady, consistent tension so the blade stays flat and you don’t lose accuracy to sag or slack.
Control the tape with both hands when possible to prevent snap-back that can cut fingers or mar surfaces.
Maintain Straight Alignment
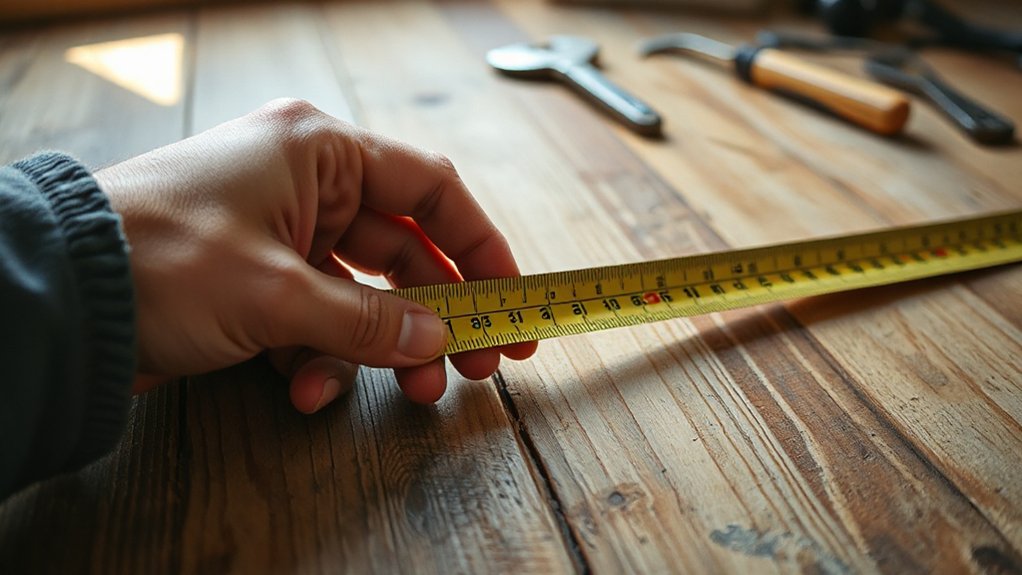
To get an accurate reading, pull the tape out in a straight line and hold it under steady tension from end to end. Keep the blade flat against the workpiece, not twisted or arched, so the markings sit square to your reference edge.
Use simple measuring techniques: align the hook firmly to the starting point and sight straight down the tape, not from an angle.
When you’re spanning gaps or working alone, support the tape to prevent sag. Clamp a scrap block at the start, rest the blade along a straightedge, or use alignment tools like a framing square or level to keep the tape true.
Watch for snags on corners; they can kick the blade off line and cause a snap-back. Retract slowly to protect your hands and the blade.
Apply Consistent Tension
How hard you pull on the blade changes the number you read, so apply steady, consistent tension from the hook to the case every time. Keep the tape straight, don’t let it sag, and avoid yanking, which can shift the hook and defeat Tape calibration.
When measuring alone, brace the hook firmly against the edge or use a clamp, then pull until the blade is taut, not bowed.
For inside measurements, seat the case flat against the surface and maintain the same pull you use on outside reads.
Practice tension control by using the same hand position and pull distance each time.
Retract the blade slowly to prevent whipback cuts and bent hooks, and replace damaged tapes promptly.
Measure Inside vs Outside Corners the Right Way
Although inside and outside corners look similar on paper, they call for different tape-measure habits if you want tight joints and accurate cuts.
For corner measurement, do an inside outside comparison before you mark: inside corners measure to the true intersection, while outside corners measure over the edge thickness.
For inside corners, push the tape’s housing firmly into the corner, keep the blade flat on both surfaces, and read at the exact meeting point. If the housing won’t seat, use the case length printed on the tape, add it to the blade reading, and note the method.
For outside corners, hook the end over the edge, pull straight, and account for trim or material thickness. Clamp workpieces, keep fingers clear, and retract slowly.
Choose the Right Tape Measure for DIY Projects
Choose a tape measure length that matches your typical DIY jobs so you don’t overreach or wrestle with extra blade that can snap back and cut you.
For most home projects, a 16–25 ft tape covers furniture, framing, and room layouts without sacrificing control.
Prioritize a durable blade with a protective coating, strong standout, and a dependable lock so your measurements stay accurate and your hands stay safe.
Select Appropriate Tape Length
Before you start measuring, match your tape’s length to the job so you don’t fight a short blade or wrestle an oversized case. For indoor DIY, a 12–16 ft tape covers cabinets, trim, and furniture without extra bulk.
For framing, decking, or fencing, step up to 25 ft so you can span studs and sheet goods in fewer resets. If you measure large rooms or exterior runs, consider 30–35 ft, but remember longer tapes weigh more and can snag.
Keep safety in mind: longer blades can whip back harder, so control retraction and clear bystanders.
During material selection, pick a length you’ll actually carry.
Use storage tips: clip it securely, wipe grit off, and store dry to prevent sticking and kinks.
Prioritize Blade Durability Features
When you’re measuring around sharp edges, dusty lumber, or rough concrete, a flimsy blade will kink, chip, or lose its coating fast. Choose tough Blade materials like high-carbon steel with a nylon or Mylar protective layer so the markings don’t wear off and the blade resists rust.
Look for a reinforced blade end and a durable hook with strong rivets; a loose hook can throw off inside and outside measurements.
Check standout strength and blade width—wider blades stay straighter when you’re working solo, reducing slips that can cut your fingers.
Pick a case with an ergonomic design and a rubber overmold so you won’t drop it on ladders or uneven floors.
A reliable lock should clamp firmly without grinding.
Measure Alone With a Tape Measure (No Helper)
Even if you don’t have a helper, you can still get accurate measurements by anchoring the tape securely and keeping it straight under light tension. Hook the tang over a clean edge or fasten it with painter’s tape, a clamp, or a screw at the zero point, then extend the blade smoothly without kinks.
Check tape calibration by confirming the hook slides slightly; don’t mash it against corners. For long spans, support the blade mid-run with a scrap block, or measure in shorter sections to prevent sag and snapback.
Use measuring ergonomics: square your stance, keep your eyes directly over the mark, and lock the blade before you write anything down. Retract slowly to protect your fingers and prevent blade whip.
Transfer Tape Measure Marks for Cleaner Cuts
Although you can cut right off a tape reading, you’ll get cleaner, safer results by transferring that measurement to a clear, knife-thin layout line on the workpiece. Lock the tape, hook it securely, and place a sharp pencil tick at the exact graduation—don’t make a fat dot.
For reliable mark transfer, square that tick across the face with a combination square or speed square, then knife the line for zero-width guidance when the cut matters. If you’re using a saw, keep the blade on the waste side and align to the knife line, not the tick.
Clamp the stock before cutting, keep fingers clear, and confirm the line stays visible. This simple step boosts cut precision on every cut you make.
Avoid the Most Common Tape Measure Mistakes
Because small tape-measure habits can stack into big errors, you’ll get better—and safer—results by avoiding a few common mistakes: reading from a loose or bent hook, letting the blade sag or twist, measuring from the wrong end (including the case) without accounting for it, and trusting a smudgy “fat” mark instead of a crisp tick.
Keep the hook seated and square to the edge, and pull with consistent tension so the blade stays straight. Support long spans with your free hand to prevent droop that steals length and can snap back on fingers.
Confirm you’re using the right measurement units before you cut, especially when plans mix imperial and metric. Don’t assume tape calibration; instead, work from clean ticks and repeat critical dimensions.
Check Tape Measure Accuracy and Replace Bad Habits
Before you trust a measurement for a cut or install, confirm your tape measure reads true and that your technique isn’t introducing error. Compare it to a known standard, like a steel rule or factory-marked yardstick, at several points (1″, 12″, 24″). If it’s off, retire it; don’t “average” errors.
Check the hook: it should slide slightly to account for inside/outside measuring. If it’s bent, loose, or missing rivets, replace the tape to prevent kickback and bad cuts.
Use simple calibration techniques: mark a test board, re-measure, and verify repeats match. Replace habits that add error—tilting the tape, measuring over debris, or reading from the wrong edge.
Follow storage best practices: retract slowly, wipe clean, and store dry.
Frequently Asked Questions
How Do I Measure Curved Surfaces Accurately With a Tape Measure?
To measure curved surfaces accurately, you’ll follow smart measuring techniques: press your tape measure along the curve, keeping it flat and snug without twisting.
For tight curves, use tape measure tips like marking intervals with painter’s tape, then measure each segment and add them.
If the tape won’t bend, wrap a flexible string around the curve, mark the length, then measure the string straight.
Wear gloves near sharp edges.
What’s the Best Way to Measure Around Pipes or Round Objects?
Wrap a flexible tape around the pipe to get circumference, keep it level, and read where it meets zero.
If you only have a rigid tape, use a strip of paper or string, mark the overlap, then measure that length.
Convert to diameter by dividing by 3.1416.
For tight spaces, a laser distance tool won’t help much, but fiber optic inspection lights improve visibility.
Wear gloves to avoid sharp edges.
How Can I Prevent Tape Measure Blade Rust and Sticking?
Prevent rust and sticking by keeping your tape dry, clean, and lightly lubricated.
For Tape maintenance, wipe the blade after use, especially if you’ve measured wet lumber or worked outdoors, then retract it fully.
For Rust prevention, apply a thin coat of silicone spray or light machine oil and wipe off excess to avoid attracting grit.
Don’t snap the blade back—control recoil to protect the coating and hook.
Store it in a dry case.
Should I Measure at Room Temperature to Avoid Expansion Errors?
Yes—you should measure near room temperature when you can; a 10°C change can shift a 1 m steel measurement by about 0.12 mm, enough to matter in tight fits.
To manage Temperature effects, let your tape and workpiece acclimate indoors for 15–30 minutes.
Use Material considerations: wood moves with humidity, plastics soften, and metal expands.
Keep hands clear when retracting to avoid cuts.
How Do I Safely Retract the Tape Measure Without Damaging the Hook?
To safely retract the tape without damaging the hook, you control Blade retraction with your thumb and let it glide in. Don’t let it snap back.
Keep the hook aligned with the case slot and avoid twisting the blade.
Use Hook safety: pinch the blade near the case, slow the last 6–12 inches, and guide the hook into the housing.
Wear gloves if it’s sharp; keep fingers clear.
Conclusion
By now, you’ve learned your tape isn’t a magical ribbon—it’s a tiny courtroom. The hook will testify, the markings won’t lie, and your slack line will get convicted as “crooked cut.” Keep the blade straight, under tension, and mind inside vs. outside corners, or your shelf will fit like a clown shoe. Choose the right tape, check accuracy, and transfer marks cleanly. Measure twice, cut once—then keep your fingers.

