Start by measuring your usable area, planning 36-inch walkways, and placing dining near the kitchen with seating in a tight U- or L-shape. Choose simple patio shapes and slope the surface away from the house for drainage. Pick pavers for easy repairs and cooler footing, concrete for lower cost with control joints, or decking for a softer feel. Add shade, warm 2700–3000K lighting, and privacy screens plus big pots for greenery. Next, you’ll see easy upgrades that fit your budget.
Key Takeaways
- Plan zones for dining and lounging with 36-inch walkways, placing dining near the kitchen and seating in sheltered shade.
- Choose durable surfaces: pavers for easy repairs and cooler feel, concrete for budget strength, or decking for a softer, level platform.
- Add built-in benches or low planter walls along edges to define space, save floor area, and create windbreaks and extra seating.
- Layer warm, low-glare lighting with string lights, lanterns, and path lights, using 2700–3000K bulbs and timers for effortless ambiance.
- Create privacy and softness with trellises, vines, and grouped planters or screens, keeping elements simple, movable, and low-maintenance.
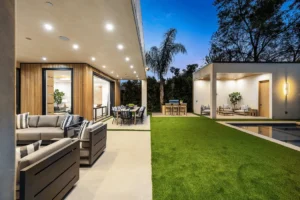
Choose a Patio Design Layout for Your Space
Before you buy pavers or start digging, pick a patio layout that fits your yard’s shape, how you’ll use the space, and your budget. Measure the usable area, note door swings, and keep at least 36 inches for main walkways.
Place dining zones close to the kitchen to cut trips, and tuck lounge seating where you’ll get shade or a wind break.
Use simple shapes (square, rectangle) to reduce cuts and waste; add interest with a curved edge only where it won’t complicate grading.
Plan drainage with a slight slope away from the house.
A Decorative border can define zones and hide minor edge imperfections.
Choose patio color that matches siding and reduces heat.
Compare Patio Materials: Pavers, Concrete, Decking
Now you’ve got your layout, you need to choose between pavers, concrete, and decking based on how long each lasts and how much upkeep you’re willing to handle.
Compare the real installed cost plus ongoing expenses like sealing, repairs, and replacement boards so you don’t get surprised later.
Then weigh style and comfort—color and texture options, heat underfoot, and slip resistance—so the patio looks right and feels good to use.
Durability And Maintenance
Because your patio takes constant abuse from sun, rain, freeze–thaw cycles, and foot traffic, durability and maintenance should drive your material choice as much as appearance and price.
For weather resistance, pavers handle cracking well because units can shift and you can replace a damaged piece without redoing the whole surface.
Concrete resists wear, but it can crack; you’ll need control joints, prompt crack sealing, and occasional resealing to reduce spalling and staining.
Decking won’t crack, yet moisture can warp boards and invite rot or mold, so ventilation and proper fasteners matter.
For easy cleaning, broom-and-hose works on all three, but pavers need joint-sand touch-ups, concrete needs stain spot-treatment, and decking needs periodic washing and inspection for loose boards.
Cost, Style, And Comfort
Durability keeps your patio from turning into a repair project, but your final pick usually comes down to cost, style, and how it feels underfoot.
Pavers cost more up front, yet you can replace single units, change patterns, and get solid Weather resistance with proper base prep. They also stay cooler than dark slabs.
Concrete is usually the budget winner for large areas. You can broom-finish for traction, stamp for style, or tint for color, but cracks can telegraph over time.
Decking often lands mid-to-high cost, especially with composites. It feels softer, reduces glare, and works well with outdoor furniture because it’s level, but you’ll pay for framing and fasteners.
Match comfort to your barefoot use and your wallet.
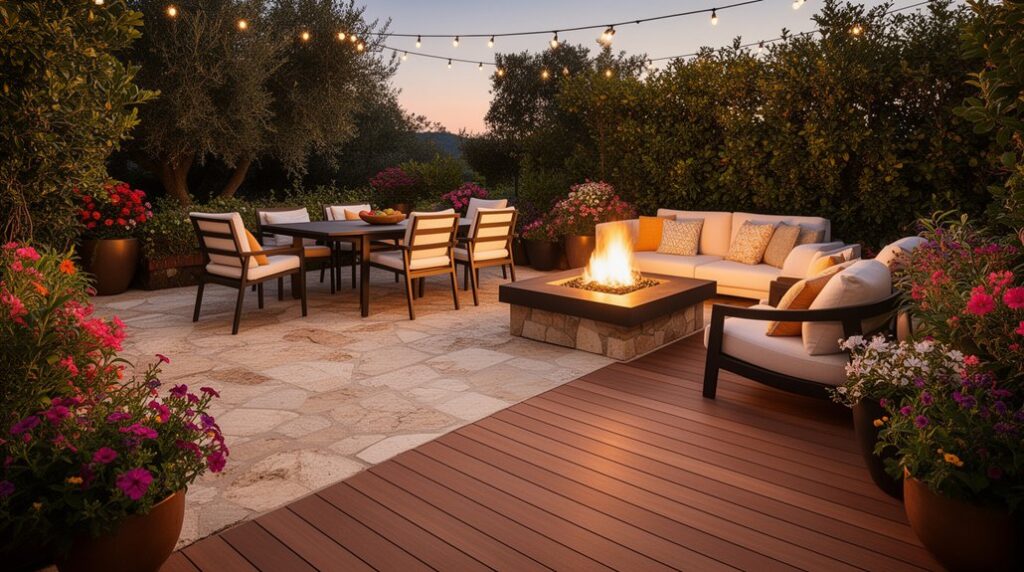
Create a Cozy Patio Conversation Zone
To create a cozy patio conversation zone, you’ll get the best results by clustering seating close enough for easy talk—think a small sectional or four chairs around a compact table.
Anchor the setup with a budget-friendly outdoor rug and a few weather-resistant cushions or throws to soften hard surfaces without buying all-new furniture.
Finish with warm, low-glare lighting like string lights or solar lanterns so the space feels inviting after sunset without driving up your electric bill.
Intimate Seating Arrangement
When you arrange seating so everyone faces each other, your patio instantly feels more like a living room than a backyard. Start by measuring your usable footprint and sketching a tight U-shape or L-shape that leaves a 30–36 inch walkway.
Choose outdoor furniture with slim arms or armless pieces to keep the circle close without crowding. Anchor the setup with a small, stable table within easy reach of every seat, and keep legs on pavers or a flat pad so chairs don’t wobble.
If your space feels exposed, add budget-friendly privacy screens like lattice panels, tall planters, or a folding divider to block sightlines and reduce wind. Keep seats 6–8 feet apart across the center for easy conversation.
Warm Lighting And Textiles
Even if you keep your furniture simple, warm lighting and a few soft textiles can make the whole patio feel like a cozy conversation zone. Start with String lights overhead or along a railing; pick warm-white LEDs and a timer so you won’t waste power.
Add Festive lanterns on the table or steps for layered glow, and choose battery or solar models to skip extension cords.
Then soften hard surfaces: throw pillows in outdoor fabric, a washable blanket for chilly nights, and a low-pile rug to define the seating area. Store textiles in a weatherproof bin so they last longer.
Keep colors neutral, then add one accent tone for a pulled-together, budget-friendly look that invites lingering chats outdoors.
Add Built-In Patio Seating (Benches, Walls, Planters)
Because loose patio furniture eats up floor space and blows around in bad weather, built-in seating gives you a cleaner layout with less upkeep. Start with built-in benches along the patio edge to define zones and keep walkways clear.
Cap a low retaining wall with a smooth stone or composite seat for a durable, wipe-clean surface. Add storage by framing a bench box with weatherproof hinges for cushions and games.
For tight budgets, build simple pressure-treated bench frames and face them with inexpensive decking boards.
Use planter walls to double as backrests and wind breaks while adding greenery; line them with landscape fabric and include drainage gravel so water won’t rot the wood.
Finish with removable seat pads you can bring inside.
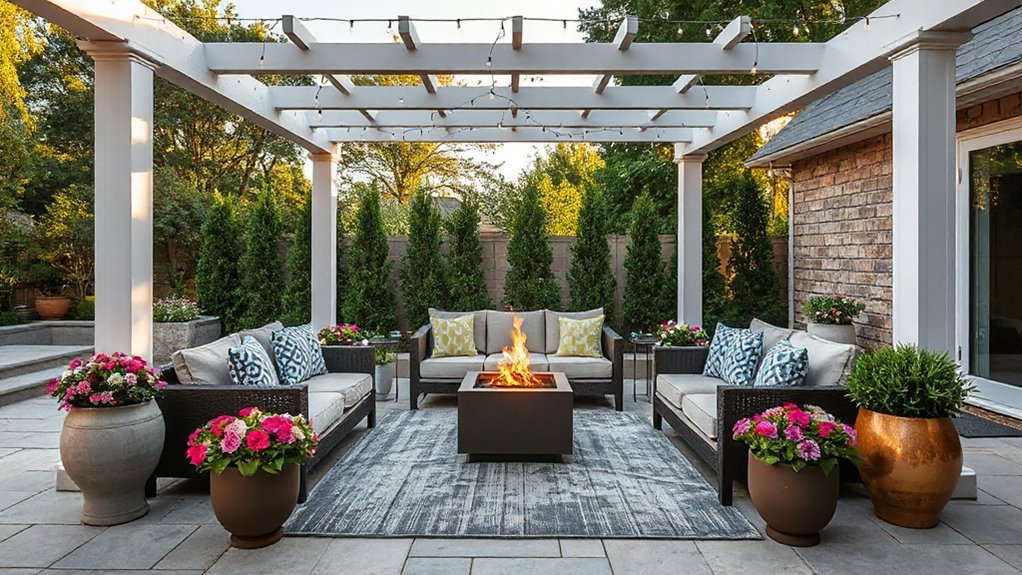
Pick Patio Shade: Pergola vs Awning vs Umbrella
How much shade do you really need, and do you want it fixed or flexible? Start by mapping sun angles and measuring the patio area you’ll cover.
A pergola gives permanent structure and boosts resale, but it’s the priciest; add a retractable canopy or slats for better outdoor coverage and to handle afternoon glare.
An awning delivers broad, reliable shade with a smaller footprint; choose manual to save money or motorized if you’ll use it daily, and confirm wall strength and wind ratings.
An umbrella is the cheapest, quickest of all shade options; pick a cantilever base for seating layouts, but expect less stability and replacement fabric every few seasons.
Match your budget, wind exposure, and use frequency.
Layer Patio Lighting for Mood and Safe Paths
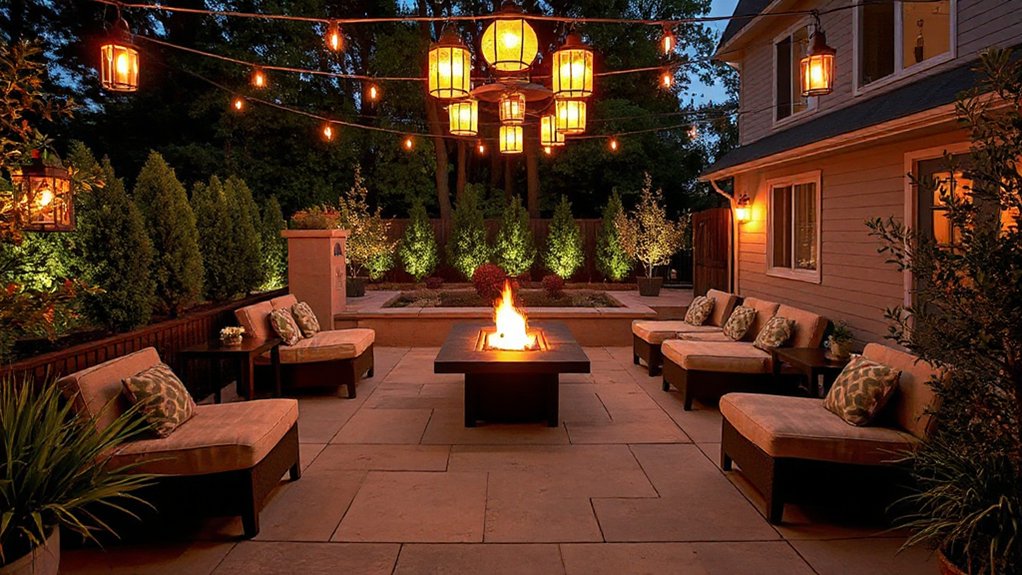
Once you know where you’ll sit and walk, you can layer patio lighting so it looks inviting and still keeps paths safe. Start with ambient light: hang string lighting under a pergola, along eaves, or between posts, keeping it high enough to avoid glare.
Next add task light where you’ll cook, serve, or read; a simple wall sconce or clamp light often costs less than built-ins.
Finish with pathway illumination: low-voltage LED stakes, step lights, or solar markers placed at turns, grade changes, and the first and last step. Use warm bulbs (2700–3000K) for comfort, and aim fixtures downward to reduce harsh shadows.
Put everything on a timer or smart plug so you don’t waste power nightly.
Add Patio Plants and Privacy (Screens, Hedges, Panels)
If your patio feels exposed, add plants and simple privacy elements to define the space without building a full enclosure. Start with patio plants in large, lightweight pots so you can shift them for sun, wind, or guests. Choose hardy options for your climate—dwarf evergreens, clumping grasses, or tall herbs—and group three containers to block sightlines faster than one.
For structure, install privacy screens where you actually need coverage: along the neighbor-facing edge or behind seating. Budget-friendly picks include outdoor fabric panels on a tension wire, lattice sheets screwed to posts, or reed fencing zip-tied to a railing.
Add a narrow trellis and let vines climb for a softer look. Keep watering simple with saucers or drip lines.
Frequently Asked Questions
How Do I Obtain Permits or HOA Approval for a New Patio?
Start by calling your city or checking its website to confirm the permit process for patios. Then submit a site plan, materials list, and contractor info.
You’ll pay fees, schedule inspections, and keep receipts to avoid costly redo’s.
Next, request HOA approval by sending the same drawings, color samples, drainage notes, and timeline.
Follow setback rules, use licensed pros if required, and get everything in writing before you build.
What’s the Typical Cost Range for a Professionally Installed Patio?
You’ll typically pay $15–$50 per sq ft, or about $4,000–$15,000 for a 300‑sq‑ft patio.
Like watching a grocery total climb item by item, costs rise with every upgrade: pavers over concrete, thicker base, edging, drainage.
Material options drive the biggest swing, while design considerations—curves, steps, retaining walls, lighting—add labor.
Get 3 bids, confirm prep specs, and cap add‑ons early.
How Long Does a Patio Installation Usually Take From Start to Finish?
You can expect a typical patio installation to take about 3–10 working days from excavation to final cleanup.
Simple paver or concrete slabs often finish in 3–5 days.
While complex layouts, drainage fixes, or retaining walls can push the timeline to 2–3 weeks.
Weather and inspections can add delays.
If you’re adding landscape lighting, plan extra trenching and wiring time.
Wait to place outdoor furniture until curing or joint sanding completes.
How Should I Maintain and Clean Patio Materials Through Different Seasons?
Wait until the first freeze or heatwave, and you’ll see why Seasonal cleaning matters: sweep weekly, rinse monthly, and scrub stains fast.
For Material maintenance, seal concrete/pavers every 2–3 years; spot-reseal joints.
Wood: clean with mild soap, re-stain every 1–3 years, and keep gaps clear.
Spring: wash off salt/pollen.
Summer: prevent mildew with airflow.
Fall: remove leaves promptly.
Winter: use plastic shovels, avoid rock salt.
Will Adding a Patio Increase My Home’s Resale Value?
Yes, adding a patio can increase your home’s resale value, especially if you build it well and keep costs reasonable. You’ll see the best return with durable materials, clean drainage, and permits handled.
Boost appeal with simple Landscaping ideas like edging, lighting, and low-maintenance plants.
Stage it with smart Furniture arrangements that show usable zones for dining and lounging.
Don’t overbuild for your neighborhood; match local comps.
Conclusion
Funny how a “simple” patio turns into a mini project manager role—you plan the layout, weigh pavers vs concrete vs decking, and suddenly you’re budgeting like it’s tax season. But you’ll thank yourself later. Set a conversation zone, add built-in benches or planter walls to cut furniture costs, and choose shade that fits your climate and wallet. Finish with layered lighting and privacy plants, and your “extra” effort becomes effortless outdoor living.