
You’ll handle most home fixes with a 16‑oz claw hammer, a #2 Phillips/slotted set or 6‑in‑1 driver, 8″ combo pliers plus 10″ tongue‑and‑groove pliers, and a 25‑ft tape measure. Add a torpedo level, utility knife with spare blades, adjustable wrench, small socket set, hex keys, and a compact hacksaw. Keep a non‑contact voltage tester and basic wire strippers for safe electrical checks. Keep going to see smart upgrades and maintenance tips.
Key Takeaways
- Start with core tools: 16‑oz claw hammer, #2 Phillips and flat screwdrivers, utility knife, combination pliers, and an adjustable wrench.
- Add measuring and layout essentials: 25‑ft tape measure, combination square, pencil/marker, and chalk line for accurate marks and cuts.
- Keep leveling tools: a torpedo level for small installs and a 24‑inch level for doors, cabinets, and shelving alignment.
- Include cutting and prying basics: snap‑off knife blades, compact hacksaw, tin snips, plus a flat pry bar and nail set for clean removal.
- Improve capability and safety with hex keys, small socket set, locking pliers, work gloves, and a non‑contact voltage tester for quick electrical checks.
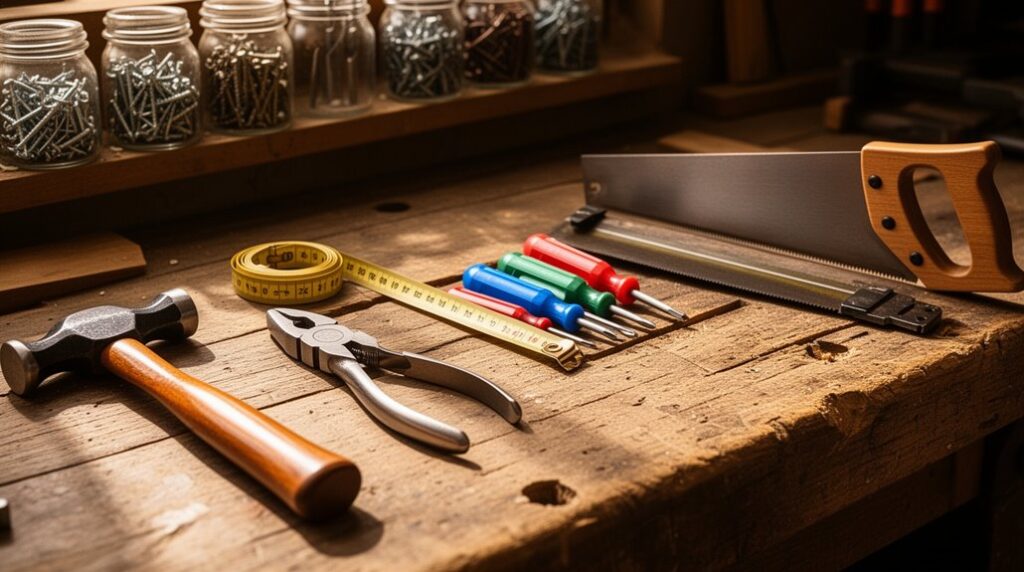
Essential Homeowner Hand Tools: Quick Checklist
If you’re setting up a basic tool kit on a budget, start with a small set of dependable hand tools that cover most repairs without wasting money on specialty gear.
Buy a 16 oz curved-claw hammer for nails and light demo. Add a #2 Phillips and slotted screwdriver set, plus a 6-in-1 driver for versatility.
Keep 8-inch combination pliers and 10-inch tongue-and-groove pliers for gripping fittings.
Include a utility knife with replaceable blades for home decor tasks like trimming wallpaper, caulk, or packaging.
Choose an adjustable wrench and a small socket set for common nuts and bolts.
Finish with a compact pry bar, a hex-key set, and work gloves.
For garden maintenance, add hand pruners and a sturdy trowel.
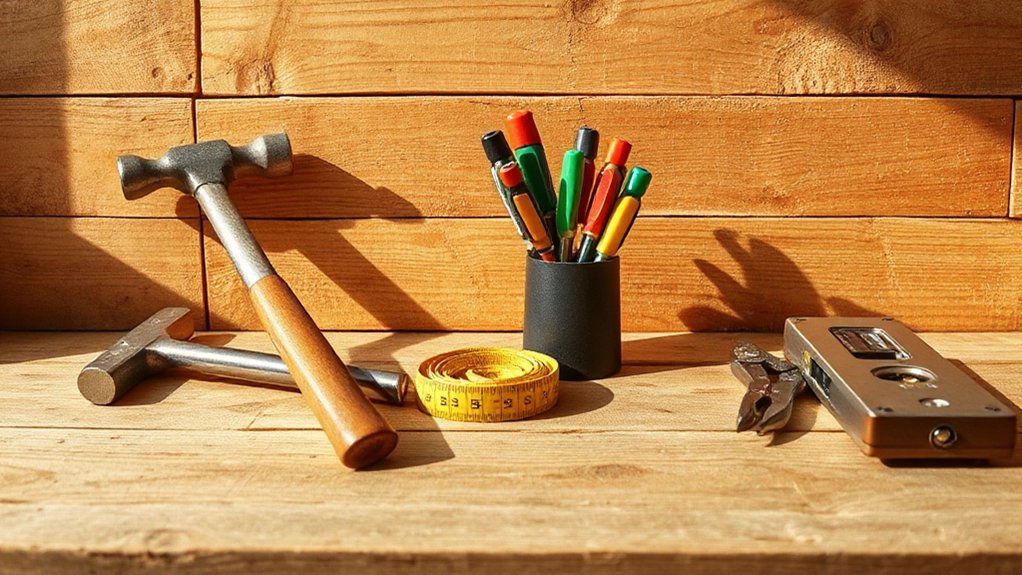
Measuring, Marking, and Leveling Tools
Once you’ve got the core hand tools covered, measuring and layout gear keeps your work accurate so parts fit and finishes look clean.
Start with a 25-foot tape measure with a stiff blade and clear standout for one-person measuring. Add a 6-inch combination square for quick 90°/45° checks and repeatable precision measurement.
For accurate marking, keep a mechanical pencil, a fine-tip permanent marker, and a chalk line; choose dark chalk for exterior work and blue for easy cleanup indoors.
A torpedo level handles shelves and appliances, while a 24-inch level improves door frames and cabinet runs.
If you’re on a budget, skip the app levels and buy one solid, straight level with readable vials.
Screwdrivers and Hex Keys for Fasteners
You’ll get more done for less money if you buy the common screwdriver types you actually encounter—Phillips, slotted, Torx, and square—and skip gimmicky multi-bit sets with soft tips.
For hex keys, choose a set that covers both metric and SAE, with hardened steel and a sensible range, so you’re not rounding fasteners or hunting for missing sizes.
Above all, match the driver to the fastener and apply controlled torque so the bit stays seated and threads survive.
Choosing Common Screwdriver Types
When should you reach for a Phillips, a flathead, a Torx, or a hex key? Match the driver to the fastener to prevent cam-out and stripped heads.
Use Phillips for most household screws in drywall anchors, hinges, and fixtures; seat the tip fully and push straight.
Choose flathead for slotted screws on covers and older hardware, but expect it to slip if you torque hard.
Grab Torx for deck screws, appliances, and many modern products; it transfers torque efficiently and resists stripping.
Use a hex key for socket-head fasteners on furniture and bikes, turning squarely to avoid rounding.
Keep a Manual screwdriver for feel and control, and add a Cordless screwdriver for repetitive installs without overspending.
Selecting Proper Hex Key Sets
Because hex sockets round out fast once the key slips, a solid hex key set saves both fasteners and time. Buy two ranges: metric (1.5–10 mm) and SAE (1/16–3/8 in) so you’re covered on furniture, bikes, and appliances.
Choose alloy steel with a black-oxide or nickel finish for corrosion resistance without paying premium prices. Get both short and long arms; long keys reach recessed screws and improve access.
Ball-end keys help in tight angles, so keep a straight-end option for seated screws. Prioritize Hex key storage that locks sizes in place and labels clearly, since missing one size stalls jobs.
For comfort on repeated turns, add Ergonomic hex handles or a fold-up set.
Fastener Fit And Torque
Although the handle feels like the main lever, fastener fit sets your real torque limit—so match the driver or hex key to the screw head with zero wobble before you lean on it.
Choose the correct tip profile (Phillips, Pozidriv, Torx, hex) and exact size; a “close enough” fit cams out, rounds heads, and wastes money on replacements.
Seat the tool fully, keep it inline, and apply steady pressure, not speed.
For stubborn screws, step up to a larger handle or use a box-end hex key for more leverage, but don’t exceed what the fastener can take.
Use witness marks or a small torque wrench for repeatable torque calibration on furniture bolts and bike parts.
Cheap sets are fine if sizes are accurate.
Hammers and Nail Tools for Hanging Jobs
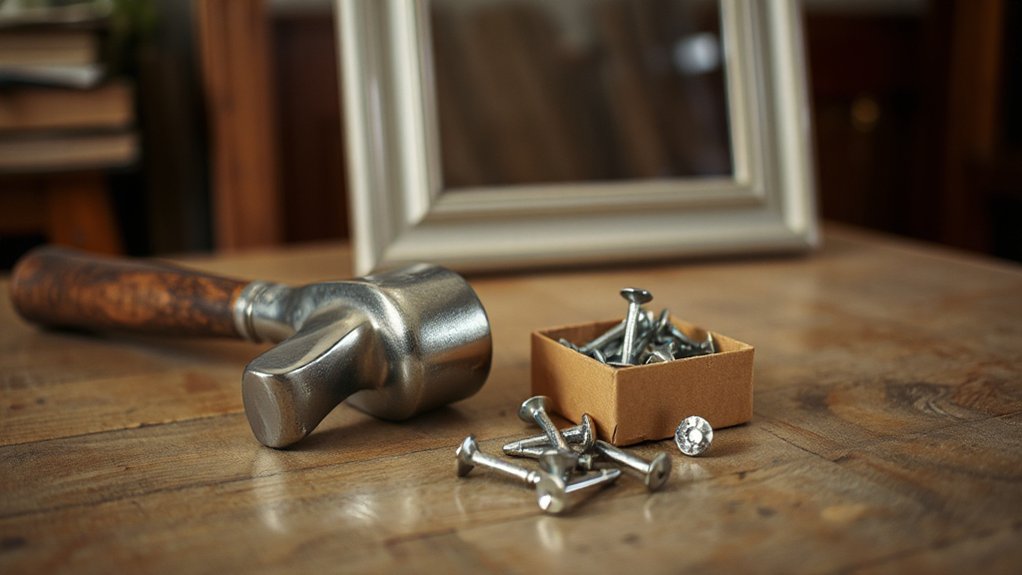
To hang pictures, mirrors, or small shelves cleanly, you’ll rely on a hammer and a few nail-setting tools that let you drive fasteners straight without chewing up the wall or the hardware. Choose a 16‑oz curved-claw hammer for most indoor jobs; it’s affordable and balances control with power.
Add a nail set so you can sink finish nails below the surface without denting trim, then patch cleanly. For Decorative nail techniques, use a lightweight tack hammer and pre-mark spacing; tap with short, controlled strokes to avoid bending brads.
Follow Hammer safety tips: wear eye protection, keep your free hand behind the strike line, and stop if the head feels loose. Store it dry to prevent rust.
Pliers and Pry Tools for Grip and Pull
When you need solid grip and controlled pulling, you’ll reach for the right pliers first—start with slip-joint for general work, needle-nose for tight spaces, and locking pliers for stubborn fasteners.
For prying and lifting without wrecking trim, you can cover most jobs with a flat pry bar and a small cat’s paw for nail pulling.
Buy mid-grade steel with comfortable grips and skip gimmicks, because these tools earn their keep fast.
Essential Pliers Types
How do you hold, twist, and pull parts without slipping or chewing them up? Start with multi purpose pliers: 8–10″ slip-joint or tongue-and-groove for nuts, hose clamps, and odd shapes.
Add 6–8″ combination/lineman’s pliers for gripping and cutting light wire; choose induction-hardened cutters and insulated grips if you’ll touch electrical.
Needle-nose pliers reach into boxes and help bend hooks; pick long, serrated jaws with a side cutter.
Locking pliers (Vise-Grip style) clamp when you need a temporary “third hand”; buy one mid-size, adjustable jaw.
Round out with Specialized pliers only as needed: diagonal cutters for clean snips, and end-cutters for pulling staples and nails.
Must-Have Pry Tools
Pliers clamp and twist, but they can’t always separate tight-fitting parts or lift something that’s glued, rusted, or nailed in place—this is where pry tools earn their spot. Keep a 10-inch flat bar for trim, a small “cats paw” for sunk nails, and a slim putty knife for paint-sealed joints. A lightweight molding bar reduces wall damage and costs little.
Use innovative pry techniques: start with the thinnest edge, work in short steps, and add a wood shim as a fulcrum to protect surfaces. For stuck parts, tap the bar with a hammer instead of forcing it.
Follow pry tool safety tips: wear eye protection, keep hands out of the travel path, and don’t pry with cracked tools.
Wrenches for Nuts and Bolts (Adjustable & Fixed)
Although a wrench looks simple, choosing the right type saves you time, prevents rounded fasteners, and keeps your knuckles intact.
Adjustable wrenches earn their keep when you don’t know the fastener size, but you’ve got to set the jaw snug and pull so the fixed jaw takes the load. Buy one 8-inch and one 10- or 12-inch; skip bargain models with sloppy jaws.
Fixed wrenches (combination or box-end) grip on more flats, deliver higher torque, and slip less, so they’re your everyday choice for plumbing shutoffs, furniture hardware, and outdoor equipment.
Start with a metric and SAE set from 8–19 mm and 1/4–3/4 inch. Add a short cheater bar only when needed.
Cutting, Trimming, and Scraping Tools
Once you’ve got fasteners under control with the right wrench, you’ll hit the next bottleneck: cutting things to length, trimming them to fit, and scraping away what shouldn’t be there.
Start with a 25mm snap-off utility knife for drywall, flooring, and packaging; buy bulk blades and swap often.
Add a compact hacksaw for metal and PVC, and a set of tin snips for thin sheet goods.
For clean trim lines, a sharp chisel and a rigid putty knife double as crafting tools and scrapers for paint drips, caulk, and adhesive.
Don’t overspend on exotic steels—spend time on sharpening blades with a small stone or strop, and you’ll cut faster and safer.
Keep a cutting mat and clamp nearby.
Basic Electrical Hand Tools for Safe Fixes
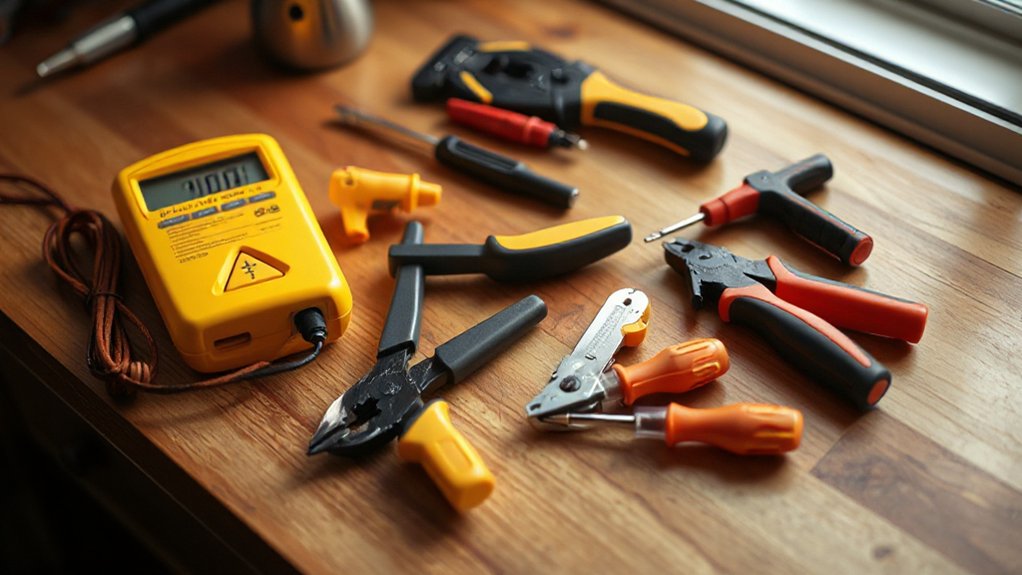
Before you touch any wiring, build a small kit that lets you verify power is truly off and make solid, code-friendly connections without mangling conductors. Start with a non-contact voltage tester for quick checks, then confirm with a two-pole tester or multimeter for reliable circuit testing at outlets and switches.
Add insulated screwdrivers, needle-nose pliers, and lineman’s pliers for twisting and torqueing connections. Use wire strippers matched to common gauge (14/12 AWG) so you don’t nick copper, and keep diagonal cutters for clean trims.
A compact fish tape helps route replacement conductors, while a utility light improves visibility inside boxes. Choose midrange tools with UL-listed testers to keep Electrical safety affordable.
Store, Clean, and Maintain Hand Tools Properly
When you store and maintain your hand tools like precision gear, they stay accurate, safe, and cheaper to own. Start with smart tool storage: keep tools dry, off concrete, and organized in a pegboard, toolbox, or drawer foam so edges don’t bang together. Add silica packs or a rust-inhibitor strip in closed boxes. Wipe tools after every job; sweat and drywall dust cause corrosion fast.
For tool cleaning, use a stiff brush and mild degreaser on metal, then dry fully. Remove rust with fine steel wool or a nylon abrasive pad and light oil. Lubricate adjustable joints and ratchets with a drop of machine oil, not grease. Sharpen blades regularly and store them sheathed. Replace cracked handles before they fail under load.
Frequently Asked Questions
How Much Should I Budget for a Complete Starter Hand Tool Set?
You should budget $75–$150 for a complete starter hand tool set, or $150–$300 if you want pro-grade steel and better warranties.
You’ll cover a hammer, screwdrivers, pliers, tape measure, utility knife, level, adjustable wrench, and hex keys.
Add Safety gear (gloves, glasses) for $15–$40.
Plan $10–$20 yearly for Tool maintenance: light oil, rust inhibitor, and replacement blades.
Should I Buy Tools Individually or as a Pre-Made Kit?
Buy a pre-made kit if you need basics fast, but buy individually if you want higher quality per dollar. Like building a playlist, you’ll skip filler and keep what you use.
Kits usually cost less upfront and include a case that helps with storage solutions.
Individual buys let you match drive sizes, steel grades, and ergonomics.
Either way, budget for Tool maintenance: oil, rust control, and periodic calibration.
What Brands Offer the Best Value for Homeowners Versus Professionals?
For homeowner value, you’ll get the best cost-to-performance from Ryobi, Craftsman, Kobalt, and Husky.
Pros usually justify Milwaukee, DeWalt, Makita, and Bosch for durability and service networks.
You can mix tiers: buy pro-grade drill/impact, homeowner-grade hand tools.
Protect value with Tool maintenance (clean, oil, calibrate) and smart storage solutions (stackable cases, wall rails) to reduce loss, damage, and downtime.
How Do I Choose Tools That Fit My Hand Size and Grip Strength?
Choose tools by testing handle diameter and trigger reach in your hand; you shouldn’t strain to close grips.
Prioritize ergonomic tool design with contoured, rubberized handles and a neutral wrist angle.
Apply grip comfort considerations: look for textured surfaces, flared ends, and lighter spring tension on pliers/snips.
Compare weights; smaller hands often need slimmer handles, not heavier tools.
Buy one midpriced model first, then standardize if it fits.
Which Tools Are Worth Buying Used, and Which Should Be New?
Buy used for solid-steel hand tools like hammers, pry bars, chisels, and quality screwdrivers if tips aren’t rounded.
Buy new for measuring tools, utility knives, bits, and anything with wear parts (tape measures, levels, clamps) where accuracy matters.
Always inspect for cracks, rust pitting, and loose handles, then plan Tool maintenance (clean, oil, sharpen).
Don’t skimp on safety gear importance—new gloves, eye protection, and earplugs.
Conclusion
With these core hand tools on hand, you’ll handle most “little surprises” around the house without calling in help. Measure and level first, then drive fasteners with the right screwdriver or hex key. Use a hammer, pliers, and pry bar for hanging and pullouts, and keep an adjustable wrench plus a small set of fixed wrenches for hardware. Cut clean, scrape safely, and use basic electrical tools when needed. Store dry, wipe clean, oil lightly.

