Table of Contents
Key Takeaways
- A reclaimed wood dining table is one of the most impactful pieces of furniture you can introduce to a home — and building one yourself puts you in complete control of the result.
- Timber selection is the single most consequential decision in the entire project; species, condition, and width all determine what the finished table looks and feels like.
- A dining table top needs proper jointing, thorough preparation, and correct moisture content before any construction begins — shortcuts at this stage cause problems that cannot be fixed later.
- The base must be designed to carry the considerable weight of a solid reclaimed top; steel frames and trestle constructions are the most reliable options.
- Finishing a dining table correctly matters more than on almost any other piece of furniture — it will take heat, moisture, and daily contact, and the finish needs to handle all of it.
- The result of getting this right is a table that will be the centre of your home for decades — and one that no one else will have.
Why We Decided to Build Our Own Reclaimed Wood Dining Table
The dining table is the most important piece of furniture in a home. Not the most expensive, not necessarily the most designed — but the most important. It is where the household gathers, where meals are shared, where conversations happen that people remember years later. A table that is right for that role is worth taking seriously.
We had spent a long time looking. We knew what we wanted — something solid, something with genuine character, something that would fit our dining room without looking like it had been delivered in flat-pack form forty-eight hours earlier. What we could not find, at a price that made sense, was a reclaimed wood dining table that ticked all of those boxes.
So we made one. This is the full account of how we did it — the timber sourcing, the planning, the construction, and the finishing — including everything we wish someone had told us before we started.
Sourcing the Timber
Finding the right timber for a dining table top is more involved than sourcing for a smaller project. You need more of it, the boards need to be in reasonable condition across their full length, and for a piece this significant you want timber with genuine character rather than merely adequate material.
We visited three reclamation yards before we found what we were looking for. The search took the best part of a month, which sounds excessive but was entirely worth it. The timber you choose will define the table for its entire life. Rushing that decision is a false economy.
What We Were Looking For
Our dining table needed to seat eight comfortably — which meant a top of around 220cm by 95cm. That width made single-slab timber impractical; we were always going to be jointing boards together. What we wanted was a set of boards from the same source, ideally the same original floor or structure, so that the colour and grain would be broadly consistent across the top.
We settled on reclaimed oak floorboards from a Victorian manor house — wide boards, 180mm across, 32mm thick, with the original face showing the kind of warm, complex grain that only centuries of growth and decades of use produce. We bought enough for the top with a sensible surplus, because reclaimed timber always throws surprises and running short part-way through is a problem you do not want.
Choosing Your Species
Oak
Our choice, and the most widely available quality reclaimed hardwood in the UK. Old oak is extraordinarily dense — significantly harder than new oak grown at commercial speed — and it develops a patina over time that becomes richer with every year of use. For a dining table that will take heat from dishes, moisture from spills, and the daily contact of plates and cutlery, old oak is close to the ideal material. Reclaimed Victorian and Edwardian oak floorboards are the most common source, and the wide boards produced in that period are difficult to match in new timber.
Elm
Elm carries a wild, interlocking grain that makes it one of the most visually dramatic timbers available for furniture. Dutch elm disease wiped out British elm populations in the 1970s, which means genuinely old elm is not commercially available as new timber — reclaimed is the only route. When you find it in good condition at a reclamation yard, it is worth considering seriously. The grain pattern means it can be harder to machine cleanly than oak, but for a dining table top the result is spectacular.
Pitch Pine
For a more industrial or rustic aesthetic, reclaimed pitch pine is a strong option. Dense, resinous, and extremely hard-wearing, pitch pine from Victorian mill and factory floors takes a beautiful finish and ages with dignity. It is typically more affordable than oak, and boards of generous width are reasonably available. The warm amber and red tones of old pitch pine work particularly well in kitchens and in dining rooms with a contemporary or mixed-material aesthetic.
Iroko and Other Tropical Hardwoods
Reclaimed iroko, teak, and similar tropical hardwoods occasionally appear at specialist salvage yards and are worth considering for their exceptional durability and distinctive grain. These species were used widely in mid-century commercial and institutional buildings. They require slightly different finishing approaches — teak in particular has a natural oil content that can affect adhesion — but the results can be outstanding.
Planning the Build
Finalising Dimensions
Our finished table is 220cm long, 94cm wide, and 76cm tall. Height matters more than people often appreciate — a table that sits at the wrong height relative to your chairs makes every meal subtly uncomfortable. Standard dining table height in the UK is 73–76cm; check the chair height you are working with and confirm the top-to-seat clearance will be comfortable before committing to a base design.
Width is the other dimension worth thinking about carefully. A table that seats four per side needs to be at least 85cm wide to allow comfortable place settings on both sides without the centre becoming unusable. We went to 94cm, which gives generous space for serving dishes in the middle without the table becoming difficult to reach across.
Designing the Top
We used five boards jointed along their long edges to make up the full width. Before jointing, we spent time laying the boards out in different configurations, flipping some face-down, rearranging the order, until we had an arrangement where the grain and colour flowed as well as possible across the full width. This step costs nothing except time and makes a significant difference to the finished result.
The end grain of adjacent boards should ideally run in alternating directions — cup up, cup down, cup up — to counteract any tendency to cup across the width as the timber responds to seasonal humidity changes.
Designing the Base
A solid reclaimed oak dining table top is extremely heavy. Our five-board top, before finishing, weighed in at close to 80kg. The base needs to be designed to carry that weight without flex, and it needs to be fixed to the top in a way that allows the timber to move seasonally without cracking.
Steel Frame
We went with a welded steel frame — two rectangular end frames of 40mm square box section, connected by two parallel stretchers running the length of the table. The frames were made by a local fabricator to our drawings, powder-coated in a matte anthracite finish, and drilled with slotted holes for fixing to the top. Slotted holes are important: they allow the timber to expand and contract across its width without the fixings fighting the wood. Rigid fixing of a solid timber top to a metal base is an invitation to cracking.
Trestle Construction
A trestle base in reclaimed timber gives a more unified, traditional look and is well within the capability of a confident DIYer with basic joinery tools. Two A-frame or T-shaped trestles, connected by a central stretcher tenoned or bolted through, create a stable base that can be built from the same timber batch as the top. The visual warmth of an all-timber table works particularly well in traditional or country interiors.
Turned or Tapered Legs
Four substantial turned or tapered legs — in oak, pine, or metal — with a central stretcher for rigidity is a cleaner, more furniture-maker look than either a trestle or a full steel frame. This approach works best when the legs are substantial enough in section to look proportionate under a wide, heavy top. Spindly legs under a generous reclaimed top look wrong and can be structurally inadequate.
The Build Process
Step One: Timber Preparation
Before any jointing or cutting, every board went through a full inspection. We ran a strong magnet along each face and edge to locate hidden fixings, punched out every nail and screw we found, and went over the boards again by hand to catch anything the magnet had missed. Old oak floorboards can harbour generations of fixings — some original, some from subsequent reflooring — and a single missed nail in a planer or thicknesser is an expensive and potentially dangerous problem.
We also checked moisture content across every board. The readings ranged from 10% to 13% — acceptable for indoor furniture, but we gave the boards another two weeks stickered in our dining room before we started cutting, to allow them to acclimatise fully.
Step Two: Dimensioning
Each board was run through the thicknesser in light passes to bring them all to a consistent 28mm. We lost a few millimetres of thickness in the process, which was expected — the face of reclaimed floorboards is never perfectly flat, and consistency across the full set of boards matters more than preserving maximum thickness.
The edges of each board were shot straight on the jointer to give clean, gap-free joints. Old floorboards are rarely perfectly straight along their length, and this step cannot be skipped. A poorly fitted joint in a dining table top will be visible for the life of the piece.
Step Three: Jointing the Top
We used a biscuit joiner to cut slots at 300mm intervals along every joining edge, then laid all five boards out dry with the biscuits in place to check the fit before committing to glue. Satisfied with the arrangement, we applied a generous bead of interior PVA to each joining face, inserted the biscuits, and clamped the assembly with five sash clamps running across the width and two pipe clamps running along the length to keep the boards from bowing during clamping.
The assembly was left clamped on a flat surface — critical, this — for a full twenty-four hours before the clamps came off.
Step Four: Flattening the Top
Even with careful preparation, a jointed top will rarely be perfectly flat straight from the clamps. We used a hand router with a wide spoilboard sled to skim the face of the top flat — a technique that takes some setup but produces a reliably flat result across a wide panel that a belt sander alone cannot guarantee. A cabinet scraper and hand plane refined the surface before sanding began.
Step Five: Sanding
We worked through 80, 120, and 180 grit with an orbital sander, vacuuming and tack-clothing between each grit. The end grain of the boards — visible at each end of the table — was given extra attention, as end grain is more absorbent and will take finish differently if not sanded consistently with the face.
The edges were softened with a hand plane and finished by hand with 180-grit paper. We chose a relatively square edge profile — just enough of a softening to remove the sharpness — to keep the honest, substantial quality of the timber.
Step Six: Fixing the Base
The steel frame was positioned centrally on the underside of the top and the fixing positions marked through the slotted holes. We drilled pilot holes at the mid-point of each slot, allowing room for the timber to move in either direction, and fixed through with M8 bolts and large penny washers to distribute the load. The washers sit in shallow recesses routed into the underside so the frame sits flush against the timber.
Step Seven: Finishing
For a dining table — a surface that will take hot dishes, spilled wine, and daily contact — the finish is not a cosmetic decision. It needs to protect properly.
We used Osmo Polyx-Oil in a satin finish, applied in three coats. The first coat was worked into the timber with a flat brush, left for eight hours, and then lightly abraded with 320-grit paper before the second coat went on. The third coat was applied and left to cure fully over forty-eight hours before the table went into use.
Osmo penetrates rather than sitting on the surface, which means it protects effectively without the plastic quality of a polyurethane lacquer. It can be refreshed in future by cleaning the surface and applying a maintenance coat — no stripping or sanding back required. For old oak in particular, which has a relatively open grain, a penetrating finish is far more appropriate than a surface coating.
The underside of the top received two coats of the same product. Finishing both faces is not optional on a dining table — uneven moisture absorption between top and underside is a reliable route to cupping.
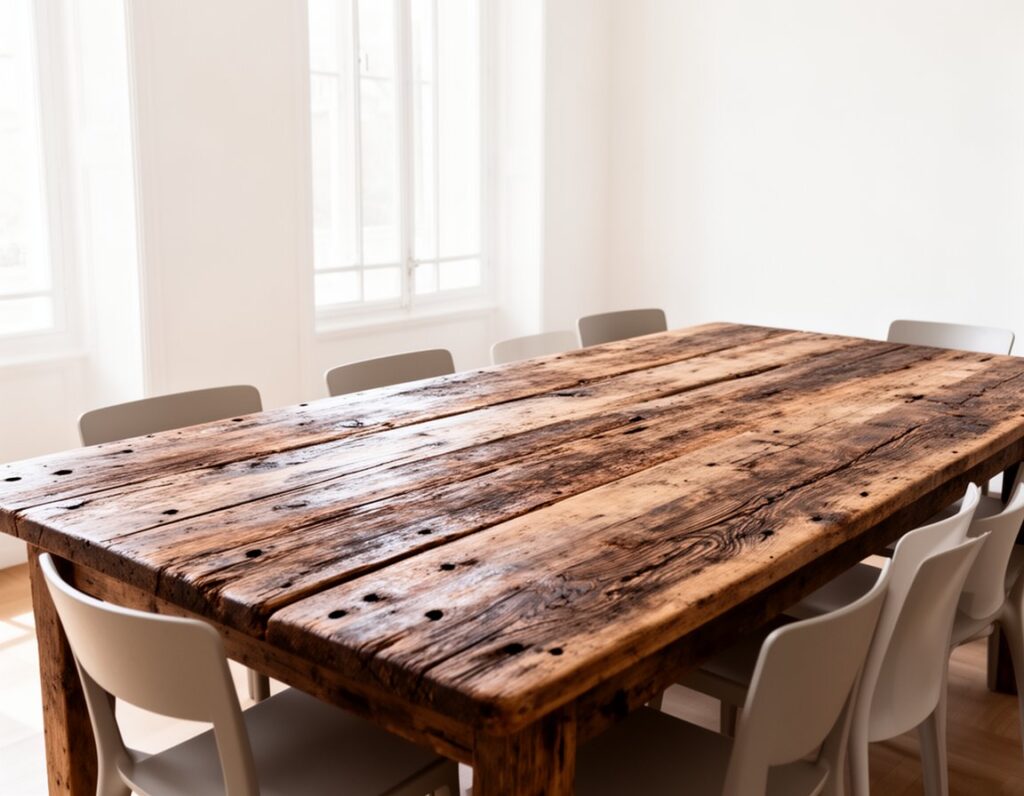
The Finished Table
The table has been in daily use for nearly two years. It has been through three Christmas dinners, countless everyday meals, homework sessions, jigsaw puzzles spread across the full surface, and at least one incident involving a full bottle of red wine. The surface looks better now than it did when we finished it — the oak has darkened slightly, the grain has deepened, and the marks of use have joined the marks the timber came with in a way that feels entirely right.
It is the piece in our house that we are most pleased with. Not because it was the most difficult to make — it was not — but because getting the timber right, taking the time to prepare it properly, and thinking carefully about the design produced a result that is genuinely irreplaceable.
Frequently Asked Questions
How long does it take to build a reclaimed wood dining table?
The physical build — jointing, flattening, sanding, fitting the base, and finishing — took us a full weekend of concentrated work, plus evenings across the following week for finishing coats and curing time. The honest answer including timber sourcing, acclimatisation, and drying time is closer to six to eight weeks from start to finished table. Most of that time is waiting, not working — but the waiting is not optional. Timber that has not had time to acclimatise will move after the table is built, and movement in a dining table top is a serious problem.
How much does it cost to build a reclaimed wood dining table?
Material costs for a table of the size described in this article — seating eight, solid reclaimed oak top, welded steel base — came to approximately £600 in total. That breaks down roughly as £350 for the timber (including surplus for wastage), £180 for the fabricated steel base, and £70 for finishing products, consumables, and fixings. A comparable table from a bespoke furniture maker would cost several times that figure. A mass-produced approximation at a similar price would not be in the same category of material or construction.
How do I prevent the table top from cracking or warping?
The three most important factors are moisture content before construction, finishing both faces of the top, and allowing for seasonal movement in how the base is fixed. Get all three right and a solid timber dining table top is extremely stable in normal domestic conditions.
Get any one of them wrong and you will have problems. Moisture content should be checked before the timber is machined and again before finishing — 8–12% is the target range for furniture used in centrally heated UK homes. Both faces must receive the same number of finish coats. And the base fixings must allow the timber to move seasonally — slotted holes in a steel frame, or wooden buttons in a routed groove for a timber base.
What is the best way to clean and maintain a reclaimed oak dining table?
Day-to-day cleaning is straightforward: a lightly damp cloth, followed immediately by a dry one. Avoid leaving water or other liquids to sit on the surface. For spills, blot rather than wipe — wiping spreads liquids and can push them into the grain. Once or twice a year, clean the surface thoroughly, allow it to dry, and apply a maintenance coat of the same finishing product used originally. With a penetrating oil or hardwax oil finish, this process takes less than an hour and keeps the surface protected and looking its best without any sanding or stripping.
Can I add a leaf extension to a reclaimed wood dining table?
Yes, though it adds significant complexity to the build. An extending dining table requires either a draw-leaf mechanism, a butterfly leaf, or a separate central leaf with a table that pulls apart to accommodate it. All of these require precise engineering of the underframe and careful matching of the extension leaf timber to the main top — which can be challenging with reclaimed material, where exact colour and grain matching is never guaranteed. If extension capability is important, it is worth discussing with a furniture maker who has experience of building extending tables in reclaimed timber, rather than attempting it as a first DIY project.
Conclusion
Building a reclaimed wood dining table is a project that asks more of you than a smaller piece — more planning, more timber, more careful preparation, and more patience with the process. But it returns more too. The result is a table with a presence and a character that cannot be purchased off a website, at a price that is a fraction of what a comparable bespoke piece would cost to commission.
More than that, it is a table with a story. The timber came from a specific place, served a specific purpose, and was brought back into use by someone who took the time to understand the material and treat it properly. That story does not leave the room. It sits at the table with you every time you eat.
For a full grounding in the material — how to source it, what to look for, how to prepare it, and what to expect when working with it — our guide to reclaimed wood covers everything you need to know before you start.