Start with a roof inspection: check attic stains and odors, scan shingles for cracking or bald granules, and photograph flashing weak points at chimneys, skylights, and valleys. Upgrade to Class 3 or 4 impact-resistant shingles, high-wind metal, or impact-rated tile for storm protection. Add peel-and-stick or high-temp synthetic underlayment, new step flashing, drip edges, and clear gutters. Balance soffit and ridge vents, air-seal, boost insulation, and consider ENERGY STAR cool shingles or coatings. Keep going to see which upgrades fit your climate, budget, and insurer.
Key Takeaways
- Upgrade to UL 2218 Class 4 impact-resistant shingles or high-wind metal panels to better withstand hail and storms.
- Install peel-and-stick underlayment at eaves and valleys to stop wind-driven rain and ice-dam leaks.
- Replace and correctly layer flashing at chimneys, skylights, valleys, and vents to prevent recurring water intrusion.
- Improve attic performance with balanced soffit-to-ridge ventilation plus air-sealing and higher R-value insulation for comfort and moisture control.
- Choose ENERGY STAR or CRRC-rated cool roofing materials or coatings to reduce heat gain, lower bills, and modernize curb appeal.
Roof Inspection Checklist: Prioritize Upgrades Fast
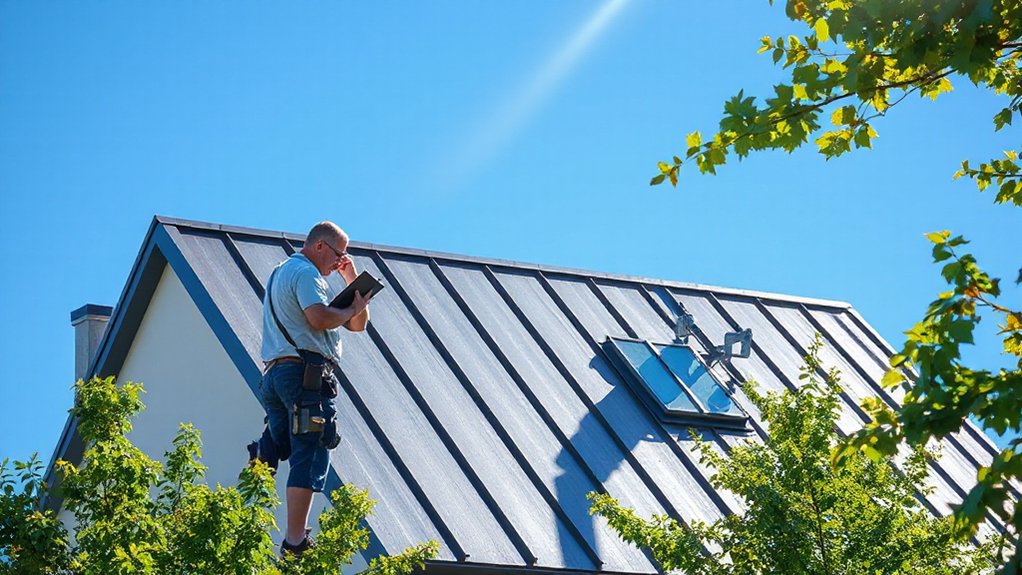
Before you spend money on roofing upgrades, run a quick inspection checklist so you can spot the highest-impact fixes first. Start inside: look for ceiling stains, musty attic odors, and daylight at ridge lines.
Outside, scan shingles or tiles for curling, cracking, bald granules, and soft spots that signal trapped moisture. Check flashing at chimneys, skylights, and valleys; loose metal and failed sealant cause most leaks.
Clear gutters and confirm downspouts discharge away from the foundation to protect fascia and prevent ice dams. Inspect ventilation: blocked soffits and weak exhaust bake shingles and cut Roof durability.
Finally, document issues with photos, rank them by water-entry risk, and set Maintenance schedules so you fix small failures before they cascade.
Wind- and Hail-Rated Roof Materials to Consider
Once you’ve flagged weak spots in your inspection, you can upgrade to roof materials that are tested for wind uplift and hail impact. You’ll want to compare impact-resistant shingles (often Class 3 or 4), metal roofing engineered with high-wind fastening systems, and tile assemblies designed to shed hail without cracking.
Next, you can match each option to your local storm risk, budget, and insurance requirements.
Impact-Resistant Shingle Options
If your roof takes regular abuse from high winds or hailstorms, impact-resistant shingles can cut down on damage, surprise leaks, and frequent repairs. Look for UL 2218 Class 4 or equivalent testing, plus manufacturer wind ratings that match your local code and storm history.
Laminated asphalt “architectural” options typically outperform 3-tab, and polymer-modified shingles add flexibility that helps resist cracking on impact.
Ask your roofer about enhanced nailing patterns, starter strips, and high-bond sealant zones—details that keep tabs from lifting when gusts hit.
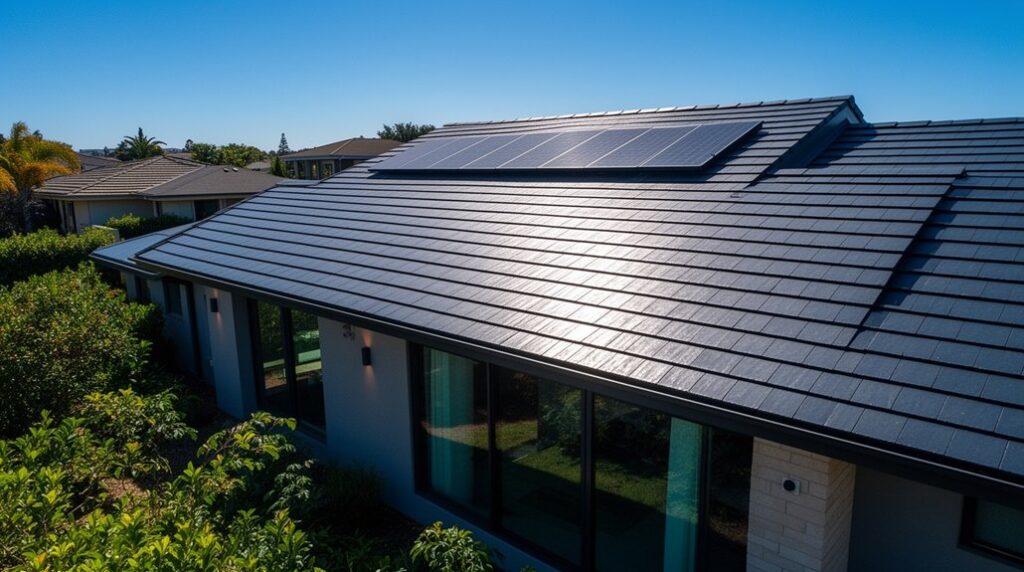
If you’re planning solar integration, choose a shingle approved for mounting hardware and verify warranty language.
Pair the upgrade with gutter protection so hail shed and granules don’t clog downspouts during heavy rain events.
Metal Roofing Wind Performance
Why does metal roofing keep its edge when storms crank up the wind? You get tight interlocking panels, concealed fasteners, and tested attachment patterns that limit uplift and flutter. Look for UL 580/1897 or FM 1-90 ratings, and ask your roofer to match clip spacing and screw type to your local design wind speeds.
Standing-seam systems trend upward because they shed gusts cleanly and reduce exposed penetrations. For coastal zones, choose thicker gauges, corrosion-resistant coatings, and high-temp underlayment so edges don’t peel back.
Properly detailed eaves, ridges, and hip caps keep pressure from sneaking underneath. Done right, you’ll see metal durability and reliable wind resistance with a modern, low-maintenance profile.
Tile Systems For Hail
How do tile roofs hold up when hail starts hammering your house? Better than you might think—if you choose the right system. Look for Class 4 impact ratings and thicker profiles in concrete or polymer-modified tiles; they’re trending because they mimic clay or slate while resisting fractures.
Prioritise hail resistant tiles with reinforced edges and interlocking side laps that reduce uplift and limit water entry after strikes.
You’ll also want a high-quality underlayment (synthetic, self-adhered in valleys) so your roof stays watertight even if a tile chips. Specify corrosion-resistant fasteners, foam or mortar set per manufacturer, and tight flashing at penetrations.
With proper installation and a documented warranty, tile becomes reliable, impact proof roofing that modernises curb appeal and lowers storm-season repair risk.
Underlayment and Flashing Upgrades That Prevent Leaks
Even a premium shingle system can fail when water slips past the surface, so upgrading your underlayment and flashing is one of the smartest leak-prevention moves you can make. Choose a high-temp synthetic underlayment or peel-and-stick membrane at eaves, valleys, and around penetrations to stop wind-driven rain and ice backup.
Replace aging step flashing, chimney counterflashing, and pipe boots with corrosion-resistant metal and molded gaskets, and insist on proper overlap and sealant discipline. If you’re planning solar integration, specify flashed mounts that tie into the underlayment layer, not just surface caulk.
Add drip edge along rakes and eaves to direct runoff into your system, and pair it with gutter protection to keep debris from forcing water under the edge. You’ll reduce staining, rot, and call-backs.
Ventilation Upgrades to Stop Moisture and Mold
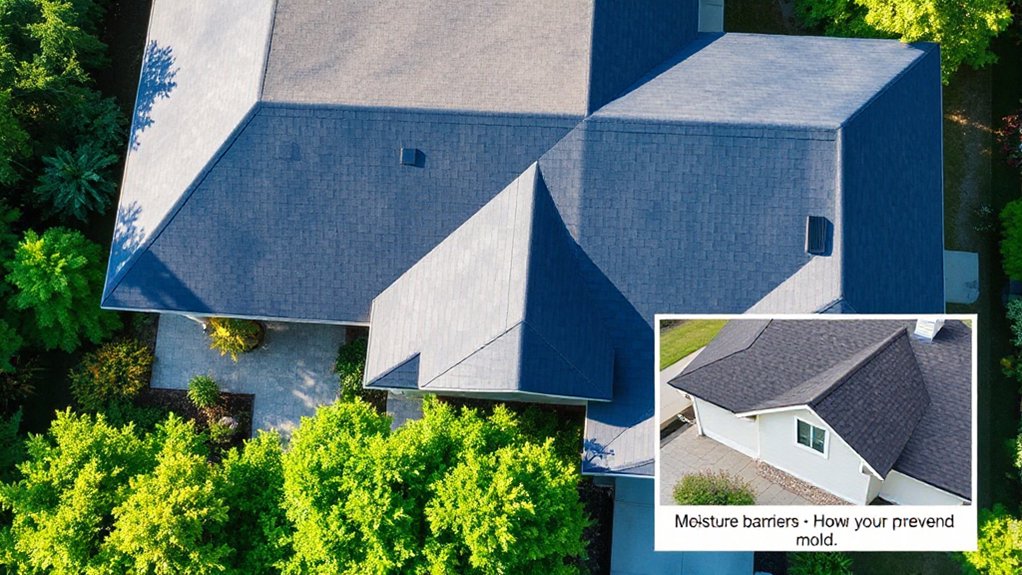
Water doesn’t have to leak through shingles to cause damage—trapped humidity in the attic can still soak insulation, warp decking, and feed mold.
Upgrade your attic ventilation so moist air exits as fast as it enters. Start by confirming you’ve got balanced intake and exhaust: continuous soffit vents paired with a ridge vent usually outperform scattered box vents and look cleaner on modern rooflines.
Add baffles at eaves so airflow doesn’t get blocked, and seal off bathroom-fan duct leaks that dump steam into the attic.
For humidity control, consider smart vents or a variable-speed attic fan with a humidistat, set to trigger before condensation forms.
You’ll reduce musty odors, protect framing, and extend shingle life year-round.
Roof Insulation Upgrades That Lower Energy Bills
Because heat moves to the path of least resistance, a thin or patchy attic insulation layer can quietly drive up your HVAC runtime all year. Start with an air-seal: foam or caulk top plates, penetrations, and the attic hatch, then add insulation to your climate’s recommended R-value.
Blown-in cellulose fills gaps fast; spray foam suits tight eaves; batt upgrades work when you cut and fit cleanly around wiring. Don’t block soffit-to-ridge airflow—use baffles—so insulation stays dry and effective.
Upgrade duct insulation and seal joints with mastic to stop losses. If you’re planning solar panel integration, keep access paths and avoid compressing insulation at racking points.
For rooftop garden design, specify high-compressive insulation above the deck and a continuous vapor control layer.
Cool Roof Shingles and Coatings for Summer Heat
To cut peak summer heat gain, you can choose a cool roof that reflects more solar energy and sheds absorbed heat faster, keeping the roof surface and attic temps lower.
You’ll see this in today’s reflective shingle options—light granules, “cool color” pigments, and ENERGY STAR–rated lines that fit common asphalt profiles without changing your roof’s look.
If you’re coating instead, you’ll need proper prep, correct mil thickness, and regular inspections to maintain reflectivity and seal small cracks before they turn into leaks.
How Cool Roofs Work
When summer sun beats down, how do you keep your roof from turning your attic into a heat trap? Cool roofs work by managing two physics basics: reflectance and emittance. A reflective surface bounces more solar energy away before it turns into heat, while high emittance lets the roof shed absorbed heat faster. That lowers roof-surface temperatures, reduces heat flow into decking and attic air, and eases your HVAC load during peak hours.
You’ll get the best results when you pair the roof surface with tight air sealing, balanced intake/exhaust ventilation, and insulation that meets current code.
If you’re planning solar integration, cooler roof temps can also support steadier panel performance. Choose eco-friendly materials and low-VOC coatings to modernise without sacrificing indoor air quality.
Reflective Shingle Options
Cool-roof performance comes down to reflectance and emittance, and the fastest way to put those principles to work is with reflective shingles or a purpose-built coating.
When you shop, look for “cool roof” asphalt shingles with light-toned, ceramic-coated granules that boost solar reflectance without the glare of bare metal. You’ll also find polymer-modified, factory-finished options that hold colour longer and resist algae streaking.
If you’re planning solar integration, choose shingles that manage heat around mounting points and keep attic temps steadier, which can help equipment run closer to spec.
Ask for CRRC-rated data, not just marketing claims, and compare aged reflectance values.
You can also prioritise eco friendly materials, like shingles with recycled content and low-impact manufacturing.
Coating Application And Care
How do you get cool-roof performance without swapping your entire shingle system? Apply a reflective roof coating designed for asphalt shingles, and you’ll cut surface temps during peak summer heat.
Prep drives results: wash off algae and chalking, let the roof dry fully, and repair curled tabs or exposed nails before you coat.
Follow manufacturer specs on application techniques—correct mil thickness, coverage rate, and cure window matter more than brand hype. Use a roller for field areas and a brush for edges, vents, and flashing, then back-roll for even reflectivity.
Protect coating durability with simple care: clear debris, avoid pressure washing, inspect after storms, and recoat on schedule when gloss and reflectance fade.
Modern Roof Colours and Profiles for Curb Appeal
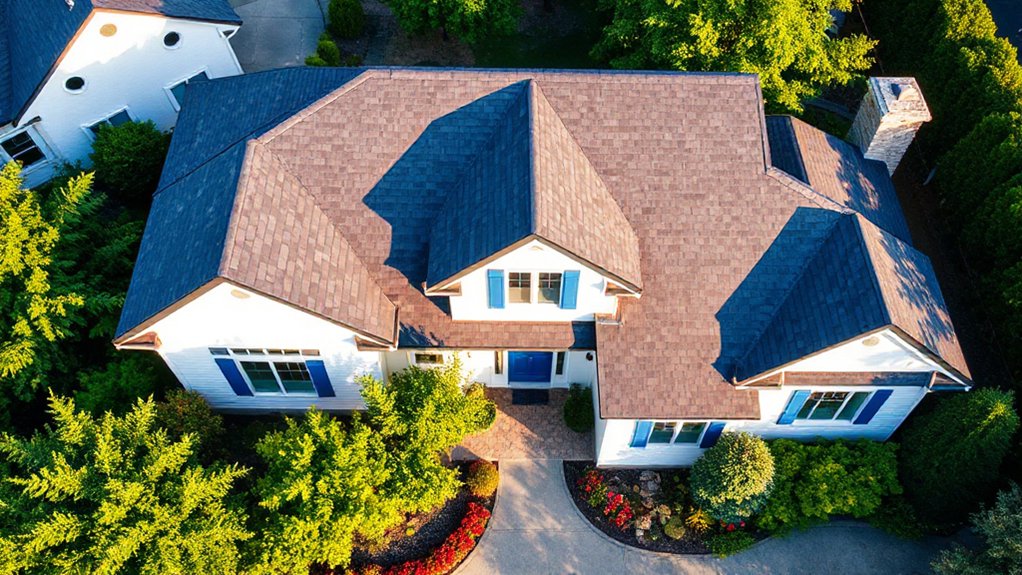
Because your roof dominates the street view, choosing a modern colour and profile is one of the fastest ways to sharpen curb appeal without touching the rest of the exterior.
Start with Color pairing: match undertones to fixed elements like brick, stone, and trim. Cool greys suit crisp whites and black frames; warm charcoals flatter creamy renders; deep greens and bronzes complement timber and earthy masonry.
Then dial in profile selection. Low-profile metal standing seam reads contemporary and clean, while architectural shingles add depth without looking busy.
If you want a modern Mediterranean vibe, choose flat-profile concrete or clay rather than high-barrel shapes. Keep contrast intentional: dark roofs slim bulky forms, lighter tones brighten compact homes.
Finally, check that chosen finishes resist fading and hide dust in your climate year-round.
How to Vet a Roofing Contractor (Bids, Warranties)
Even if two roofing bids look similar on the surface, the fine print can hide big differences in materials, labour scope, and warranty coverage. Treat the Bidding process like a checklist: confirm tear-off layers, underlayment type, ventilation upgrades, flashing details, and cleanup. Ask for product line names and colour codes, not “architectural shingles.”
Compare labor hours and who handles permits and inspections.
Verify Contractor credentials before you sign: license, insurance certificates, manufacturer certifications, and recent local references. Request photos of comparable jobs, especially modern profiles like standing seam or impact-rated shingles.
For warranties, separate manufacturer coverage from workmanship, confirm transferability, and get exclusions in writing. Guarantee the bid lists change-order pricing and a final walkthrough to document completion.
Frequently Asked Questions
Do I Need a Permit for Roofing Upgrades in My Area?
You probably do need a permit, but it depends on your city and the scope of work.
If you’re replacing shingles in-kind, you may skip it.
If you’re changing materials, altering the roofline, adding skylights, solar mounts, or structural decking, you’ll likely need one.
Check local Building codes and permit requirements on your municipality’s website, then confirm with the building department before scheduling contractors.
How Long Will My Home Be Exposed During the Roof Replacement?
You’re typically exposed for only a few hours to a day, because crews strip and “dry-in” sections fast.
Your roofing duration depends on size, layers, and complex details like valleys, skylights, and chimneys.
Most replacements finish in 1–3 days, with underlayment protecting you overnight.
Weather impact matters most: rain, high winds, or extreme heat can pause work.
Ask for staging and tarping plans.
Can I Stay in My Home While Roofing Work Is Underway?
Yes, you can usually stay in your home while roofing work is underway, but you’ll need to plan around it. Expect higher noise levels during tear-off, nailing, and material drops, especially in the morning.
Interior disruption is typically minimal, though vibrations can shift wall art and dust may sneak in via attic access.
You should secure pets, clear driveways for deliveries, and avoid working from home.
Will Roofing Upgrades Affect My Home Insurance Premium or Coverage?
Yes, roofing upgrades can change your premium or coverage—like a shield that gets stronger overnight. You should tell your insurer before and after work, because insurance implications depend on materials, wind ratings, fire resistance, and installation quality.
You may qualify for discounts with impact-resistant shingles or improved ventilation, but some changes trigger coverage adjustments or inspections.
Keep permits, invoices, and photos, and confirm updated replacement cost and endorsements in writing.
What Financing Options Are Available for Major Roofing Improvements?
You’ve got several financing options for major roofing improvements: home equity loans or HELOCs, contractor financing, and cash-out refinancing if rates make sense.
You can also use personal loans for faster approval, or 0% intro APR credit cards for smaller phases.
Check local and federal loan programs, including energy-efficiency incentives for cool roofs or solar-ready upgrades.
Compare APR, fees, lien terms, and repayment flexibility before you sign.
Conclusion
You start with a quick inspection and, by coincidence, the same weak spots that threaten leaks also drive heat gain and mold. When you upgrade to wind- and hail-rated shingles, tighten underlayment and flashing, and improve ventilation, you’re not just “fixing” a roof—you’re modernising performance. Add better insulation and a cool-roof finish, then pick a fresh colour/profile for curb appeal. Finally, vet contractors by bids, warranties, and timelines so the upgrade lasts.