Stock a small kit (hammer, 6-in-1 screwdriver, utility knife, tape, spackle, caulk, sandpaper). Patch nail holes by sanding, pressing in spackle, scraping smooth, drying, then sanding flush. Clean scuffs, prime bare drywall, and feather a matched paint touch-up with a mini-roller. Re-caulk tubs or trim by cutting out old caulk, cleaning, taping edges, laying a steady bead, and peeling tape fast. Tighten loose knobs and silence squeaky hinges with a quick wipe and silicone spray. Keep going for more foolproof blending tricks.
Key Takeaways
- Patch small drywall holes with spackle, sand flush, and wipe dust for an instantly cleaner-looking wall.
- Re-caulk tubs, sinks, and trim by removing old caulk, cleaning the joint, and applying a smooth new silicone bead.
- Touch up paint by cleaning, lightly sanding, priming bare spots, and feathering thin coats to blend seamlessly.
- Tighten loose knobs, pulls, and hinges; reinforce stripped holes with toothpicks and wood glue for sturdier, fresher hardware.
- Quiet squeaky doors by cleaning hinge knuckles and applying silicone or white lithium lubricant, then cycling the door to work it in.
Grab This Basic DIY Repair Kit
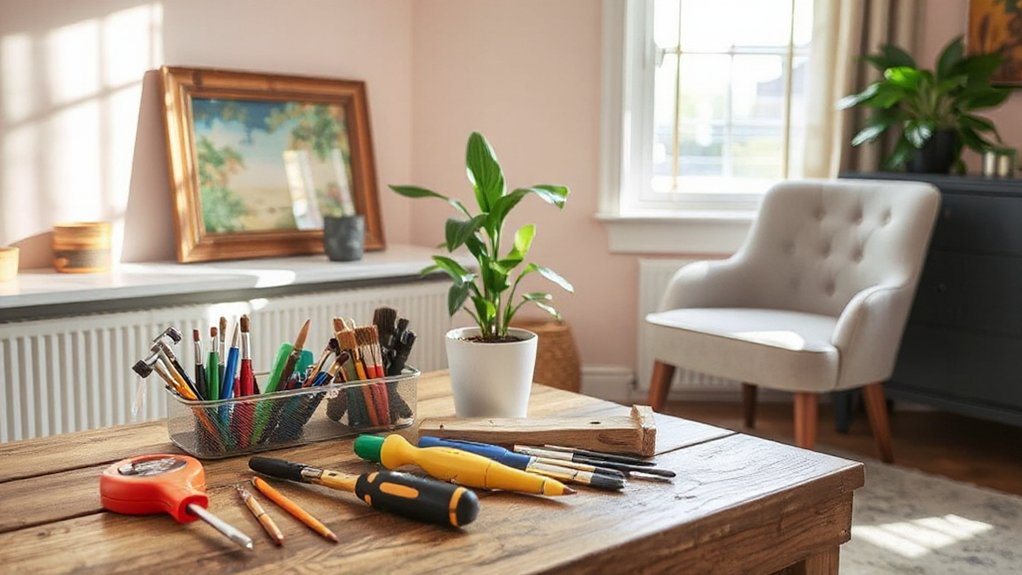
Before you start patching holes or tightening loose hinges, set yourself up with a basic DIY repair kit that covers most quick fixes without draining your budget. Buy a 12–16 oz hammer, 6-in-1 screwdriver, tape measure, utility knife, adjustable wrench, slip-joint pliers, and a small level.
Add painter’s tape, a putty knife, sandpaper, a tube of caulk, and a few screws/anchors. For basic tool organization, keep everything in a cheap toolbox or zip pouch, then label a small parts container by size.
Follow essential safety tips: wear safety glasses, cut away from yourself, shut off power at the breaker, and ventilate when using adhesives. Restock after each job, so you’re ready.
Patch Nail Holes With Spackle in 10 Minutes
Even if you’ve never repaired drywall, you can make nail holes disappear in about 10 minutes with a small tub of spackle and a putty knife. Start by removing any loose drywall paper and lightly sanding the rim so the surface feels flat. Wipe away dust with a damp rag.
For nail hole concealment, scoop a pea-size amount and press it firmly into the hole, then scrape across at a low angle to leave a thin, smooth layer. Use tight strokes; extra spackle just means extra sanding.
Let it dry per the label, usually a few minutes. Sand with fine-grit paper until flush, then wipe clean. If the hole still shadows, repeat with a second thin pass, using the same spackle application techniques.
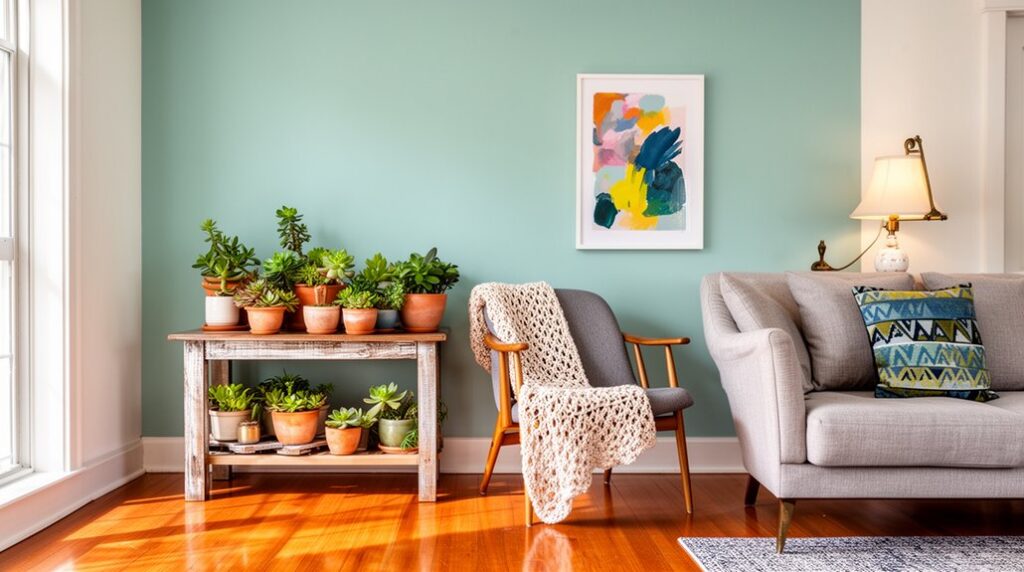
Touch Up Scuffed Paint Without Visible Edges
When scuffs and chips show up on a wall, you can blend a touch-up so it doesn’t leave a hard “paint patch” edge by matching the paint and softening the perimeter.
Start with Color matching: take a small chip (or a paint-smeared swab) to the store for a sample-size pot, and match sheen too.
Clean the area, then lightly sand the scuff and feather the surrounding paint 2–3 inches out; wipe dust. If the spot is bare drywall, dab on a tiny bit of primer and let it dry.
Apply paint with a small foam roller or soft brush, working from the center out. For edge blending, use less paint at the outer ring and stipple or roll lightly until the perimeter disappears.
Let dry, then repeat if needed.
Re-Caulk Tubs, Sinks, and Trim the Clean Way
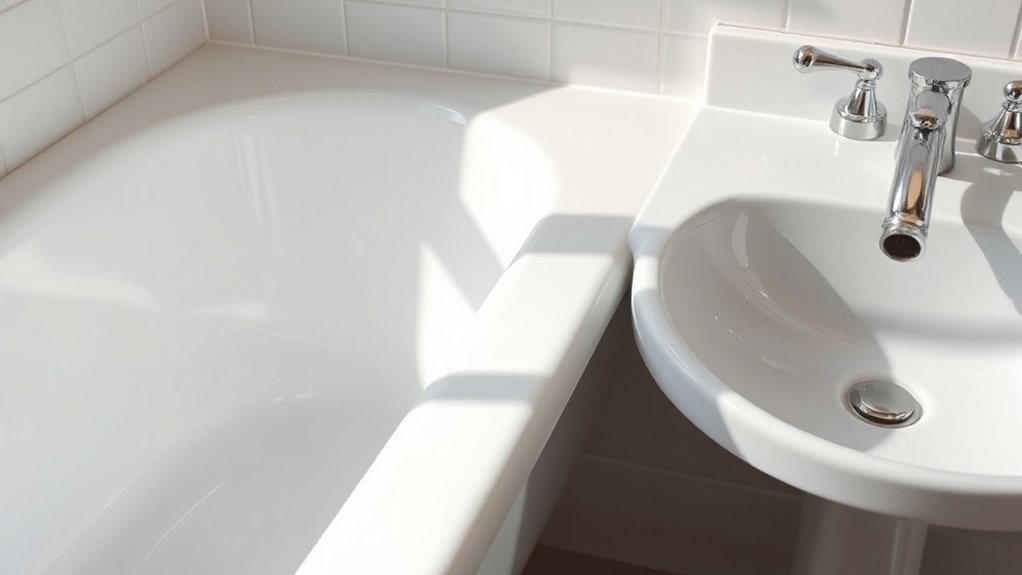
Start by cutting and scraping out the old caulk completely, then wipe the joint with cleaner and let it dry so the new bead sticks.
Tape both sides of the seam for crisp lines and keep the job cheap by using a basic caulk tool or an old credit card.
Run a steady, waterproof bead, smooth it in one pass, and pull the tape before it skins over.
Remove Old Caulk Cleanly
Before you lay down fresh caulk, strip the old bead completely so the new seal sticks and looks sharp. For clean caulk removal, score both edges with a sharp utility knife, keeping the blade flat to avoid gouges. Grab the loosened strip with needle-nose pliers and pull slowly; re-score stubborn spots instead of yanking.
If it’s silicone, soften it with an inexpensive silicone caulk remover gel or mineral spirits, then scrape with a plastic putty knife to protect finishes. Use an old toothbrush to work residue out of corners, then wipe with rubbing alcohol so nothing slippery remains.
Finish by checking for hidden gaps or moldy crumbs—good sealing techniques start with a bare, solid joint.
Prep And Mask Surfaces
Even if you’ve removed every bit of old caulk, a dirty or wet joint will still ruin a new bead. Start your surface preparation by vacuuming crumbs and scraping dust from the seam. Wash with warm soapy water, then wipe with rubbing alcohol to cut soap scum and oils. Rinse lightly and dry completely; use a hair dryer if you’re in a hurry.
If you spot mildew stains, dab on diluted bleach, wait 10 minutes, then rinse and dry again.
Next, use simple masking techniques: run painter’s tape along both sides of the joint, keeping the gap consistent. Press tape edges firmly with a putty knife so water can’t creep under. Cover nearby fixtures with a rag.
Apply Smooth Waterproof Bead
Once the joint is clean, dry, and taped, load a tube of 100% silicone (or kitchen-and-bath caulk) into a caulk gun. Snip the nozzle at a 45° angle to match the gap, and puncture the inner seal.
Hold the gun at a steady angle and pull the trigger smoothly as you move, keeping constant pressure for even Bead application. Don’t overfill; a smaller bead tools cleaner and costs less.
Immediately mist with soapy water, then tool the bead with a caulk-smoothing tool or a gloved finger, pressing just enough to bridge both surfaces for reliable Waterproof sealing.
Peel tape before skin forms. Wipe mistakes with paper towels, then let it cure per the label before using the area.
Tighten Loose Knobs, Handles, and Hinges Fast
Start by checking the usual culprits—cabinet knobs, drawer pulls, door handles, and hinges—and note which ones wiggle or sag.
Grab the right screwdriver or hex key (skip oversized bits that strip screws) and snug everything down by hand, working in small turns.
If a screw won’t bite because the hole’s stripped, reinforce it with a cheap fix like toothpicks and wood glue or a slightly larger screw before you re-tighten.
Identify Common Loose Hardware
Where do those mysterious wiggles come from when you grab a cabinet pull or swing a door? Usually, it’s one of three culprits: screws backing out, stripped holes, or shifting wood.
Start by checking high-touch spots first—kitchen pulls, bathroom towel bars, door hinges, and drawer slides.
Run your fingers around the hardware and note any movement side-to-side, up-and-down, or a visible gap between the plate and surface. Open and close doors slowly and watch for hinge leaves that lift or rub.
For furniture stability, test chairs and tables by gently rocking them and locating the joint that clicks.
For quick fixture adjustments, look for misaligned strike plates, loose wall anchors, or handles that rotate without resistance. List each spot so you fix only what’s needed.
Use Proper Tightening Tools
If you use the right driver and bit, you’ll snug up loose knobs, handles, and hinges in minutes without stripping anything. Start by matching the screw head: Phillips, flat, Torx, or square.
Grab a budget screwdriver set with multiple bits, and choose the largest bit that fully seats—no wobble.
For knobs and pulls, hold the hardware steady, then tighten the mounting screw until it’s firm, not forced.
For hinges, open the door slightly to reduce stress, then snug each screw in a top-to-bottom pattern.
Use a power drill on low torque and slow speed, or finish by hand for control.
Stop as soon as the hardware stops shifting, and recheck after a few open-close cycles.
Reinforce Stripped Screw Holes
A stripped screw hole won’t grip, so knobs, handles, and hinges keep loosening no matter how often you tighten them. Fix it fast with a cheap fill-and-reset approach.
First, remove the hardware and clean out dust.
For wood, pack the hole with wood glue and toothpicks or a dowel, then tap it flush and let it dry.
Next, drill a fresh pilot hole; smart drill bit selection matters—use a bit slightly smaller than the screw’s core so threads bite.
Reinstall the hardware and tighten by hand.
If the hole is deep or the door edge is soft, upgrade screw length so the screw reaches solid wood behind the damaged area.
For metal, use a thread insert or a slightly larger screw.
Fix a Squeaky Door Hinge in 5 Minutes
Although a squeaky hinge can sound like a bigger problem, you can quiet it in about five minutes with a basic lubricant and a rag. Open the door and wedge it steady with a towel so it won’t swing.
Wipe dust and grime off the hinge knuckles first; buildup makes noise worse. For quick door hinge lubrication, spray a small amount of silicone or white lithium into the hinge gaps, or dab household oil if that’s what you’ve got.
Swing the door back and forth 10–15 times to work it in. If it still chirps, tap the hinge pin up with a screwdriver, pull it out, wipe it clean, coat it lightly, then slide it back.
Wipe drips for clean squeak elimination.
Make DIY Repairs Disappear With Matching Tips
When a repair works but still sticks out, matching the surrounding finish makes it disappear fast and cheap. Start by cleaning the area and feather-sanding edges so the patch fades into the wall.
For Color matching, scrape a small paint chip from a hidden spot or take a removable item (outlet cover) to the store; buy the smallest sample size. If you’re using leftover paint, stir hard and compare in daylight.
Next, practice paint blending on cardboard. Use a small brush for corners, then a mini-roller to mimic existing texture. Don’t paint a hard square; extend past the repair and taper pressure outward.
Let it dry, then adjust with a second thin coat. Finish by wiping trim touch-ups with a damp cloth for clean lines.
Frequently Asked Questions
How Do I Remove Stripped Screws Without Damaging the Door or Cabinet?
To remove stripped screws without damaging the door or cabinet, start gentle and work up.
Try the rubber band method: press a wide rubber band into the head, push hard, and turn slowly. If it slips, switch to a screw extractor: drill a small pilot hole, seat the extractor, then turn counterclockwise.
Protect surfaces with painter’s tape, keep the drill straight, and stop once it bites cleanly.
What’s the Safest Way to Clean Lead Paint Dust in Older Homes?
You’ll clean lead paint dust safest by isolating the area, going wet, and sealing waste.
For Lead dust cleanup, wear a P100 respirator, gloves, and disposable coveralls—key Safety precautions.
Turn off HVAC, tape plastic sheeting, and keep kids/pets out.
Mist surfaces, then wipe with disposable wet wipes or rags and a phosphate-free cleaner.
HEPA-vac only.
Double-bag debris, label, and wash hands/clothes separately.
When Should I Call a Professional Instead of Attempting a DIY Repair?
Measure twice, cut once: you should call a professional when the job risks your health, involves permits, or affects structure.
Start with DIY safety tips—shut off power/water, wear PPE, and test for lead/asbestos.
Next, set a budget cap; if tools, materials, and your time cost more than Hiring professionals, outsource it.
Finally, stop and call when you see sparking, leaks inside walls, sagging, mold, or persistent odors.
How Can I Repair Cracked Drywall Corners Without Replacing the Corner Bead?
You can handle drywall corner repair without corner bead replacement by stabilizing and resurfacing.
Cut out loose tape and crumbly mud, then tighten any nearby screws.
Apply setting-type compound into the crack, embed paper tape, and smooth with a 6-inch knife.
After it sets, add two thin coats, feathering wider each time.
Sand lightly, prime, and paint.
If cracks return, add a vinyl corner tape over the area.
Which Wall Textures Are Hardest to Match After Patching and Repainting?
You’ll struggle most matching skip trowel, knockdown, heavy orange peel, and sand swirl textures after patching and repainting.
First, photograph the texture and test your Texturing techniques on scrap drywall.
Second, thin your mud and build in light passes; don’t try one heavy coat.
Third, feather edges wider than the patch.
Finally, use paint blending: box your paint, roll the whole wall, and keep a wet edge throughout.
Conclusion
With a basic kit on hand, you can refresh any room without spending much. Start by filling nail holes with spackle, let it dry, then sand smooth. Feather on touch-up paint so edges vanish. Scrape old caulk, clean well, and lay a neat new bead. Tighten loose knobs and hinges with a screwdriver, then silence squeaks with a drop of oil. Do these quick fixes, and you’ll feel back to square one—only better.