
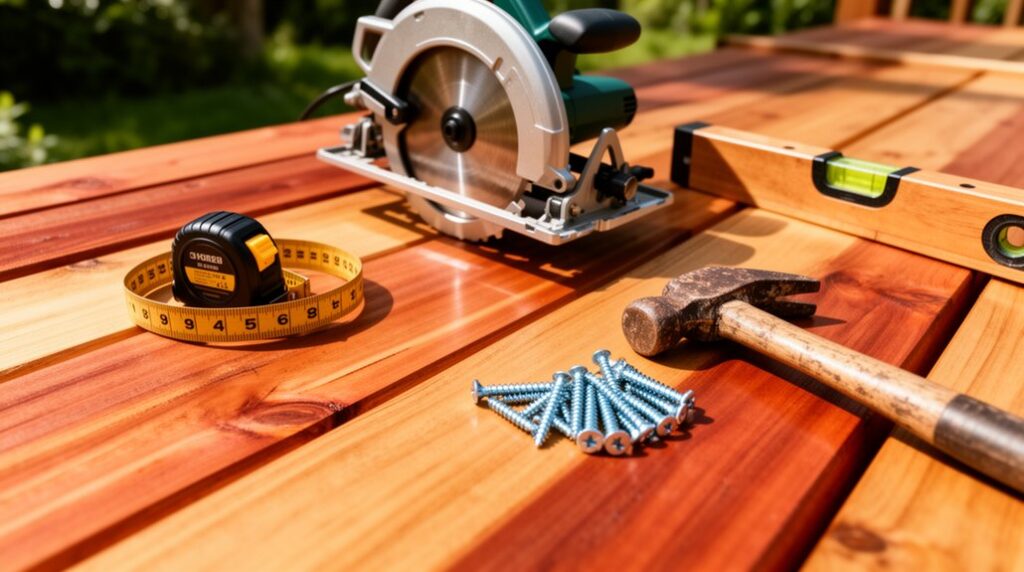
You’ll build a straighter, safer deck with a core kit: a 25–35 ft tape, pencil/marker, chalk line, and level or straightedge to keep layout square. Cut boards cleanly with a miter saw and stop block, a circular saw for rips, and a jigsaw for notches, using sharp carbide composite blades plus a vacuum for dust control. Install boards with coated screws or hidden fasteners, a clutch drill/driver, and spacers or jigs. Next, you’ll see which upgrades save the most time.
Key Takeaways
- Use a miter or circular saw with sharp carbide composite blades for clean, repeatable cuts and minimal waste.
- Add a stop block to your miter saw setup to speed up identical cuts and keep board lengths consistent.
- Use a drill/driver with adjustable clutch and proper bits plus hidden fastener tools for secure, uniform fastening.
- Carry tape measure, chalk line, string line, and a level to keep layout square, straight, and joists flat.
- Protect yourself with eye, hearing, and respiratory gear, and control dust with a vacuum or extractor for safer work.
Must-Have Decking Installation Tools (vs Optional)
Before you start laying boards, sort your gear into true essentials and “nice-to-haves” so you don’t improvise unsafe workarounds mid-build.
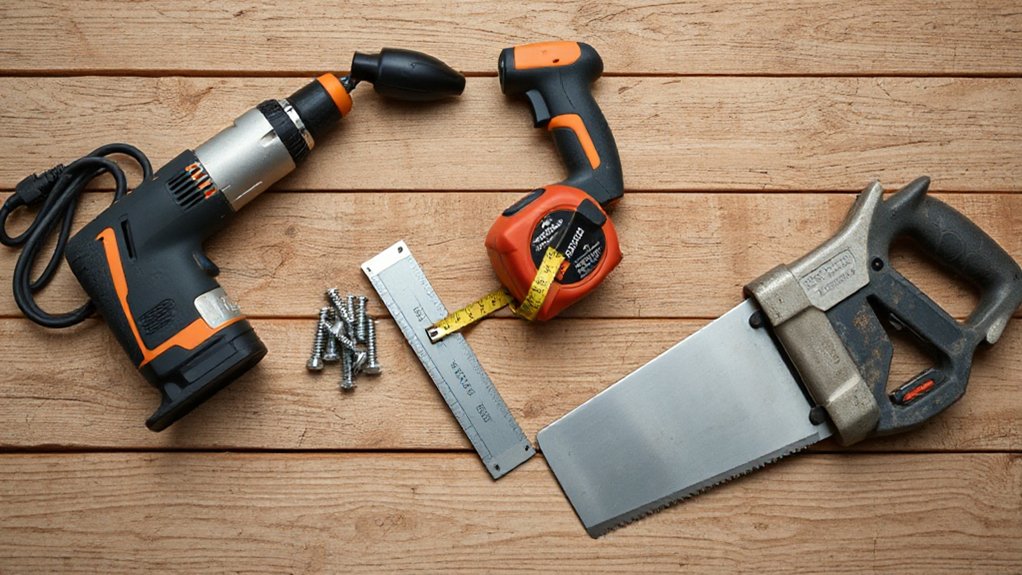
Essentials: a circular saw or miter saw with a sharp, correct blade; an impact driver with the right bit; a drill for pilot holes; a pry bar; clamps; a chalk line; a speed square; and a reliable fastener system (hidden fasteners or coated screws).
Add PPE: safety glasses, hearing protection, gloves, and a dust mask, especially when cutting composites.
Nice-to-haves: a collated screw gun, jigsaw for notches, oscillating multi-tool for trim, and a router for clean edges that boost Decking aesthetics.
Choose durable blades and low-VOC products to reduce environmental impact. Keep a fire extinguisher nearby too.
Measuring and Layout Tools to Keep Your Deck Square
To keep your deck square, you’ll start with essential measuring tools like a tape measure, framing square, chalk line, and string line so your reference lines stay consistent.
You’ll use proven squaring and layout methods—check diagonal measurements for equal length, apply the 3-4-5 rule for right angles, and lock your layout with stakes and taut strings before you cut or fasten anything.
You’ll also recheck measurements often and mark cut lines clearly to prevent miscuts that can cause binding, kickback, or unsafe rework.
Essential Measuring Tools
Even if your framing skills are solid, a deck won’t stay square without accurate measuring and layout tools guiding every cut and fastener. Start with a quality 25–35 ft tape measure with a firm standout so you can hook joists and beams safely without overreaching.
Add a folding rule for tight spots and repeat cuts, and keep a steel ruler for quick checks on board gaps and hardware offsets. Use a carpenter’s pencil and fine-tip marker so your marks stay visible on treated lumber.
A chalk line helps you mark long, straight reference lines across multiple boards. Protect measurement accuracy by wiping mud off blades, locking tapes gently, and replacing worn hooks—tool maintenance prevents costly, unsafe rework later.
Squaring And Layout Methods
Although your tape and pencil get you close, squaring and layout methods keep the entire deck frame true so joists, decking, and rail posts land where they should. Snap chalk lines for main beams and rim joists, then confirm square by comparing diagonal measurements; adjust until both diagonals match.
Use the 3-4-5 method on corners when you can’t measure long diagonals accurately. Clamp a framing square or speed square to the rim while you mark joist locations, keeping your decking layout consistent.
For repeatable marking techniques, make a story pole from scrap to transfer joist spacing and block positions without re-measuring. Mark cut lines with a knife for clean starts, and wear eye protection when snapping chalk to avoid dust and grit.
Cutting Tools for Decking: Saws, Blades, Dust Control
When you’re cutting decking, the saw and blade you choose will decide whether you get clean, chip-free edges or burned boards and unsafe kickback. Use a miter saw for consistent crosscuts and a circular saw with a straightedge for long rips; save a jigsaw for notches and curves.
Match Blade types to material: carbide-tipped, fine-tooth blades for composites and PVC; fast, coarse framing blades will melt and fray. Keep blades sharp, set depth just past the board, and support both sides to prevent binding.
Clamp workpieces, stand out of the cut line, and let the saw reach full speed. Control debris with dust extraction, a vac-ready shroud, and a mask. Clean chips often to avoid slips too.
Fastening Tools for Decking Boards and Hidden Fasteners
Once your boards are cut and staged, you’ll need fastening tools that keep spacing tight and drive depth consistent.
You can use a deck screw driver with the right bit, clutch setting, and eye/hearing protection to prevent cam-outs and snapped heads.
For a cleaner surface, you’ll switch to a hidden fastener installer that seats clips squarely and applies even pressure so boards lock in without damaging edges.
Deck Screw Drivers
How do you drive hundreds of deck screws cleanly without stripping heads or chewing up boards? You use deck screw drivers that control speed, torque, and depth.
Choose a driver with an adjustable clutch or dedicated depth stop so every fastener seats flush without crushing composite. Prioritize screw bit compatibility: match Torx, square, or Phillips to your screw, and keep fresh, hardened bits on hand to prevent cam-out.
Use a variable-speed trigger and start slow to avoid skittering, then finish with steady pressure.
For safety, wear eye protection, keep your free hand clear, and secure boards before fastening. Set your driver to reverse briefly if a screw binds, rather than forcing it.
Hidden Fastener Installers
Deck screw drivers handle face-fastened boards well, but hidden fasteners demand a tool that seats clips consistently between boards without twisting or snapping them. A hidden fastener installer aligns the clip, drives the screw at the correct angle, and maintains uniform spacing so your rows stay straight.
For hidden fastener installation, choose a tool matched to your clip system and board thickness, and verify it fits your impact driver or drill.
Keep your hands clear of the board edge, wear eye protection, and use hearing protection when driving fasteners all day. Set clutch or torque low first to avoid stripping.
In hardwood or composites, predrill if the manufacturer recommends it. With concealed fastening techniques, check every few boards with a straightedge and adjust before errors compound.
Spacing and Leveling Tools for Consistent Decking Gaps
Although your deck boards may look straight by eye, consistent gaps and a flat surface only happen when you control spacing and height as you fasten. For reliable deck spacing, use composite-specific gap spacers or a 16d nail as a quick gauge, but stick to one method so gaps don’t drift. Clamp-on board jigs also hold alignment while you drive fasteners, reducing board creep and twist.
For leveling accuracy, check each run with a 4–6 ft level or a straightedge, then verify joist crowns before committing. Use a string line to spot high joists, and correct them with a planer, shims, or sanding block as needed. Recheck after every few boards; it’s easier to fix early than later.
Safety Gear for DIY Deck Installation

Before you pick up a saw or driver, put on the safety gear that prevents the most common DIY injuries: eye protection that seals well against flying chips, hearing protection rated for power tools, and cut-resistant gloves that still let you handle fasteners. Add a snug respirator when cutting treated lumber or composites, and wear long sleeves to reduce splinters and dust irritation.
Use knee pads for prolonged fastening and non-slip boots for stable footing on joists and loose boards. Keep a hard hat on if you’re working under helpers or lifting boards overhead.
Treat Personal protective equipment as mandatory, not optional. Follow basic tool safety tips: tie back hair, remove jewelry, and avoid loose cuffs that can snag rotating bits.
Decking Tool Upgrades That Save Time and Effort
Once you’ve got your PPE dialed in, a few smart tool upgrades can cut hours off a deck build while reducing strain and repeat motions. Swap to a cordless impact driver with adjustable torque so you don’t strip fasteners, and add a collated screw gun for long runs.
Use a self-leveling laser and story pole to keep joist and board layout consistent, reducing rework. A miter saw with a stop block speeds repeat cuts; pair it with a vacuum or dust extractor to protect your lungs and keep footing clear.
For hidden fasteners, a jig with depth control improves spacing and prevents splits, especially during decking material selection. Choose sharper carbide blades suited to your boards to minimize waste and environmental impact.
Frequently Asked Questions
Can I Install Composite Decking Tools Differently Than Wood Decking Tools?
Yes, you can, but you shouldn’t treat composite vs. wood the same. You’ll still use many common tools, yet tool compatibility matters: choose carbide-tipped blades, predrill when required, and use manufacturer-approved hidden fastener jigs.
You must set torque lower to avoid stripping clips, and you should use slower feed rates to prevent melting.
Wear eye/ear protection, control dust, and support boards to reduce flex.
What Tool Rentals Are Most Cost-Effective for a One-Time Deck Build?
Rent specialty tools and buy basics: you’ll get the best value.
For a one-time deck build, prioritize renting a miter saw, framing nailer, joist/hanger nailer, and a rotary hammer if you’re setting anchors—these drive Rental costs down versus purchase.
Do a Tool comparison by day/week rates and included blades/hoses.
Skip renting drills, impact drivers, and levels.
Inspect guards, wear eye/ear protection, and test-run tools.
How Do I Maintain and Store Decking Tools to Prevent Rust and Damage?
Clean your decking tools after each session: brush off debris, wipe with a dry rag, then do tool cleaning with mild soap and water; dry completely.
For rust prevention, mist metal parts with light oil or silicone spray and store them in a dry, ventilated toolbox with desiccant packs.
Don’t leave batteries on chargers; store them cool.
Cover sharp blades, coil cords loosely, and inspect for cracks before next use.
Wear gloves when handling.
Which Decking Tools Are Best for Working Alone Without a Helper?
You’ll work solo like a one-person crew if you lean on a power drill/driver with extra bits, a reliable measuring tape, and a speed square for fast layouts.
Add a deck board straightener or clamp to hold boards tight while you fasten.
Use a miter saw stand or roller supports to manage long boards.
Wear eye/ear protection, set stable sawhorses, and secure cords to prevent trips.
What Are the Most Common Tool-Related Mistakes That Ruin Deck Board Alignment?
You’ll ruin alignment most often by skipping consistent Decking board gaps, misreading your chalk line, and letting a worn tape or square drift.
You also cause creep when you predrill inconsistently, drive fasteners at angles, or mix Fastening techniques mid-run.
Don’t overtighten; it crowns boards and twists lines.
Recheck spacing every few boards, clamp before fastening, and keep blades sharp to avoid wandering cuts.
Wear eye/ear protection.
Conclusion
You’ll install a straighter, safer deck when you treat your tool list like a testable theory: measure, cut, fasten, then verify. Use a framing square and chalk line to “prove” your layout stays square, then confirm with diagonal checks. Cut with the right blade and manage dust so lines stay visible. Fasten with a driver or nailer matched to your system, then lock in consistent gaps with spacers. Gear up—eyes, ears, lungs—every cut.

