Start by cleaning windows, opening blinds, and moving tall furniture away from light paths. Swap dark curtains for sheers and choose light paint or reflective decor to bounce daylight. At night, turn on lights one by one to spot dead zones. Replace mismatched bulbs with higher-lumen LEDs in one color temperature, and add layers: a bright floor lamp for ambient, a desk lamp for tasks, and a small accent light to soften shadows. Keep going for more simple upgrades.
Key Takeaways
- Clean windows, open blinds, and switch to sheer curtains to maximize daylight reaching the room’s center.
- Move tall furniture away from windows and dark corners to stop blocking light and reduce heavy shadows.
- Repaint with light, reflective wall colors and a lighter ceiling shade to bounce light and make the room feel taller.
- Upgrade to brighter LED bulbs with consistent color temperature, and choose higher lumens for more light without more wattage.
- Layer ambient, task, and accent lighting using floor lamps, desk lamps, and LED strips to eliminate dead zones and add depth.
Figure Out Why Your Room Feels Dark
Before you buy new lamps or bulbs, pinpoint what’s actually making the room feel dim. Start in daylight and note how much natural light reaches the center of the room, not just the window wall. Clean the window, then open blinds fully to rule out simple blockage.
Next, check your room layout: tall bookcases, TVs, or headboards can block light paths and cast big shadows. Move the tallest pieces away from windows or to darker corners.
Then, look at wall and ceiling colors; dark paint and heavy curtains absorb light. Swap to lighter textiles you already own, or flip curtains to a sheerer panel.
Finally, test at night: turn on existing fixtures one by one to find dead zones.
Upgrade Bulbs to Fix Poor Lighting Fast
Start by swapping in bulbs with the right color temperature for the mood you want—2700K for warm and cozy, 4000K–5000K for crisp and task-friendly.
Next, check the lumens on the package and go higher for a brighter room, even if the watts stay low. You’ll get a fast lighting upgrade without changing fixtures or blowing your budget.
Choose Correct Color Temperature
If your room still feels dim or harsh even after you’ve added more lamps, your bulb’s color temperature is probably working against you. Start by checking the box for Kelvin (K).
For cozy living rooms and bedrooms, pick warm white (2700K–3000K) to soften shadows and create mood lighting. For kitchens, baths, and desks, choose neutral to cool white (3500K–5000K) so colors look clearer and you stay alert.
Next, match bulbs across the room so you don’t mix yellow and blue tones. Replace one fixture at a time, then test at night and in daylight.
If you want flexibility, grab an inexpensive “tunable” or smart bulb and dial in the best color temperature for each task.
Increase Lumens, Not Watts
One quick swap can make a room feel twice as bright: upgrade your bulbs by shopping for lumens (brightness) instead of watts (energy use).
First, check what you’ve got: read the label on the old bulb or the fixture’s max-watt sticker, then match the base type (E26, GU10, etc.) for bulb compatibility.
Next, pick a higher-lumen LED with the same base—try 800–1100 lumens for table lamps, 1100–1600 for overhead, and 1600+ for task areas.
If you use a dimmer, buy “dimmable” to prevent flicker.
Finally, compare the watt draw: LEDs deliver more light with lower watts, so you’ll boost energy efficiency and cut heat.
Replace one fixture at a time to test results.
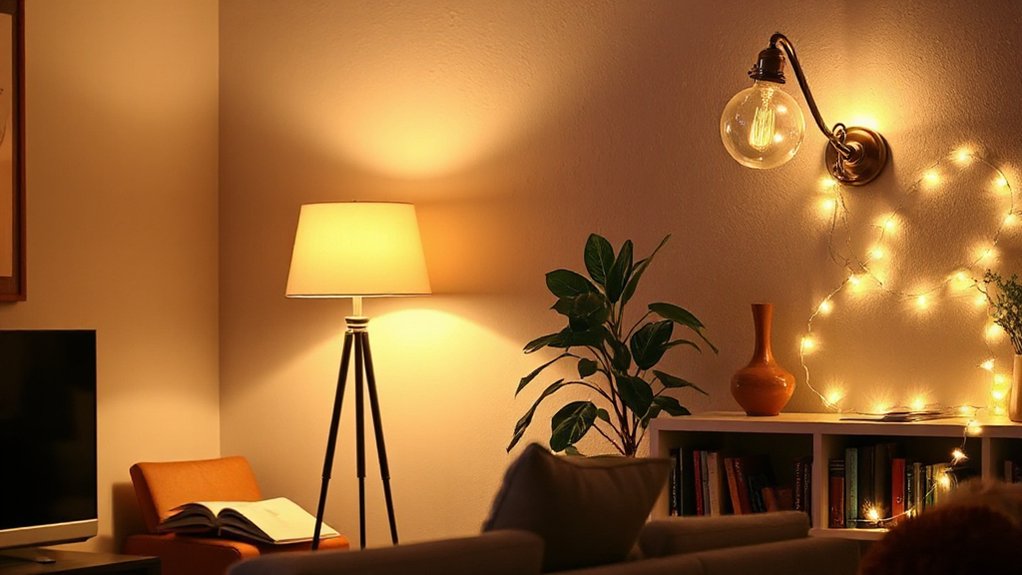
Layer Ambient, Task, and Accent Lighting
Although a single ceiling light can brighten a room, it usually leaves shadows and flat, gloomy corners, so you’ll get better results by layering three types of lighting: ambient (overall glow), task (focused light where you work), and accent (small highlights that add depth).
First, set your ambient layer: add a plug-in floor lamp or inexpensive flush-mount lighting fixtures, and choose bulb types labeled “soft white” or “daylight” based on your room’s vibe.
Next, add task light where you read, cook, or work: clip lamps, under-cabinet LED bars, or a desk lamp with a brighter lumen bulb.
Finally, create accent points: stick-on puck lights for shelves, a small picture light, or an LED strip tucked along a headboard.
Put each layer on its own switch or smart plug.
Fix Shadows With Better Lamp Placement
Start by turning on your lamps and walking around the room to spot the angles that throw harsh shadows on your work areas and walls.
Next, reposition what you already own by mixing lamp heights—floor lamp in a corner, table lamp on a surface, and a small lamp lower down—to fill in dark gaps.
Finally, aim shades and bulbs toward the walls or ceiling so light bounces back evenly and softens shadows without buying new fixtures.
Identify Shadow-Casting Angles
Before you buy brighter bulbs, figure out where your shadows are coming from by testing a few lamp angles. Turn on one lamp at a time, then stand where you read, cook, or work. Move the lamp in a slow arc: left, right, forward, and back, watching how your hands and furniture throw shade. Mark the best spot with painter’s tape.
Next, check height and tilt without buying anything. Raise a table lamp on a sturdy stack of books, or angle a floor lamp head slightly upward to bounce light off the ceiling.
If harsh lines persist, add cheap light diffusion: clip on a white shade liner, drape a sheer scarf over a frame (not touching the bulb), or aim through a frosted panel. Re-test.
Layer Lamps By Height
Once you’ve found the angles that cast the worst shadows, fix the problem faster by layering your lamps at different heights instead of relying on one bright bulb.
Start with a floor lamp in the darkest corner to lift light above eye level. Next, add a table lamp near seating to fill mid-level gaps. Then place a small accent lamp on a shelf or low side table to brighten below-counter zones.
This height variation evens out coverage and reduces harsh facial shadows. Use what you already own first; swap shades or bulbs only if needed.
If you’re short on surfaces, try lamp stacking: set a small lamp on a sturdy box, book stack, or riser. Keep cords tidy and avoid wobble hazards.
Aim Light Toward Walls
If your room still feels gloomy after adding lamps, try aiming light at the walls instead of straight into the space. Bounced light spreads evenly, softens harsh corners, and reduces face-level glare.
Start by moving a floor lamp 6–12 inches from a bare wall and angle the shade toward it. Next, place a table lamp on a console and aim it diagonally at the nearest wall, not the ceiling.
Check your wall paint: light, matte colors reflect better, while dark or glossy finishes may create hotspots. Adjust for ceiling height, too—higher ceilings need a slightly steeper angle so light hits mid-wall and returns to the room.
Finally, test at night, then tweak lamp distance until shadows fade without adding new fixtures.
Add Plug-In Fixtures for Better Room Lighting
When overhead lighting is weak or nonexistent, plug-in fixtures give you an instant upgrade without hiring an electrician. Start by choosing one floor lamp, swing-arm lamp, or plug-in wall sconce that fits your budget and room size. Pick LED bulbs (800–1100 lumens) in warm or neutral white for comfortable, usable light.
Next, plan fixture placement before you buy extras: place a floor lamp beside a sofa or reading chair, add a desk lamp where you work, and position a plug-in wall sconce near a bed for nighttime tasks.
Plug everything into a power strip with an on/off switch, or add a plug-in dimmer for control. Finally, hide cords with adhesive clips or cord covers and keep walkways clear.
Test at night, then adjust angles for even coverage.
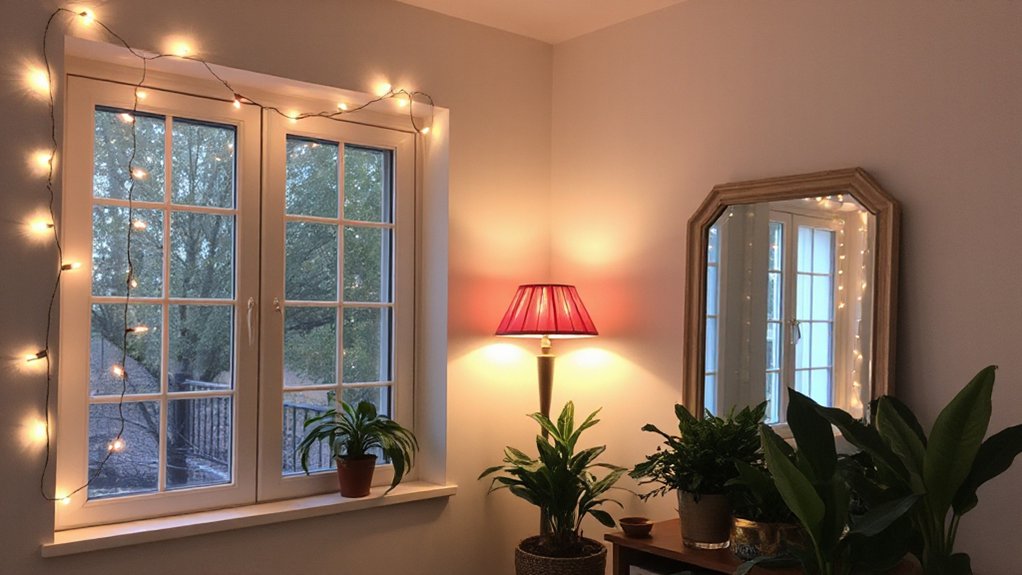
Use Mirrors to Improve Poor Lighting
Plug-in lamps add light fast, and mirrors help that light travel farther without buying more fixtures. Start with one mirror you already own, or grab a thrifted one with a simple frame.
Step 1: Stand where the room feels darkest and look toward your brightest source (lamp or window).
Step 2: Use that sightline for mirror placement—hang or lean the mirror so it “sees” the light and throws it back into the room.
Step 3: Aim for across from the lamp, or at a right angle that bounces light onto a work surface or seating area.
Step 4: Keep reflective surfaces clear: wipe glass, remove clutter in front, and avoid heavy drapes blocking the reflection.
Step 5: If glare hits your eyes, tilt the mirror slightly down or sideways.
Use Light Paint and Reflective Decor to Bounce Light
Wondering why a room still feels dim even with a lamp on? Your walls may be absorbing light. Fix it with lighter Color schemes and Reflective surfaces that push brightness back into the space.
Step 1: Pick a paint in soft white, cream, or pale greige with a satin or eggshell finish; it reflects more than flat.
Step 2: Paint the ceiling one shade lighter than the walls to “lift” the room.
Step 3: Add budget-friendly reflective decor: a glossy tray, metallic picture frames, glass vases, or a lacquered side table near your light source.
Step 4: Swap dark curtains for sheer panels or light-colored blinds.
Step 5: Keep large furniture in lighter tones to prevent light loss.
Frequently Asked Questions
How Can I Reduce Glare on TV Screens While Improving Overall Room Lighting?
Reduce TV glare by adjusting screen angles away from windows and lamps, then add curtains or blinds to control daylight.
Next, place floor lamps behind seating and use warm, diffused bulbs to brighten the room without reflections.
Try using anti glare screens if you can’t relocate the TV.
Swap exposed bulbs for shaded fixtures.
Finally, paint walls in matte finishes and add rugs to cut bounce.
Check glare at night too.
Are Smart Bulbs Worth It for Better Lighting in Older Fixtures?
Absolutely—smart bulbs can be a game-changer in older fixtures if you choose carefully.
Step 1: Check fixture compatibility (base type, enclosed rating, dimmer switch).
Step 2: Pick the smart bulb benefits you need—warm/cool tuning, scheduling, higher lumens.
Step 3: Replace flaky dimmers with smart switches or use non-dimmable mode.
Step 4: Start with one bulb, test Wi‑Fi strength, then expand only where it pays off.
What DIY Options Improve Lighting in Rental Apartments Without Drilling?
You can brighten a rental without drilling by adding plug-in and adhesive lighting. First, swap in brighter LED bulbs (higher lumens, warm/neutral tone).
Next, hang wall mounted sconces with Command strips, then route cords with adhesive clips.
Add a plug-in floor lamp behind seating for bounce light.
Place solar powered lanterns on windowsills or balconies for evening glow.
Finally, use peel-and-stick mirror tiles to reflect light.
How Do I Choose the Right Lampshade Material for Brighter Light?
Choose a lampshade material that reflects and diffuses light well.
Step 1: Pick a light lampshade color (white, cream) to boost brightness; avoid dark shades.
Step 2: Choose smooth fabric texture or lined paper for better reflection; skip heavy linen or velvet.
Step 3: Use a white inner lining or metallic foil lining on a budget.
Step 4: Match shade shape to bulb so light isn’t blocked.
How Can I Safely Add Lighting Without Overloading an Electrical Circuit?
You can add lights safely by checking what’s already on the circuit—because the surprise comes when it trips mid‑night. First, find the breaker label, then add up device watts on that circuit.
Swap bulbs to LEDs to cut load fast. Keep total under 80% of the breaker rating for Circuit safety.
Avoid daisy‑chaining power strips to prevent lighting overload. If you’re unsure, use a plug‑in lamp on a different circuit.
Conclusion
Now you’ve got a clear, low-cost plan to fix dim rooms. First, pinpoint what’s stealing light, then swap in brighter bulbs. Next, layer ambient, task, and accent lighting, and move lamps to erase harsh shadows. After that, add plug-in fixtures where you need them most. Then hang a mirror to double daylight. Finally, use lighter paint and reflective decor to bounce glow. Remember: measure twice, cut once—plan before you buy.