
Use a utility knife safely by setting up a stable, waist-high cutting surface, clamping your work, and keeping the area bright, dry, and clutter-free. Extend only as much sharp blade as you need, lock it firmly, and cut away from your body with your fingers behind the straightedge and out of the cut path. Use light pressure and make several shallow passes for control. Retract and lock the blade before carrying, then store spare and used blades in puncture-proof containers. Keep going to pick the right knife, blade, and technique.
Key Takeaways
- Use a sharp blade, extend only what you need, lock it securely, and cut away from your body.
- Set up a stable, waist-high cutting station; clamp materials and use a cutting mat or backing board.
- Keep your non-cutting hand behind the blade path, and place fingers behind the straightedge, never on the cut line.
- Make multiple light passes with controlled pressure; keep your wrist aligned and retract the blade after each pass.
- Wear cut-resistant gloves and eye protection; store and dispose of blades in puncture-proof containers, never loose in trash.
Utility Knife Safety Rules (Read First)
Before you make the first cut, lock in a few non-negotiable safety rules: use a sharp blade, extend only as much as you need, and always cut away from your body with your free hand kept well clear of the path.
Stabilize the work on a bench, clamp it when possible, and keep your stance balanced so you don’t lurch if the blade slips.
Use a straightedge as a guide, but keep fingers behind it, not on the cut line.
Wear Safety gear: cut-resistant gloves, eye protection, and closed-toe shoes.
Inspect the handle for cracks and keep the workspace dry and well lit.
Know Emergency procedures: stop bleeding with pressure, clean minor cuts, and seek help for deep wounds.
Pick the Best Utility Knife and Blade
Even if you follow every safety rule, you’ll fight the job (and invite slips) if you choose the wrong knife or blade. Pick a utility knife with a solid, no-wobble blade holder and a reliable lock (slider or screw) that won’t creep under pressure.
Choose an ergonomic design: a textured, non-slip grip, finger clearance, and a shape that keeps your wrist straight.
Match the blade to the material. Use heavy-duty blades for thick cardboard, roofing felt, or rigid foam; use standard blades for light trimming.
Prioritize Blade durability over bargain packs—dull steel forces extra force and skates. Snap-off blades are convenient, but use them only when the knife is built for them and locks each segment firmly.
Keep spare blades handy.
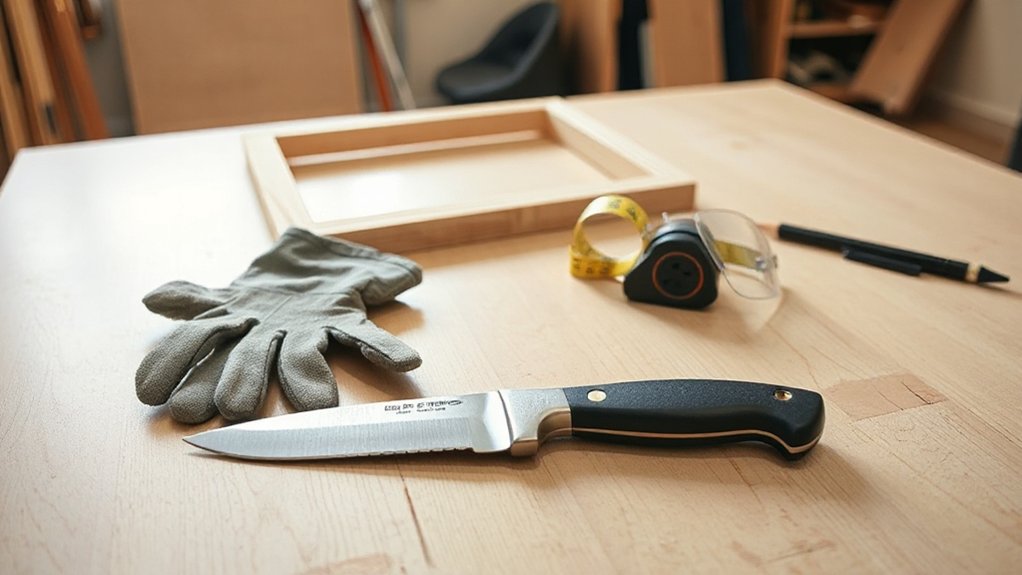
Set Up a Safe Utility Knife Cutting Station
Set up a cutting station before you ever extend the blade by choosing a stable, waist-high work surface that won’t wobble.
Secure your material with clamps or non-slip grips, and use a proper backing board or cutting mat so the blade won’t skate or hit the table.
Keep your tools within reach, clear clutter from the cutting path, and aim bright, shadow-free lighting at the cut line so you can control every pass.
Choose Stable Work Surface
Where you cut matters as much as how you cut, so choose a stable, flat surface that won’t wobble or shift under pressure. A solid bench or sturdy table beats a folding card table, which can flex and tip when you lean in. Check work surface stability by pushing on the corners and center; if it rocks, shim the legs or move to a better spot.
Set the height so your forearms stay level and you’re not hunched over, which reduces slips.
Clear the area for smart workspace organization: remove clutter, coil cords, and keep tools you’re not using off the cutting zone. Add bright lighting so your blade line stays visible. Keep the floor dry and non-slip around your station.
Secure Materials And Backing
Before you make the first cut, lock your material down and give the blade a sacrificial backing so it can’t skate, bind, or punch through into something you didn’t intend. Use Material fastening that matches the job: clamp sheet goods at two edges, pin flexible mats with non-slip pads, or tape light stock so it can’t shift mid-stroke.
Keep your off-hand well clear and never “hold and cut” freehand.
Add Backing stabilization under the entire cut path—like a self-healing mat, scrap plywood, or thick cardboard—to protect the surface and prevent sudden breakthrough. Replace backing when it’s deeply scored, because grooves can steer the blade.
If the piece is small, mount it to a larger board first for control.
Organize Tools And Lighting
With your material clamped down and a backing in place, focus next on the cutting station itself so nothing forces you to reach across an exposed blade or cut in shadow. Keep the knife, extra blades, straightedge, square, and pencil on the same side as your dominant hand, within easy reach.
Use Tool organization: a small tray or magnetic strip for blades, and a bin for offcuts, so nothing rolls into your path. Clear the surface of cords, solvents, and loose hardware before you start.
Dial in your lighting setup with a bright, diffuse task light aimed from the opposite side of your cutting hand to reduce glare and shadows. If you’re working low, add a second light to fill in.
Recheck visibility after repositioning materials.
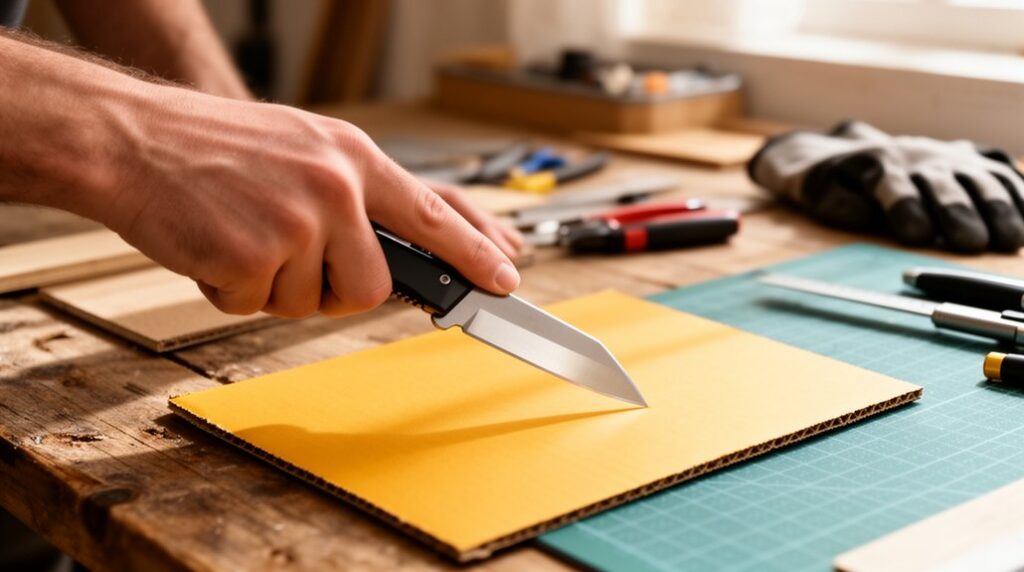
Grip and Guide a Utility Knife for Control
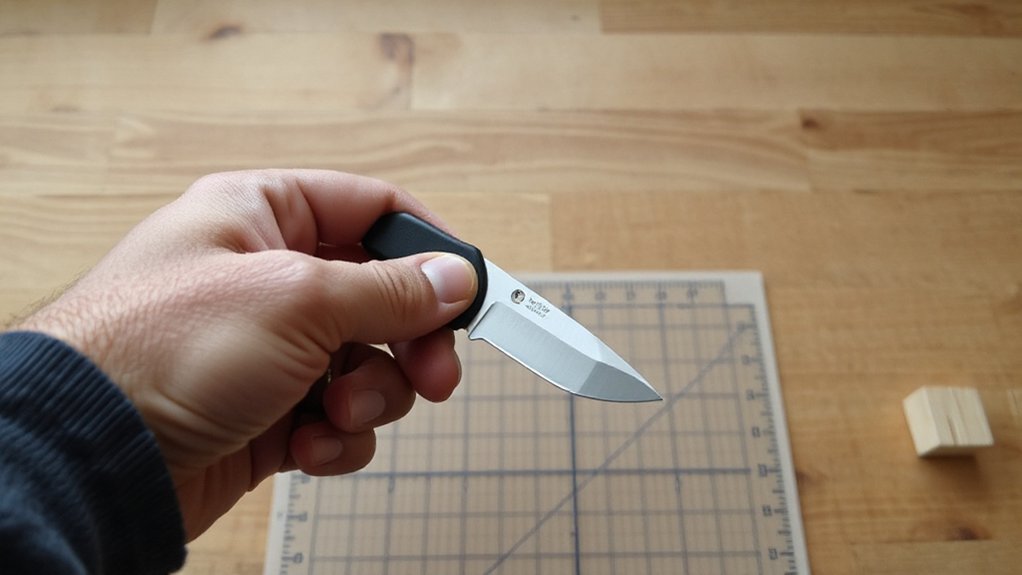
Although a utility knife looks straightforward, you’ll get safer, cleaner cuts only when you control it through a firm, deliberate grip and a guided motion. Wrap your fingers around the handle, keep your thumb on the textured pad, and avoid choking up near the blade; that blade grip invites slips.
Lock your wrist, align your forearm with the cut line, and move from your shoulder for steadier control.
Keep your non-cutting hand behind the blade path, not beside it, and brace the work with clamps when possible.
Apply light pressure and let the edge work; forcing it increases kickouts.
Use a straightedge for cutting guidance, and make multiple shallow passes rather than one deep stroke.
Retract the blade immediately after each pass.
Cut Drywall, Carpet, Boxes, and Plastic Cleanly
Because each material behaves differently under the blade, you’ll get cleaner results—and fewer slips—by matching your cut method to the job: score drywall along a straightedge and snap it, slice carpet from the backing in several shallow passes (and watch for tack strips), open boxes by cutting tape seams with minimal blade extension, and trim plastic by scoring first and then bending or cutting through slowly to prevent cracking and sudden blade jump.
For Drywall trimming, keep the straightedge pinned, cut away from your body, and support the sheet so it doesn’t tear the paper face.
For Carpet scoring, pull fibers taut, keep your free hand clear, and use knee pads so you don’t brace near the cut.
On boxes, avoid digging into contents.
On plastic, clamp it and keep the cut line supported.
Change, Store, and Carry Utility Knife Blades Safely
Before you start your next cut, you need to replace utility knife blades with control: retract the knife fully, lock it, and swap blades using the tool’s release without touching the sharp edge.
Don’t toss loose blades in a drawer—store new ones in their dispenser and drop used ones into a sealed sharps container or blade bank.
When you carry the knife, keep the blade retracted and locked, use a sheath or pocket clip, and never leave it loose in a bag where it can open or snag.
Safe Blade Replacement Steps
When you swap utility knife blades, small slips can cause big cuts, so treat every change like a controlled procedure. Retract the blade fully, lock the slider, and set the knife on a stable surface.
Wear cut-resistant gloves if you’ve got them, and keep your free hand behind the cutting path. Open the body or release the clamp per your model, then grasp the dull blade by its spine, not the edge.
Drop it straight into a puncture-proof sharps container for Blade disposal—never a loose trash bag. Insert the new blade with the edge facing forward, seat it fully, and tighten the clamp.
Cycle the slider to confirm smooth lockup. Wipe pitch off and oil lightly for Blade maintenance, then test on scrap.
Proper Blade Storage Methods
Even if you only set your utility knife down for a minute, store blades as if someone could grab them blindly. Retract the blade fully, lock the slider, and place the tool flat where it can’t roll. If you remove blades, keep new and used ones separate to prevent accidental grabs and dulling.
Use labeled Storage containers: a sealed plastic blade case for new blades and a puncture-resistant “sharps” tin for used ones. Never toss loose blades into drawers, pockets, or trash bags.
For Blade maintenance, wipe resin or adhesive off before storage, then dry the blade to reduce corrosion. Check containers for cracks and close them every time so nothing spills. Store away from children and pets.
Secure Carrying Best Practices
Although a utility knife fits easily in a pocket or tool pouch, you need to carry it like the blade could deploy or get grabbed at any moment. Lock the blade fully retracted, then verify the slider can’t move under pressure. Use a sheath or dedicated pocket, never the same space as screws, keys, or loose blades.
Keep the handle oriented downward so gravity won’t nudge the mechanism open, and avoid back pockets where you’ll sit on it. Prioritize Tool ergonomics: choose a knife with a positive lock and textured grip so you won’t fumble during retrieval.
Practice smart Carrying techniques on ladders—clip it high, close the tool pouch, and keep one hand free. Replace damaged clips immediately.
Frequently Asked Questions
Can I Bring a Utility Knife on an Airplane in Checked Luggage?
Yes, you can bring a utility knife in checked luggage, but you can’t carry it on. Follow Travel restrictions by confirming TSA rules and any airline or destination regulations.
For Blade safety, remove the blade if possible, wrap it securely, and pack it in a hard case or tool box to prevent cuts and luggage damage.
Declare nothing unless your airline requires it. Keep it inaccessible during flight.
What Should I Do if I Accidentally Cut Myself While Working?
Sure, ignore the cut and let it “air out” like a fine wine—then do the opposite. Stop work, rinse the wound with clean water, and apply direct pressure for bleeding control using gauze or a clean cloth.
Elevate the area, then clean around it with mild soap.
Apply antibiotic ointment and a sterile bandage.
Get first aid help if bleeding won’t stop, it’s deep, or you feel dizzy.
How Do I Dispose of Used Utility Knife Blades Legally in My Area?
To dispose of used utility knife blades legally in your area, you’ll follow local solid-waste rules: place blades in a puncture-proof sharps container or taped, labeled metal tin, then take it to your designated drop-off site.
For Blade disposal, don’t toss loose blades in trash or recycling. Check your city/county website for Recycling options like household hazardous waste events or scrap-metal facilities that accept sealed sharps.
Call ahead for rules.
Are Utility Knives Allowed on Job Sites With Strict Safety Policies?
Yes, utility knives are often allowed on strict job sites, but only if you follow policy—like walking a tightrope. You’ll usually need approved models (retractable, fixed-lock), documented training, and required safety gear such as cut-resistant gloves and eye protection.
Keep blades sharp and stable through regular blade maintenance, and store knives in a sheath or locked pouch. Check site rules, tool lists, and supervisor sign-off before you bring one.
What Is the Best Way to Remove Rust From a Utility Knife Safely?
Remove rust safely by removing the blade (or retracting and locking it), then wiping with mineral oil and scrubbing gently using fine steel wool or a Scotch-Brite pad.
For heavier rust removal, apply white vinegar or a rust eraser, keep strokes away from the edge, and rinse, dry, and oil immediately.
Wear cut-resistant gloves, clamp the knife if needed, and dispose of rusty blades.
Finish with blade maintenance: lubricate, store dry.
Conclusion
When you use a utility knife, you’ll get cleaner cuts and fewer close calls if you stick to the basics: choose the right knife and blade, set up a stable cutting surface, and keep your free hand out of the cut path. Extend the blade only as far as needed, cut away from your body, and take slow, controlled passes. Change blades carefully, retract or sheath it between cuts, and store it securely—why risk a slip?

