Start with a quick room-by-room plan and fix the worst glare or dim spots first. Swap incandescents and CFLs for high-CRI LEDs, choosing warm 2700–3000K for cozy spaces and neutral 3500–4000K for work zones. Add layered light: a dimmable lamp for ambient, a focused task light, and a small accent like a picture light or LED tape. Upgrade to compatible LED dimmers, plus clean paddle switches and screwless plates. Keep going to see easy fixture and smart-control wins.
Key Takeaways
- Create a room-by-room plan using ambient, task, and accent layers to eliminate glare, shadows, and dead zones.
- Swap incandescent and CFL bulbs for high-CRI LEDs, choosing consistent color temperatures suited to each room’s function.
- Upgrade dimmers and switches to LED-compatible paddle or smart controls for flicker-free dimming, scenes, and automation.
- Add targeted task lighting with under-cabinet strips, desk lamps, and vanity lights to boost comfort and usability instantly.
- Use accent lighting like picture lights, wall washers, and LED tape to highlight art, textures, and architectural features.
Start With a Modern Lighting Plan
Where do you start if you want lighting that looks modern and works better, without overspending? You start with a simple room-by-room lighting design plan. List what you do in each zone—cook, read, groom, relax—then note the problems: glare, shadows, dark corners, or fixtures that block cabinet doors.
Measure ceiling height, room width, and the distance from key surfaces like counters and mirrors so you can size lights correctly and avoid costly returns.
Next, map three layers: ambient for overall light, task for work areas, and accent to highlight art or texture.
Prioritize fixture selection by impact and price: replace the worst offenders first, keep reusable junction boxes, and standardize finishes to reduce mismatched purchases.
Swap Old Bulbs for LED Lighting Upgrades
Swap your old incandescent or CFL bulbs for LEDs and you’ll cut energy use, reduce heat, and replace bulbs far less often—an easy upgrade with fast payback.
Choose the right color temperature (warm 2700–3000K for cozy spaces, neutral 3500–4000K for task areas, daylight 5000K for crisp light) so the room looks the way you want.
Before you buy, check base type, fixture ratings (enclosed or damp), and dimmer compatibility to avoid flicker and wasted returns.
Benefits Of LED Bulbs
Ever wonder why so many homeowners start their lighting upgrades with LEDs? You’ll see the payoff fast: better energy efficiency means you use fewer watts for the same brightness, so your monthly bills drop.
LEDs also last years longer than incandescent or CFL bulbs, so you’ll buy replacements less often and spend less time on ladders. They run cooler, which helps reduce heat buildup in lamps and fixtures, and that can ease strain on your AC in summer.
Many options work with standard sockets, so you can upgrade room by room without rewiring. Plus, longer life and lower power use cut your environmental impact by reducing waste and electricity demand.
Check lumens and base type before you buy.
Choosing Color Temperature
Once you’ve picked LEDs, how do you choose the right color temperature for each room? Use Kelvin ratings: 2700K–3000K feels warm and relaxed, 3500K sits neutral, and 4000K–5000K looks crisp and task-focused. Match the tone to what you do there, not what looks trendy on the shelf.
For bedrooms and living rooms, stick to 2700K–3000K to keep ambient lighting soft and flattering.
In kitchens, bathrooms, and laundry areas, 3500K–4000K helps you see true colors without looking harsh.
For offices or craft corners, 4000K–5000K reduces eye strain and improves contrast.
To stay on budget, buy a small multipack in two temps and test them at night before committing. Keep each room consistent.
Installation And Compatibility
Where do most LED retrofits go sideways—at the bulb, the socket, or the switch? Start by matching base type (E26, E12, GU10) and bulb shape so it clears shades and Vintage fixtures. Check the fixture label for max wattage, then ignore “equivalent” claims and use actual LED watts for heat safety.
If you’ve got a dimmer, confirm it’s LED-rated; otherwise you’ll get flicker, buzzing, or dead-at-low settings. For enclosed or recessed cans, buy LEDs rated for “enclosed” or they’ll fail early.
Next, verify wiring compatibility: loose neutrals, backstabbed outlets, or old lamp cord can cause intermittent power. Replace cracked sockets and corroded contacts; they’re cheap and prevent callbacks.
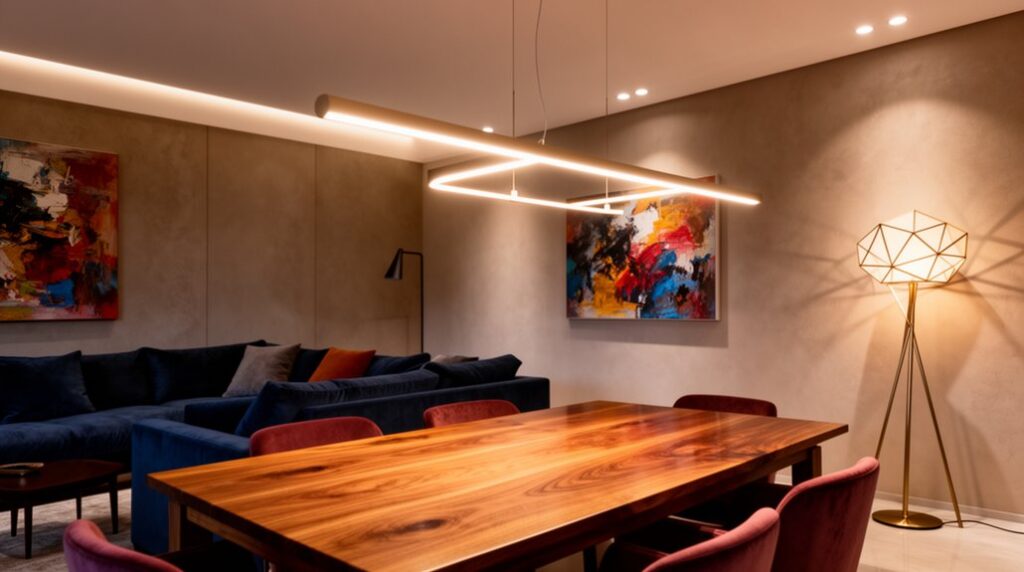
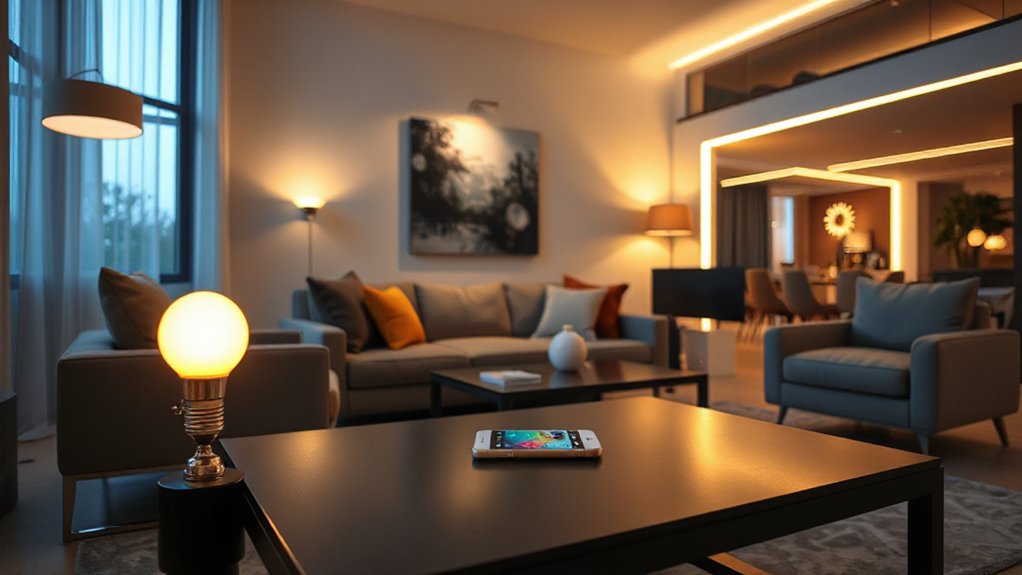
Add Layered Lighting to Transform Any Room
Even if you can’t change the layout, you can make a room feel larger, warmer, and more functional by adding layered lighting—mixing ambient (overall), task (focused), and accent (decorative) sources.
Start with a dimmable floor or table lamp for an even ambient glow, then add a focused desk lamp or under-cabinet LED strip where you read, prep, or work.
Next, use decorative accents to highlight what you already own: a picture light over art, a plug-in puck inside a bookcase, or LED tape behind a mirror for soft edge lighting.
Keep costs down by choosing plug-in fixtures, warm-white bulbs (2700–3000K), and smart plugs for schedules.
Place lights at different heights to reduce harsh shadows.
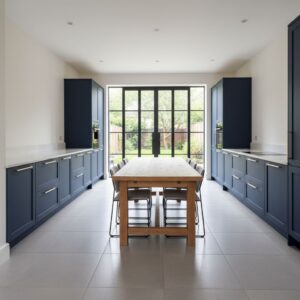
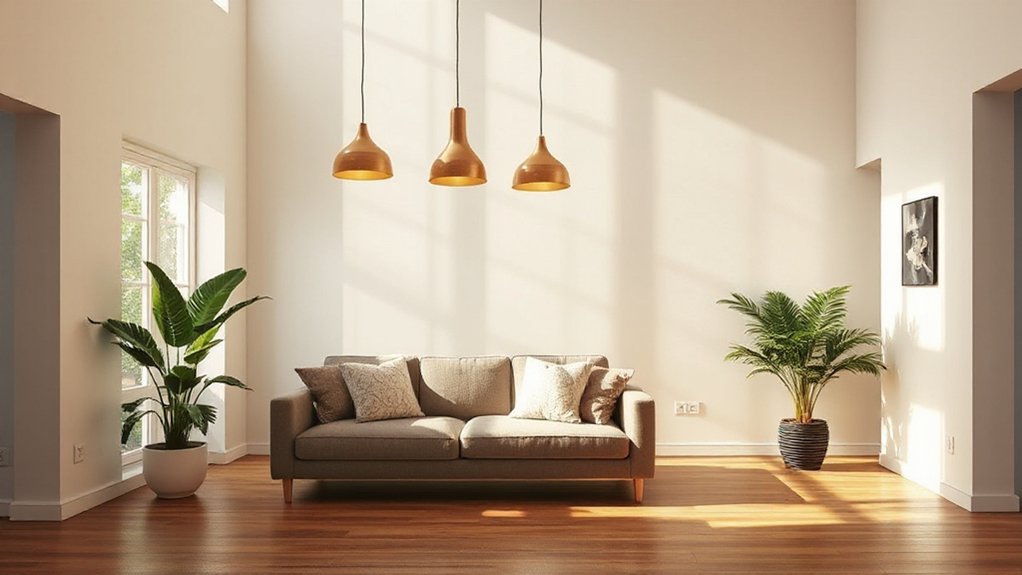
Upgrade Overhead Lighting With Statement Fixtures
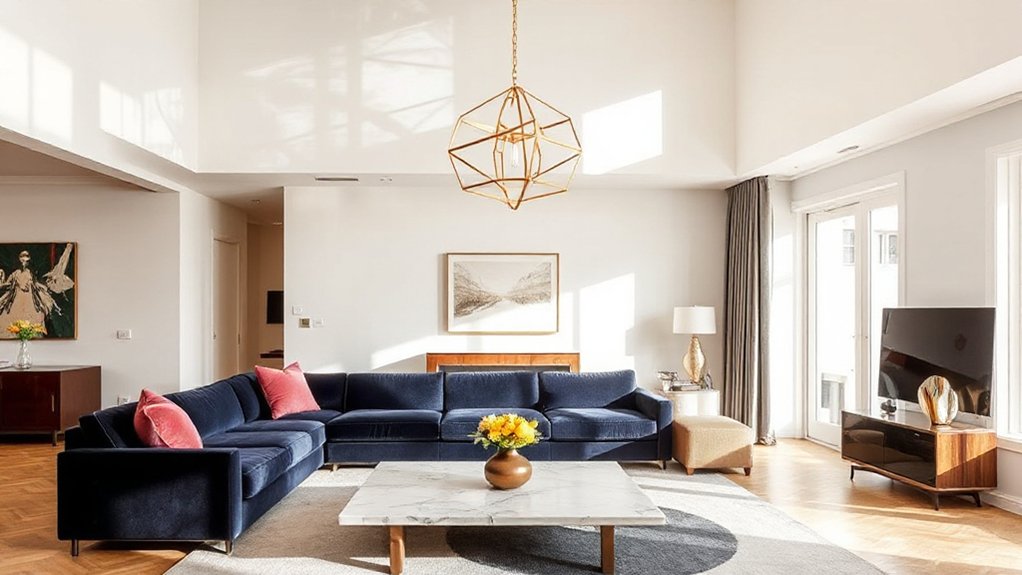
If your ceiling light feels like an afterthought, swapping it for a statement fixture gives the room an instant focal point while improving overall brightness. Start by measuring ceiling height and table/sofa clearances so the new light doesn’t hang too low.
For fast impact on a budget, choose simple chandelier styles with open frames that spread light, or a single bold pendant that defines the space. Compare pendant materials: metal reflects light and looks modern, glass keeps sightlines airy, and woven shades soften glare while hiding cheaper bulbs.
Stick with standard bulb bases to avoid pricey replacements, and pick dimmable LEDs for efficiency. Finally, match finish to existing hardware so the upgrade looks intentional, not random.
Use Modern Lighting Upgrades for Task Zones
To make everyday work areas brighter without overspending, you’ll get the most impact by layering task lighting where you actually prep, read, and focus.
Add under-cabinet LED strips for clean, shadow-free countertop light, then place small fixtures strategically to cover sink, stove, and desk zones.
Finish with an adjustable desk lamp upgrade so you can aim light exactly where you need it and cut glare.
Layered Task Lighting Placement
Because general overhead light rarely hits the spots where you actually work, you’ll get better results by layering task lighting right where each task zone happens—prep counters, a desk, a reading chair, or a vanity.
Start with a focused fixture for each zone: an adjustable desk lamp, a swing-arm wall light by the bed, or a slim mirror light for grooming. Place the beam to cross your work surface from the side, not from behind your head, so you won’t cast shadows.
Choose LED bulbs around 3000–3500K for clear color without harshness, and add a dimmer for an ambient glow when you’re done.
Pick simple, sturdy fixtures, then use decorative accents like a statement shade to elevate the room without overspending.
Under-Cabinet LED Strips
While overhead fixtures leave countertops in your own shadow, under-cabinet LED strips put bright, even light exactly where you chop, read recipes, or work at a desk nook. Choose 3000K–4000K for a clean look, and prioritize high color rendering (CRI 90+) so food, fabrics, and paint shades don’t look dull or distorted.
To keep costs down, buy a plug-in kit for short runs or a hardwired kit if you’re already opening walls. Mount strips toward the cabinet front to reduce glare and hide hot spots, and use diffusers for smoother light.
Add dimming controls via an inline dimmer or smart plug so you can switch from prep-bright to late-night glow. Measure runs, plan corners, and include extra length for mistakes.
Adjustable Desk Lamp Upgrades
Under-cabinet strips handle countertop work, but a good adjustable desk lamp gives you targeted light for a desk nook, craft table, or paperwork zone without lighting the whole room.
Choose an Adjustable desk model with a swiveling head, pivoting arm, and weighted base so you can aim light exactly where you need it.
Look for 400–800 lumens with a neutral 3500–4000K color for reading, and add dimming so you can reduce glare at night.
For budget-friendly lamp upgrades, swap in an LED bulb with high CRI (90+) and a flicker-free driver, or buy an integrated LED lamp that remembers your last setting.
Manage cords with clips, and place the lamp opposite your writing hand to cut shadows.
Install Dimmers for Instant Mood Lighting
Ever wish you could shift your room from bright task lighting to a softer glow in seconds? Install dimmer switches and you’ll get flexible mood lighting without changing fixtures.
Start by checking bulb compatibility: dimmable LEDs require an LED-rated dimmer, or you’ll see flicker and hear buzzing. If you’ve got a single-pole switch, a basic dimmer is usually a straightforward swap; three-way circuits need a matching model.
Keep costs down by upgrading the most-used rooms first—living room, bedroom, dining area—and reuse existing wall plates if they fit.
Choose a slider or rotary style for simple control, and set a “favorite” level by marking the faceplate.
Always shut off power at the breaker.
Try Smart Lighting Upgrades You Can Automate
If you want lighting that adapts to your schedule without rewiring, start with a few smart upgrades you can automate. Swap in smart bulbs for lamps and existing fixtures, then group them by room in an app.
Set routines for wake-up, dinner, or bedtime, and use warm-to-cool presets to match tasks. Add Voice control through your phone or a basic speaker so you can dim, brighten, or change color temperature hands-free.
For savings, schedule lights to shut off automatically and cap brightness at 70–80%. Place motion sensors in hallways, closets, and laundry areas to prevent wasted energy and improve safety at night.
Choose Wi‑Fi only if you’ll buy a few; hubs scale cheaper for many bulbs.
Update Switches and Controls for a Modern Look
Smart bulbs handle the automation, but outdated switches and mismatched plates can still make a room feel stuck in the past. Swap yellowed toggles for crisp, flat paddles and new screwless plates; it’s a low-cost change you’ll notice every day.
If you want more polish, install Smart switches where you actually use them—entryways, kitchens, and bedside locations—so scenes feel intentional without adding more bulbs.
Prefer a sleeker vibe? Touch controls can replace dimmers on feature walls and make lighting feel built-in, not bolted on. Match finishes (white, matte black, or brushed metal) to your door hardware, and keep plate styles consistent room to room.
You’ll modernize fast without remodeling or rewiring.
Avoid These Modern Lighting Upgrade Mistakes
Although modern fixtures and smart features promise an instant refresh, a few common missteps can waste money and make your lighting feel harsher, cluttered, or unreliable. Don’t buy by looks alone; check lumen output, color temperature, and beam spread so tasks don’t end up dim or glare-heavy.
Avoid mixing too many styles—Vintage fixtures can work, but limit them to one statement area. Skip bargain LEDs with poor CRI; skin tones and finishes will look flat.
Make sure dimmers match your bulbs; otherwise you’ll get flicker or buzzing. Don’t reuse old wiring or undersized boxes when swapping chandeliers.
If you love antique bulbs, pair them with warm, high-efficiency LEDs and confirm compatibility with smart switches.
Plan layers: ambient, task, accent.
Frequently Asked Questions
Do Modern Lighting Upgrades Increase Home Resale Value?
Yes, modern lighting upgrades can increase your home’s resale value because buyers notice lighting design and smart fixture selection. You’ll boost perceived quality, improve photos for listings, and make spaces feel larger and safer.
Focus on high-impact, low-cost swaps: LED recessed lights, updated kitchen pendants, dimmers, and matching finishes. Stick to neutral color temperatures (2700–3000K) and avoid trendy, hard-to-replace fixtures.
Keep receipts, too.
What Permits or Codes Apply When Adding New Light Fixtures?
About 40% of homeowner electrical fires involve lighting or wiring, so you can’t skip compliance. You’ll follow local building codes and often meet permit requirements when you add new circuits, move junction boxes, or change service load.
Like-for-like fixture swaps on existing boxes may not need a permit, but inspections can still apply. Call your building department, ask in writing, and budget inspection fees.
How Do I Choose the Right Electrician for Lighting Upgrades?
Choose an electrician by verifying licensing, insurance, and solid electrician credentials. Then compare written, itemized quotes.
Ask how they handle lighting installation planning, load calculations, dimmer compatibility, and fixture support.
Request photos of similar jobs and check recent reviews, not just star ratings.
Confirm they’ll pull permits if needed, warranty labor, and specify materials.
Schedule a walkthrough so you can spot communication gaps and avoid change-order surprises.
Are There Rebates or Tax Credits for LED or Smart Lighting?
Yes—often, but they vary by location and utility. You’ll usually find rebates through your electric utility for ENERGY STAR LEDs, smart bulbs, or controls, and occasional state programs.
Federal credits are less common for bulbs but may apply to whole-home efficiency upgrades. Check your utility’s “rebates” page, then search DSIREUSA.org.
You’ll cut upfront costs, boost energy savings, and reduce environmental impact, while lowering your monthly bill.
How Can I Reduce Light Pollution and Glare Inside My Home?
You can cut indoor light pollution and glare fast: about 30% of lighting in the U.S. is wasted, so tightening control pays.
Use lower-lumen bulbs, warm 2700K LEDs, and add dimmers.
Aim light down with shaded lamps and avoid bare bulbs in your line of sight.
Put task lights where you work, not overhead.
For outdoor fixtures, choose full-cutoff shields to protect the Night sky and reduce window spill.
Conclusion
Lighting accounts for about 15% of the average home’s electricity use, so your upgrades can look better and cut bills. Start by mapping your room’s tasks, then combine LEDs, layered fixtures, and dimmers to stretch every dollar. You’ll get brighter counters, softer evenings, and fewer “dead” corners without a full remodel. If you want the biggest impact fast, swap dated overhead fixtures and add smart controls—then fine-tune with switches that match your new style.