

Start with safety: if you smell gas, see smoke, or hear arcing, evacuate and call for help; shut off the main breaker before touching leaks near outlets. Do a quick monthly walkthrough with a flashlight, moisture meter, and non-contact voltage tester, noting new stains, musty odors, or warm outlets. Stop leaks by closing the nearest valve, replacing washers, and drying fast with fans and a dehumidifier. Clear slow drains with screens, hot water, baking soda, vinegar, and a plunger. Keep going to learn the simple fixes and when to call a pro.
Key Takeaways
- Do a 10–15 minute monthly walkthrough to spot new stains, odors, cracks, slow drains, flickering lights, and warped trim early.
- Treat gas smells, smoke, arcing, warm outlets, or repeated breaker trips as emergencies—evacuate or shut off power and call professionals.
- Stop leaks fast: shut off the nearest valve or main, dry thoroughly, then tighten fittings or replace washers/cartridges before hidden damage spreads.
- Prevent clogs by using drain screens, avoiding grease and coffee grounds, and flushing drains weekly with hot water; plunge early for slow drains.
- Control moisture: keep indoor humidity under 50%, run fans/dehumidifiers, recheck wet areas after 24 hours, and seal drafts with caulk and weatherstripping.
Triage Household Issues: Safety and Shutoffs First

Before you grab a wrench or start troubleshooting, triage the problem so you don’t turn a minor issue into an emergency. If you smell gas, see smoke, or hear arcing, stop and evacuate; call your utility or 911.
For leaks near outlets or appliances, assume electrical hazards: shut off power at the main breaker before touching water, cords, or panels. Know your shutoffs now—main water valve, gas shutoff, and circuit breakers—and label them clearly.
If a fixture overheats, a breaker trips repeatedly, or outlets feel warm, prioritize fire safety and cut power to that circuit.
For flooding, close the main valve, then relieve pressure at a lowest faucet. Keep a flashlight and gloves handy.
Quick Home Inspection to Catch Issues Early
You’ll catch most household problems early if you run a quick monthly walkthrough checklist and compare what you see to last month’s baseline. Watch for warning signs like new stains, musty smells, slow drains, flickering lights, unusual noises, and cracks that are spreading.
Keep a few tools handy for fast checks—flashlight, moisture meter, non-contact voltage tester, and a small level—so you can confirm issues before they turn into repairs.
Monthly Walkthrough Checklist
Although most home problems start small, a 10–15 minute monthly walkthrough helps you spot warning signs—moisture, unusual sounds, minor cracks, sluggish drains, or tripped GFCIs—before they turn into expensive repairs.
Use a simple route: exterior, basement/crawlspace, main floors, attic, then yard. Bring a flashlight, paper towels, and a phone to log photos and dates.
Test every smoke/CO alarm, run exhaust fans, and flip each GFCI and breaker you can access.
Check under sinks, around toilets, and at the water heater for dampness, then confirm shutoff valves turn smoothly.
Inspect windows and doors for sticking and torn weatherstripping.
In your Home decor zones, scan for wall scuffs that hide leaks.
For gardening tips, clear gutters, check hose bibs, and reset sprinklers.
Warning Signs To Note
Even if everything looks fine at a glance, a few small changes can signal a fast-growing problem, so train your eye to spot early warning signs as you walk through the house.
Watch for musty odors, fresh stains on ceilings, bubbling paint, or warped baseboards—these often mean hidden moisture.
Listen for new dripping, banging pipes, or a running toilet.
Check outlets and switches for warmth, buzzing, or discoloration.
During Appliance maintenance, note unusual vibrations, burning smells, slow drains, or ice buildup, and don’t ignore a repeatedly tripping breaker.
Scan foundations and walkways for widening cracks, sticking doors, or uneven floors.
For Pest prevention, look for droppings, shed wings, gnaw marks, tiny holes in wood, and ant trails along trim.
Tools For Quick Checks
Before a small leak, loose connection, or pest trail turns into a repair bill, keep a compact “quick-check” kit that lets you confirm suspicions fast. Start with a bright flashlight and inspection mirror to scan under sinks, behind toilets, and along baseboards.
Add a moisture meter for drywall and flooring, plus a non-contact voltage tester to spot unsafe outlets and loose switches. Keep a small level to catch sagging shelves, shifting door frames, or uneven floors near appliances.
Use a thermometer to verify HVAC vents and fridge temps. Include painter’s tape and a marker to flag problem spots.
Don’t let home decor or furniture arrangement hide issues; pull pieces out quarterly and recheck.
Stop Household Water Leaks Fast (Faucets, Toilets, Pipes)
When a leak starts, act fast to limit water damage and keep your bill from climbing. Shut off the nearest valve, then the main if needed. Mop up, set a fan, and inspect fittings, supply lines, and shutoffs for drips.
If a faucet leaks, replace the washer or cartridge and snug the packing nut. For toilets, add dye to the tank; if color reaches the bowl, replace the flapper and adjust the chain.
For exposed pipes, tighten compression nuts and swap cracked washers. For pinholes, use a clamp-and-rubber patch as a temporary fix.
Check water pressure; high PSI accelerates failures. Add pipe insulation to prevent sweating and winter splits.
Fix Slow or Clogged Drains Without Harsh Chemicals
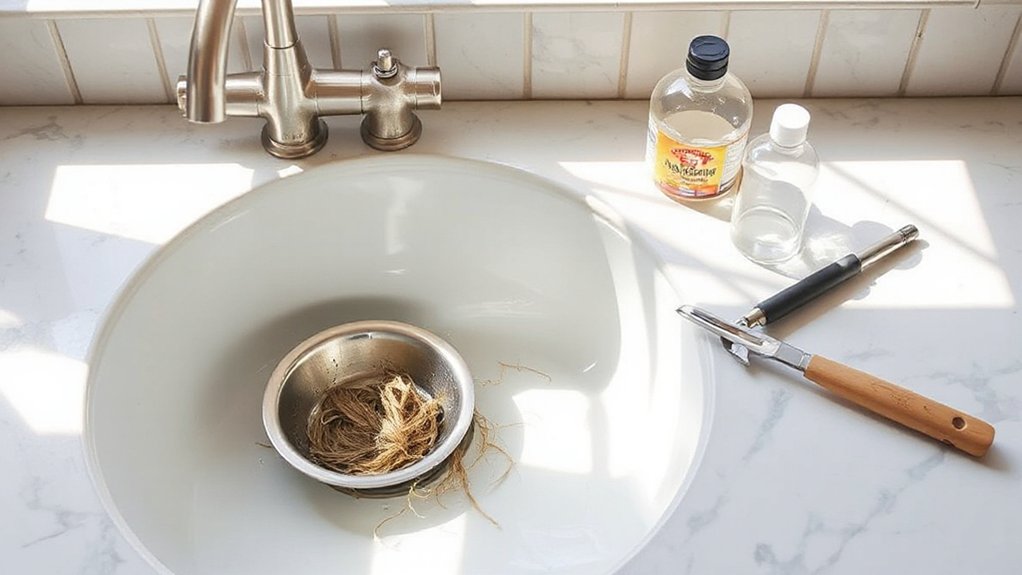
Start by pinpointing where the clog sits—trap, branch line, or main—by noting which fixtures back up and whether the drain gurgles or smells.
Clear it with non-caustic steps like pulling the stopper and hair, plunging with a wet rag seal, snaking the trap, or flushing with hot water and a measured baking soda–vinegar rinse.
Then prevent repeat buildup by using a drain screen, avoiding grease and coffee grounds, and running a hot-water flush weekly.
Diagnose Drain Clog Source
Why guess at a drain clog when a quick diagnosis can save you time and keep you from reaching for harsh chemicals? Start by identifying the drain source: sink, tub, shower, or floor drain.
Note whether one fixture is slow or several; multiple slow drains can point to a main line issue. Run water for 30 seconds and listen for gurgling, which signals trapped air or a partial blockage.
Check for backups when you run a nearby fixture (toilet plus tub, washer plus sink). Inspect the stopper, strainer, and overflow opening for visible buildup.
Then look under the sink for a sagging trap, leaks, or a clogged vent connection. Pin down the root cause before you attempt any clearing.
Use Natural Clearing Methods
After you’ve narrowed down where the clog sits, try gentle, natural methods that loosen buildup without damaging pipes or killing beneficial bacteria in a septic system.
Start by removing the stopper and pulling out hair or debris with a plastic drain snake or zip tool. Flush with a kettle of hot (not boiling) water to soften grease and soap.
Next, pour 1/2 cup baking soda, then 1/2 cup white vinegar. Cover the drain for 10 minutes so the fizz works on residue, then rinse with hot water.
For stubborn clogs, repeat once and follow with a plunger: seal the overflow, add enough water to cover the cup, and pump 15–20 times.
These natural remedies are reliable, eco-friendly solutions for most slow drains.
Prevent Future Drain Buildup
How do you keep that freshly cleared drain from slowing down again? Start with a simple barrier: use a mesh strainer in sinks and a hair catcher in showers, then empty them daily.
Don’t pour grease, coffee grounds, or starchy scraps down the kitchen drain; wipe pans first and trash solids.
Run hot tap water for 30 seconds after each use to move soap and oils through.
Once a week, flush with a kettle of hot (not boiling) water, then follow with a short cold rinse to firm up residue.
For drain maintenance, pull and clean the pop-up stopper monthly.
For plumbing safety, skip corrosive cleaners and avoid forcing a drain snake past resistance; use gentle, controlled turns.
Dry It Out Fast to Prevent Mold
Even if the leak seems minor, you’ve got to dry the area fast to stop mold before it starts. Shut off the water source, blot standing water, and remove soaked rugs, towels, or stored items. Run a fan aimed at the wet spot and open nearby windows if outdoor humidity is low.
For carpets and padding, lift an edge so air reaches underneath, or pull it up if it’s saturated. Wipe hard surfaces with a detergent solution, then dry again.
Check hidden cavities: under sinks, behind toilets, inside vanity bases, and along baseboards. Use a dehumidifier to keep indoor humidity below 50% for moisture control.
Recheck in 24 hours; if it still feels cool or smells musty, act again for mold prevention.
Seal Drafts to Cut Energy Bills and Moisture
Because tiny gaps can move more air than you’d think, you should hunt down drafts and seal them before they spike your heating and cooling costs or pull damp outdoor air into walls. On a windy day, run your hand around windows, exterior doors, plumbing penetrations, and attic hatches; use a smoke pencil or incense to spot leaks.
Prioritize Window sealing: replace brittle weatherstripping, adjust door sweeps, and re-caulk exterior window trim where it’s cracked or missing. For bigger gaps, use low-expansion spray foam, and cover open chases with rigid foam plus tape.
Pair air-sealing with Insulation improvements by topping up attic insulation after you’ve sealed ceiling penetrations. You’ll keep conditioned air inside, reduce condensation risk, and help HVAC run less.
Patch Small Drywall Cracks Before They Spread
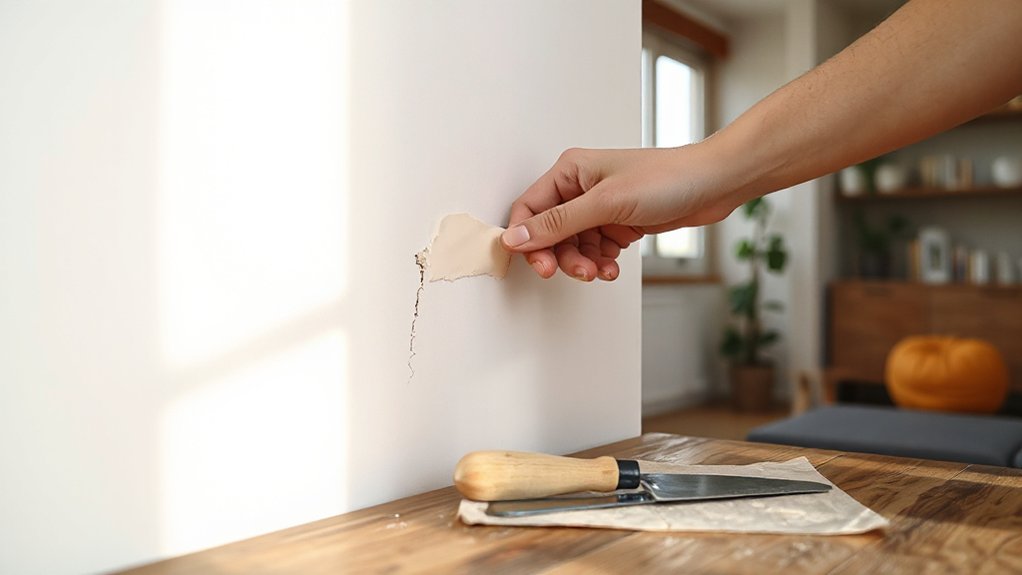
When you catch a hairline drywall crack early, you can stop it from widening and telegraphing through paint later. First, widen it slightly with a utility knife to remove loose edges, then vacuum the dust so compound bonds well.
For drywall repair, press setting-type joint compound into the crack with a 4–6 inch knife, feathering the edges thin. If the crack returns in a seam or corner, embed paper tape or mesh in a skim coat, then add a second coat after it hardens.
Sand lightly with 120–150 grit and wipe clean.
Keep movement down for crack prevention: tighten nearby screws, add a screw to loose drywall, and monitor for recurring stress.
Fix Peeling or Bubbling Paint (and Why It Happens)
Hairline cracks aren’t the only finish problem that can come back through fresh paint—peeling and bubbling signal that the coating lost its bond to the surface. You’ll usually find moisture, grease, chalky residue, or incompatible layers underneath, all classic triggers of Paint deterioration.
First, fix the cause: stop leaks, run a bath fan, and let the wall dry fully.
Next, scrape loose paint to a firm edge, then sand to feather the transition. Wash with a degreaser or TSP substitute, rinse, and let it dry.
Seal stains and porous spots with a bonding primer. For glossy trim, scuff-sand and prime before repainting.
Keep Surface preparation strict, and you’ll prevent repeat failures and save time later.
When Household Issues Need a Professional
How do you know it’s time to stop DIY-ing and call a pro? When the issue involves safety, hidden damage, or repeated failure, don’t gamble.
Call an electrician if breakers trip, outlets feel warm, or you smell burning.
Hire a plumber for burst pipes, sewage odors, or persistent leaks behind walls.
Bring in a roofer when stains spread after rain or shingles lift.
For appliance maintenance, contact a technician if gas smells, appliances spark, or error codes return after resets—unplug first.
Use certified pest control when you see droppings, wood dust, swarms, or bites, because colonies spread fast and DIY sprays can push pests deeper.
If mold keeps coming back, get testing and remediation before you repaint.
Frequently Asked Questions
How Often Should I Service My HVAC System to Avoid Expensive Breakdowns?
You should service your HVAC system twice a year: once in spring for cooling and once in fall for heating. Schedule professional HVAC maintenance to clean coils, check refrigerant, test safety controls, and inspect electrical connections, because small issues escalate fast.
You should also replace filters every 1–3 months and keep vents clear.
These steps protect system efficiency, lower energy bills, and help you avoid surprise, expensive breakdowns.
What Causes Circuit Breakers to Trip Repeatedly in an Older Home?
Repeated breaker trips usually come from overloaded circuits, short circuits, or ground faults—old wiring makes small issues feel like big failures. You run a space heater, and suddenly darkness replaces comfort.
For Electrical safety, don’t keep resetting; you risk heat buildup. Start circuit troubleshooting by unplugging high-draw devices, checking for warm outlets, loose connections, or damaged cords, and labeling loads.
If trips persist, have an electrician inspect panels, neutral bars, and aging insulation.
How Can I Prevent Roof Leaks Before the Rainy Season Starts?
Prevent roof leaks by scheduling a roof inspection now and fixing small defects before storms hit. You’ll check for missing shingles, cracked flashing around chimneys and vents, and exposed nail heads, then reseal or replace as needed.
Clean debris from valleys and guarantee gutters drain fast with regular gutter maintenance, including downspout flushing.
Trim overhanging branches, remove moss, and inspect attic for damp insulation or stains after a hose test.
When Should I Replace Weatherstripping Versus Re-Caulk Around Windows?
Replace weatherstripping when it’s flattened, torn, missing, or you feel airflow even with the window locked; it’s key for window insulation and draft prevention.
Re-caulk when you see cracked, peeling, or gapped sealant around the frame, or moisture stains appear.
Test with a lit incense stick on a windy day: moving smoke at the sash points to weatherstripping; leaks at trim joints signal caulk.
Clean, dry, then reseal.
What’s the Best Way to Keep Pests Out Without Using Chemical Sprays?
You keep pests out best by turning your home into a closed fortress: focus on sealing gaps first, then reinforce with natural repellents.
Caulk cracks, add door sweeps, repair screens, and seal pipe penetrations with foam or steel wool.
Store food airtight, wipe crumbs, fix leaks, and empty trash often.
Use peppermint oil, cedar, or diatomaceous earth at entry points, plus sticky monitors to spot activity early.
Conclusion
You don’t need to be “handy” to stop small problems from turning into big bills—you just need a simple routine. Start with safety shutoffs, then do quick monthly checks for leaks, slow drains, damp spots, drafts, and hairline cracks. Tackle fixes while they’re small: tighten, seal, dry, patch, and repaint correctly. If you’re worried you’ll miss something, take photos and keep a short checklist. Call a pro early when damage spreads.